Photographing Great Smoky Mountain National Park
What does a place feel like?
How can I capture that in still photos?
These are the questions I ask myself as a nature photographer. Maybe not every photographer thinks that way. And if so, do they try to answer those questions with a single image? Several stand-alone single images? Or do they try to do it with many images that when put together provide an answer, but where images wouldn’t on their own?
Neither approach is “right” or “wrong,” but as a project or even mini-project minded photographer, I gravitate towards the latter and try to put together a collection of images that collectively convey a rich sense of place.
This was the challenge I gave myself this past April when I drove 1,000 miles southwest to Great Smoky Mountain National Park (GSMNP or simply “the Smokies”). I had never been there before, and I was hoping to create a portfolio of images that included the landscapes, wildlife, and human history to convey a robust sense of place. All of that in only one week.
In this article I will share some of the defining elements of the Smokies as a place and include some discussion on what I was thinking as a photographer in capturing my story. I hope you enjoy the images and that this approach will spark some ideas for how you can interpret the places you visit as a photographer.
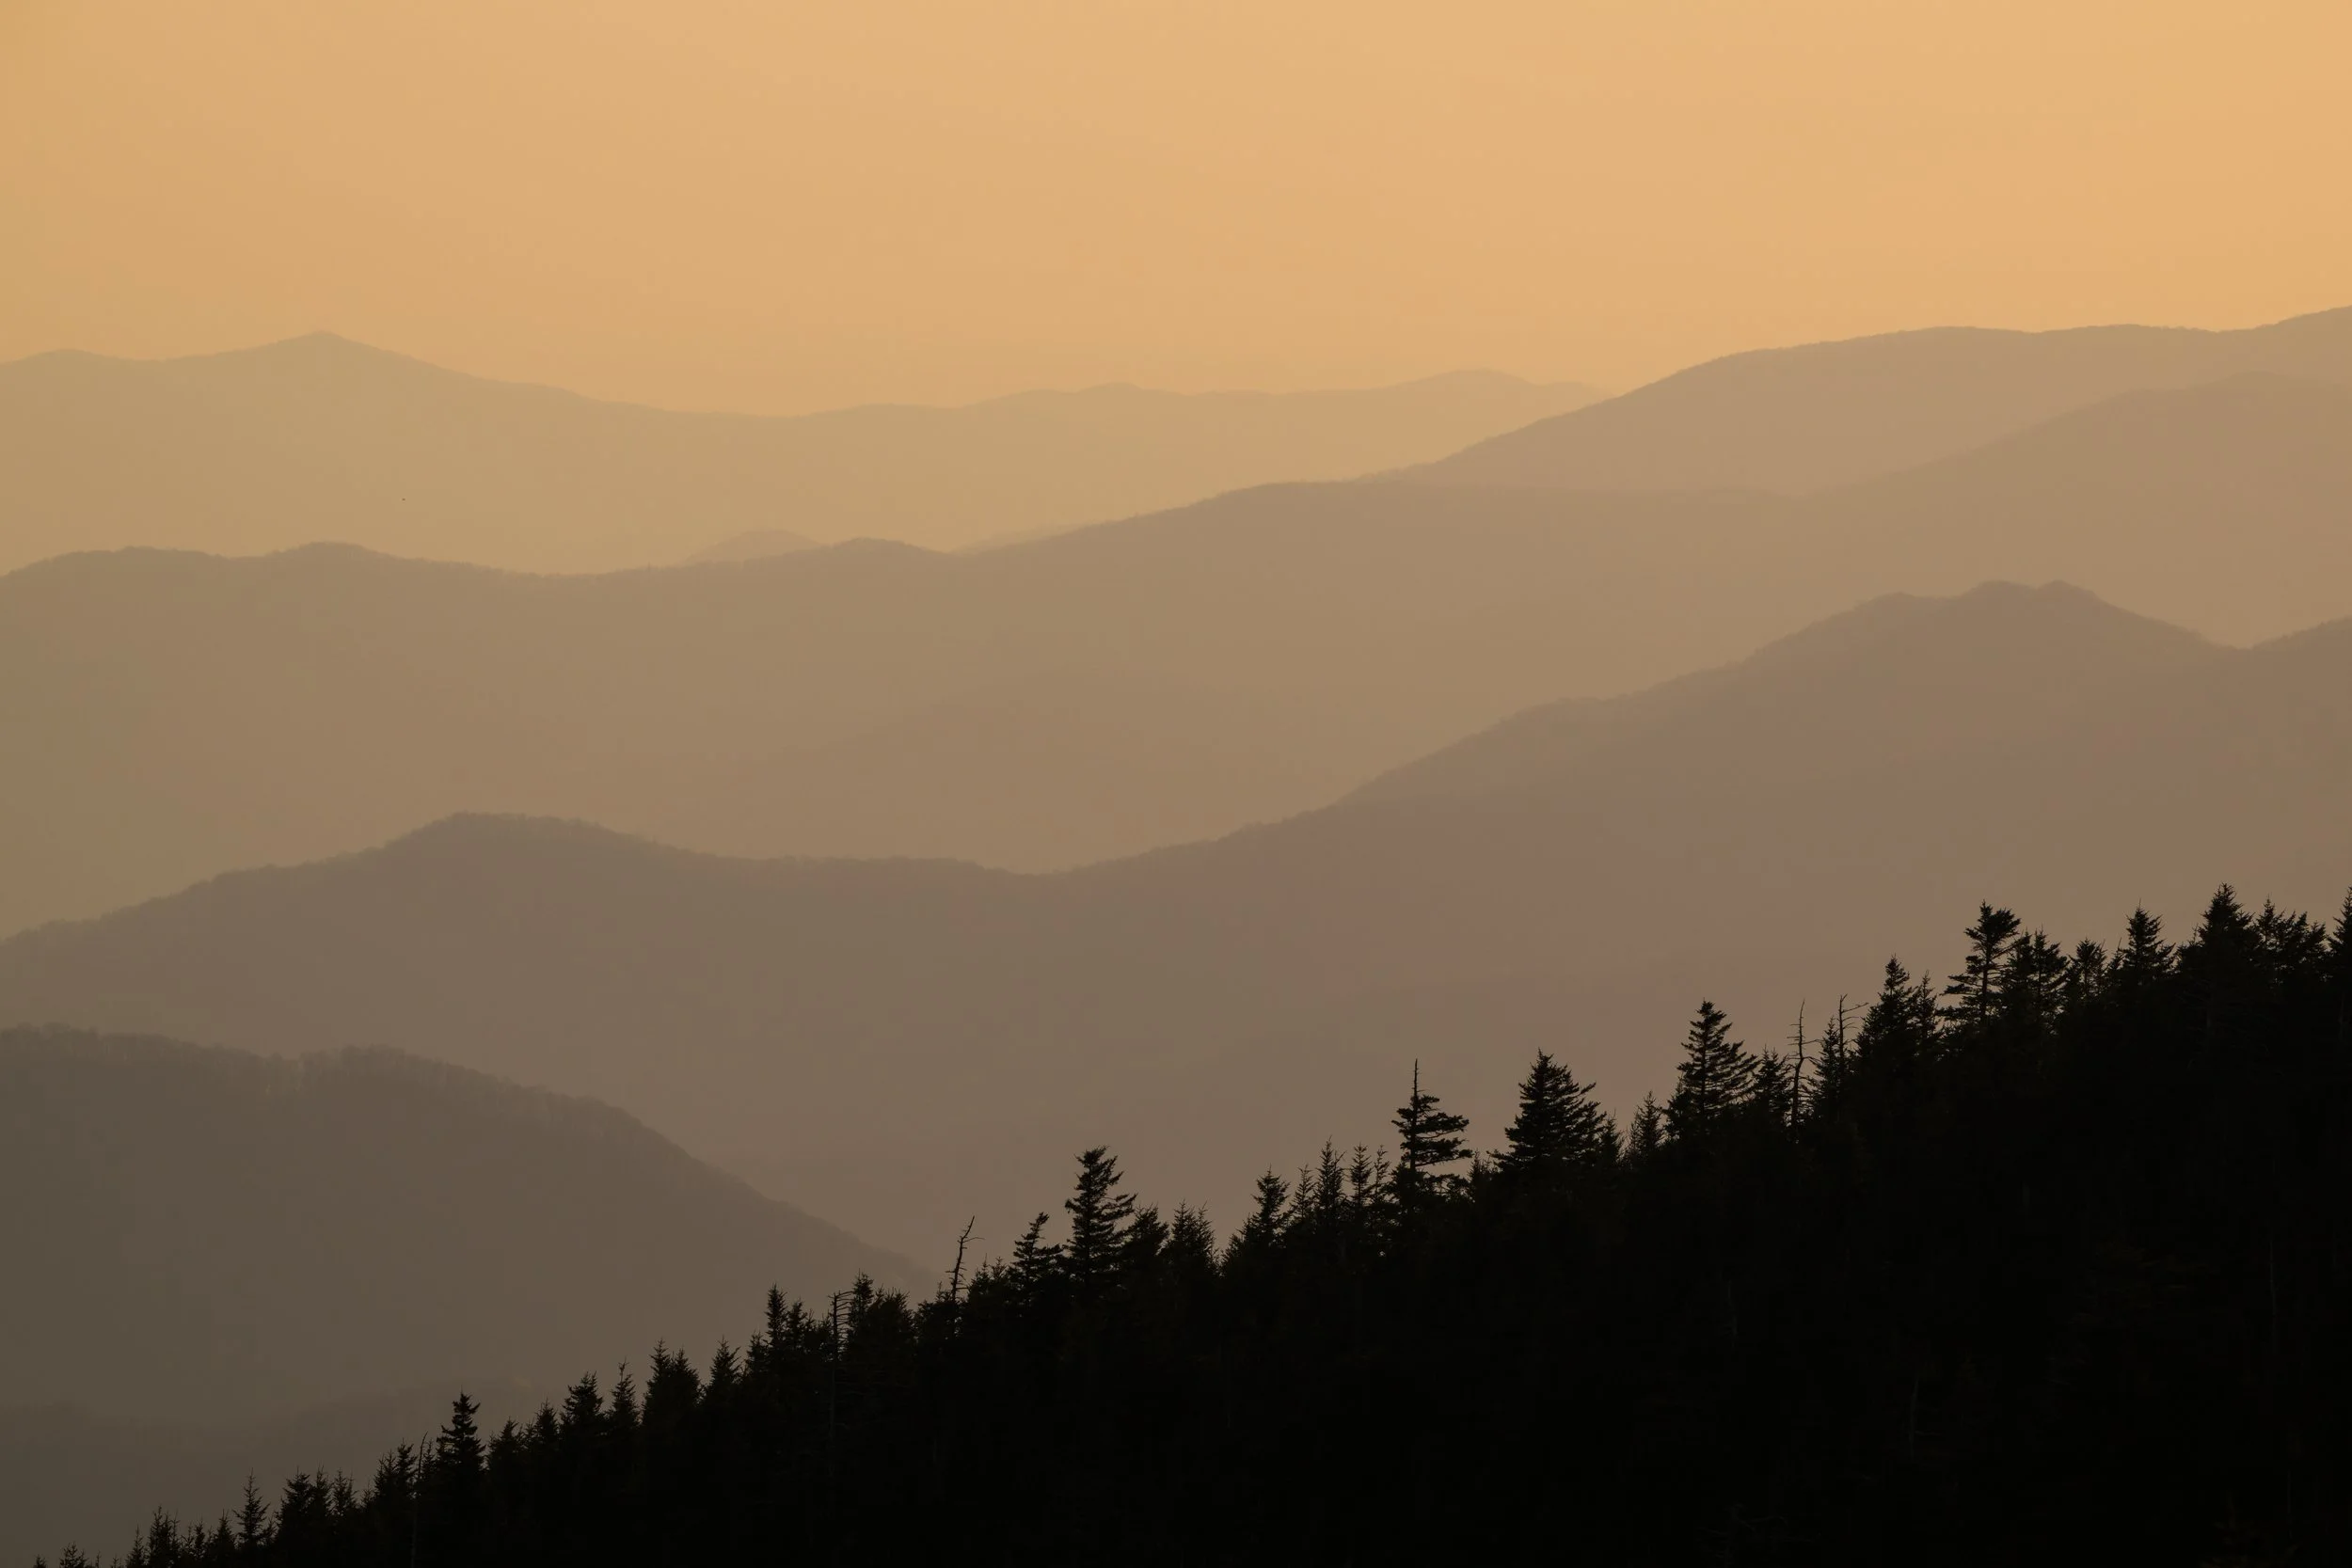
A classic image of the layers of mountain ridges in the Smokies
What does a place feel like?
How can I capture that in still photos?
These are the questions I ask myself as a nature photographer. Maybe not every photographer thinks that way. And if so, do they try to answer those questions with a single image? Several stand-alone single images? Or do they try to do it with many images that when put together provide an answer, but where images wouldn’t on their own?
Neither approach is “right” or “wrong,” but as a project or even mini-project minded photographer, I gravitate towards the latter and try to put together a collection of images that collectively convey a rich sense of place.This was the challenge I gave myself this past April when I drove 1,000 miles southwest to Great Smoky Mountain National Park (GSMNP or simply “the Smokies”). I had never been there before, and I was hoping to create a portfolio of images that included the landscapes, wildlife, and human history to convey a robust sense of place.
All of that in only one week. In this article I will share some of the defining elements of the Smokies as a place and include some discussion on what I was thinking as a photographer in capturing my story. I hope you enjoy the images and that this approach will spark some ideas for how you can interpret the places you visit as a photographer.
To view the full gallery of images from this trip visit my website gallery.
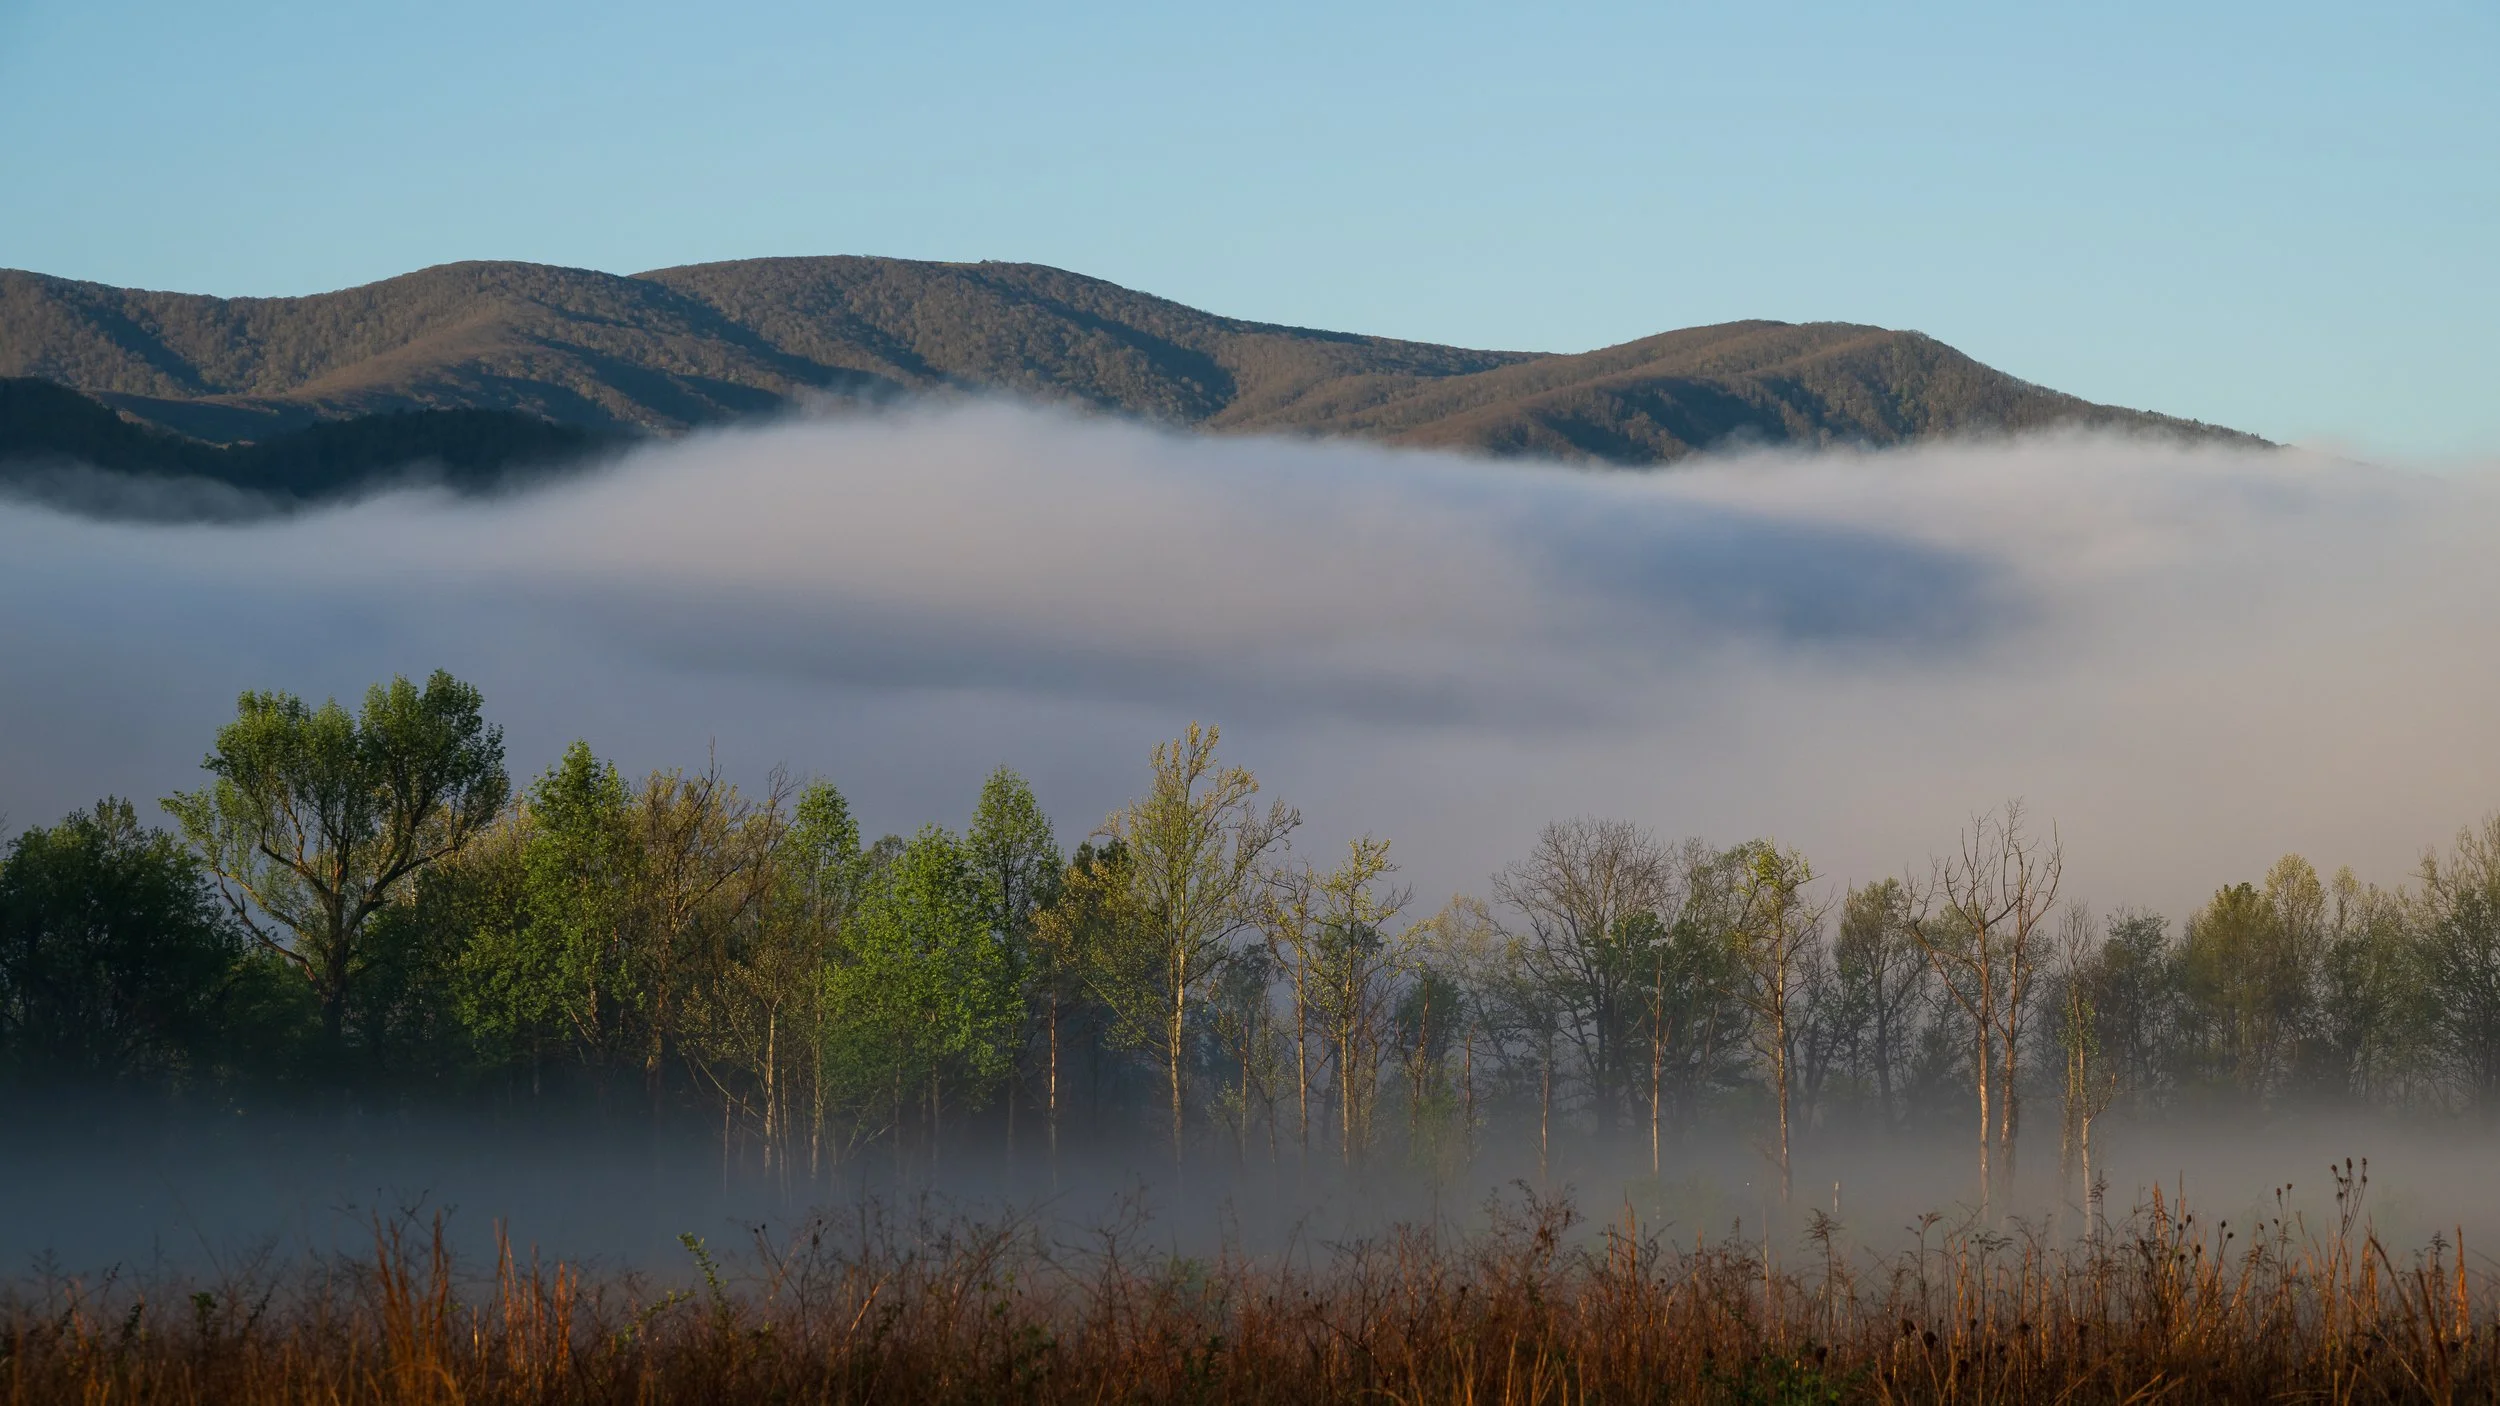
Overnight thunderstorms produced magic the next morning in Cades Cove, GSMNP!
1. “Smoky” Ridges
The Smokies have peaks that rise up to 6643 feet making them some of the biggest in the Eastern United States, even higher than 6288’ Mt. Washington in my home state of New Hampshire. There is often a haze in the air that is not the result of pollution but rather comes from natural chemicals (volatile organic compounds, or VOCs) released by the forests. Capturing expansive views of the endless ridges receding in this haze that literally give these mountains the name “Smoky” is a logical start in telling the story of this place.
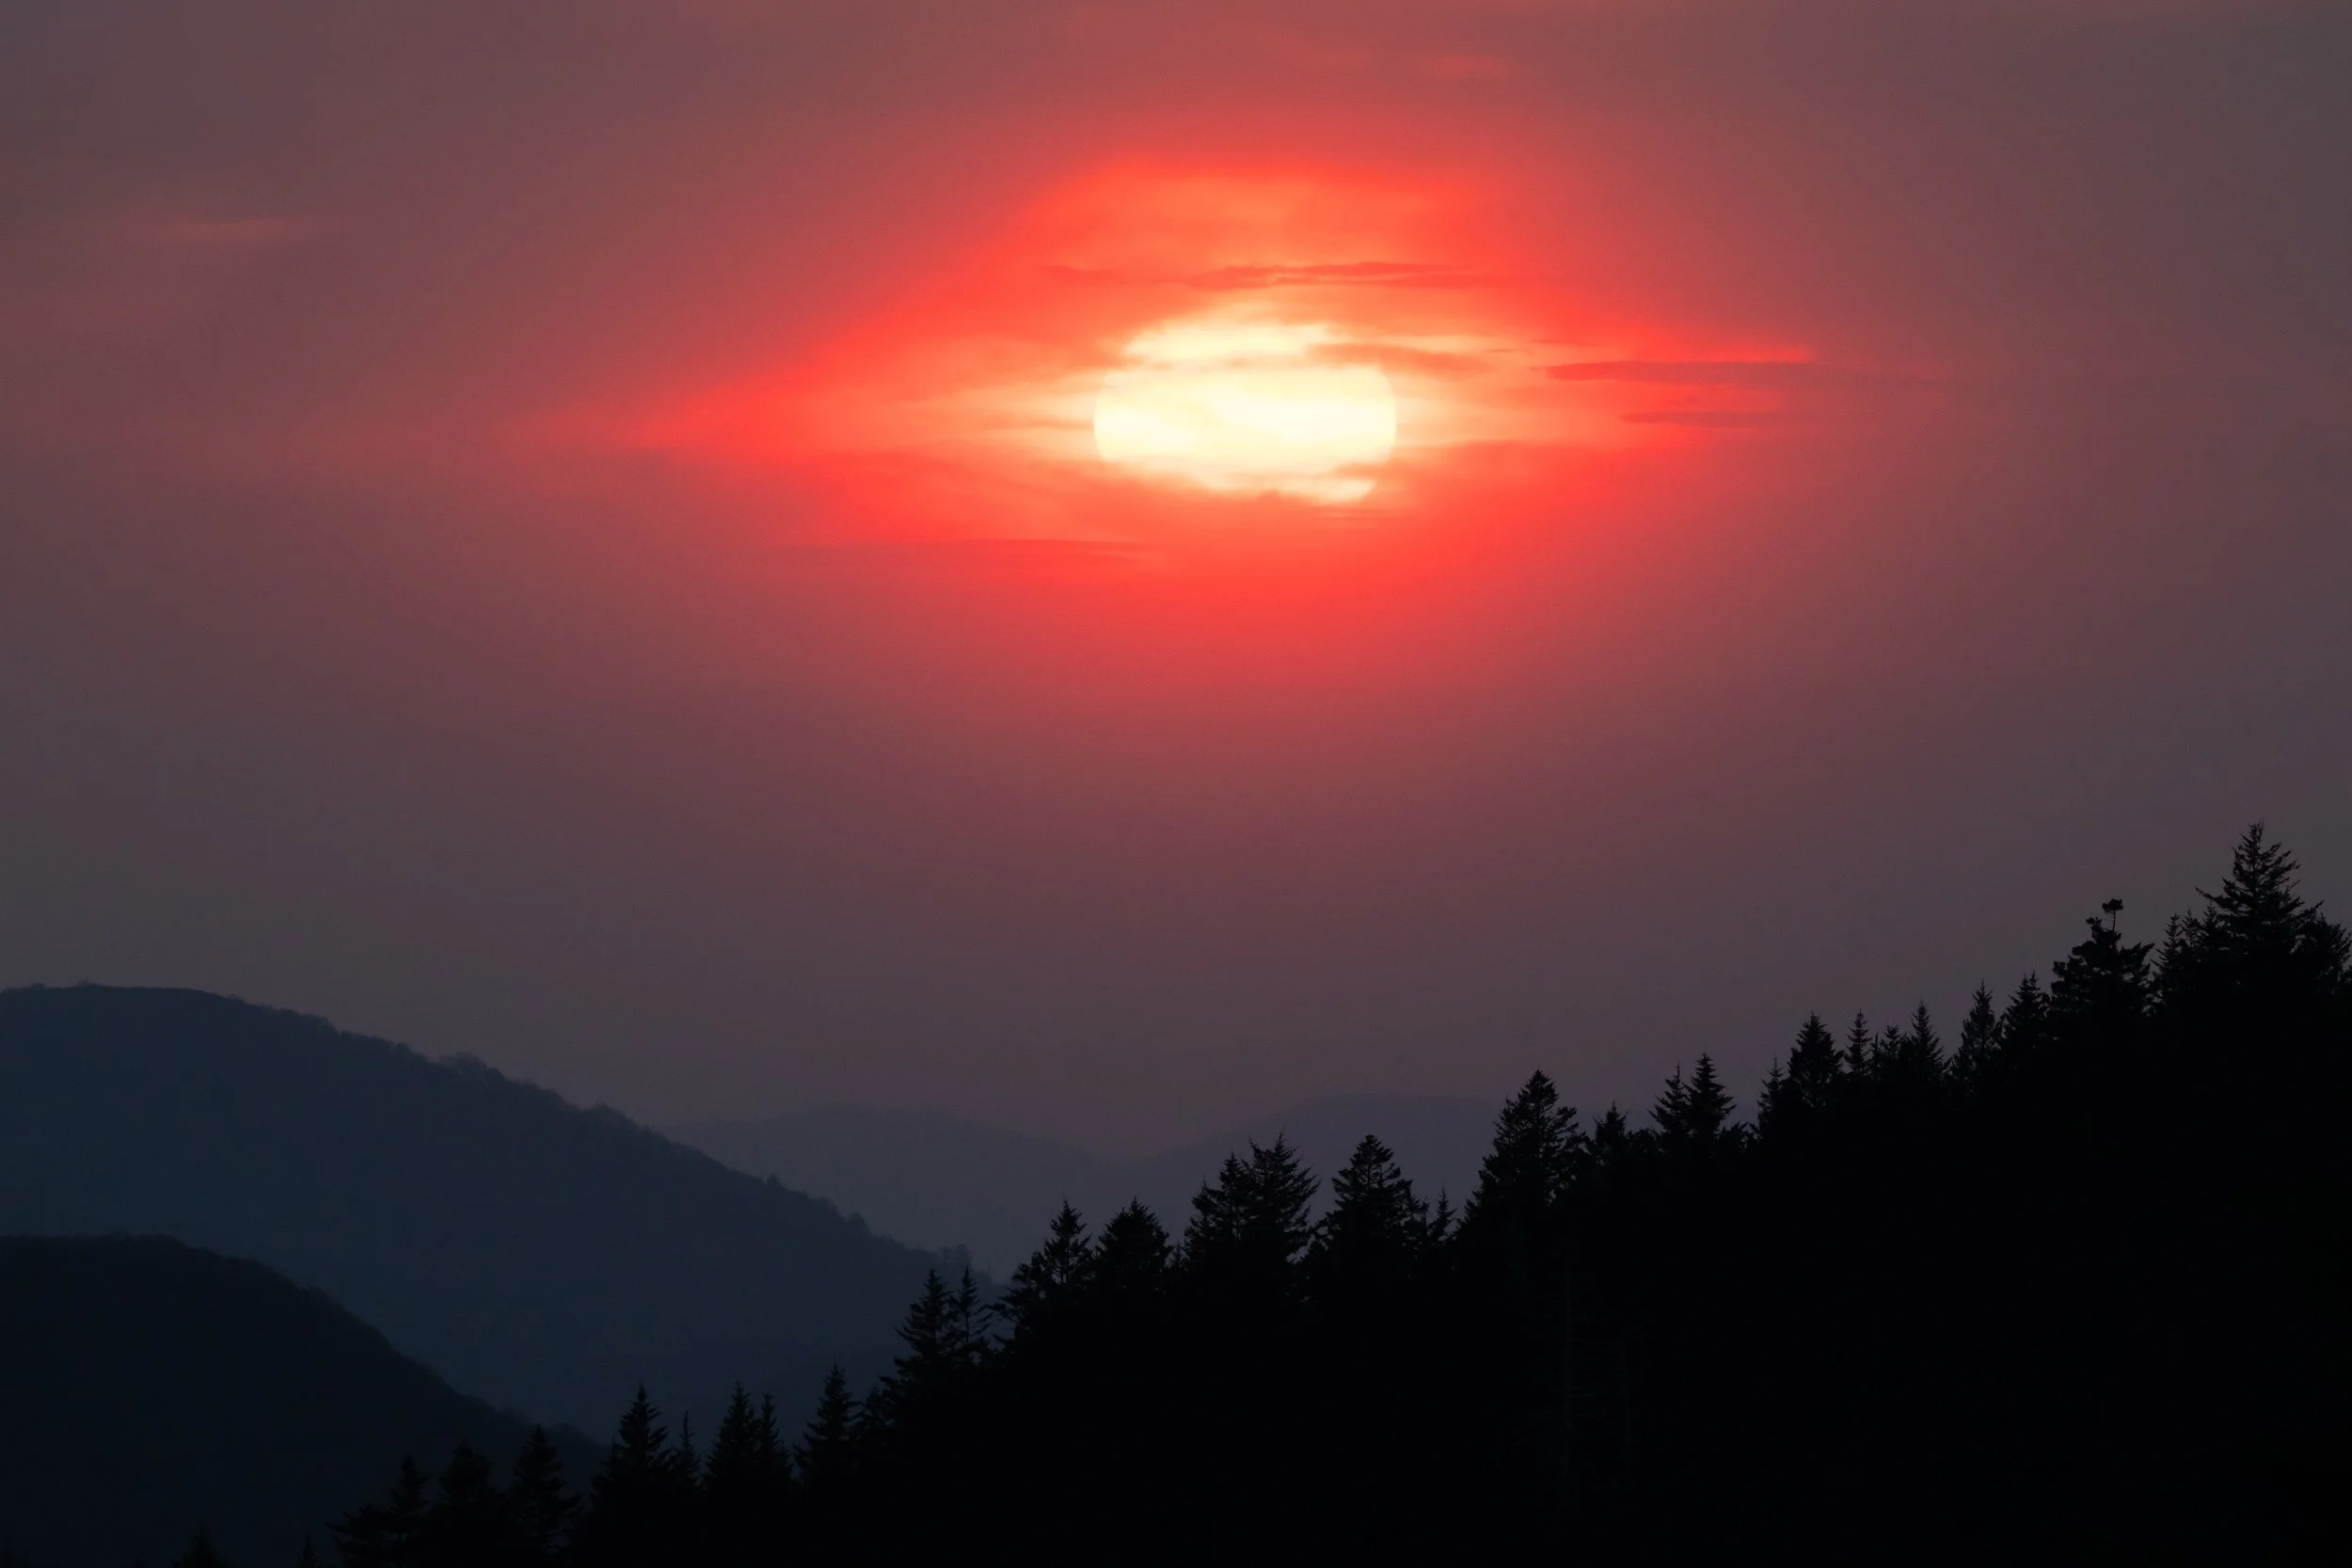
I tried to capture several images of the classic receding ridges and also got lucky with the sun poking through a hole in the clouds and the haze. These “classic” shots are best made with a telephoto lens to isolate parts of the scene and get over the messy foregrounds. It also allows you to take advantage of the compression that longer focal lengths provide. I used my Nikkor Z 180-600 lens and was shooting most of those somewhere between 200- 400mm length.
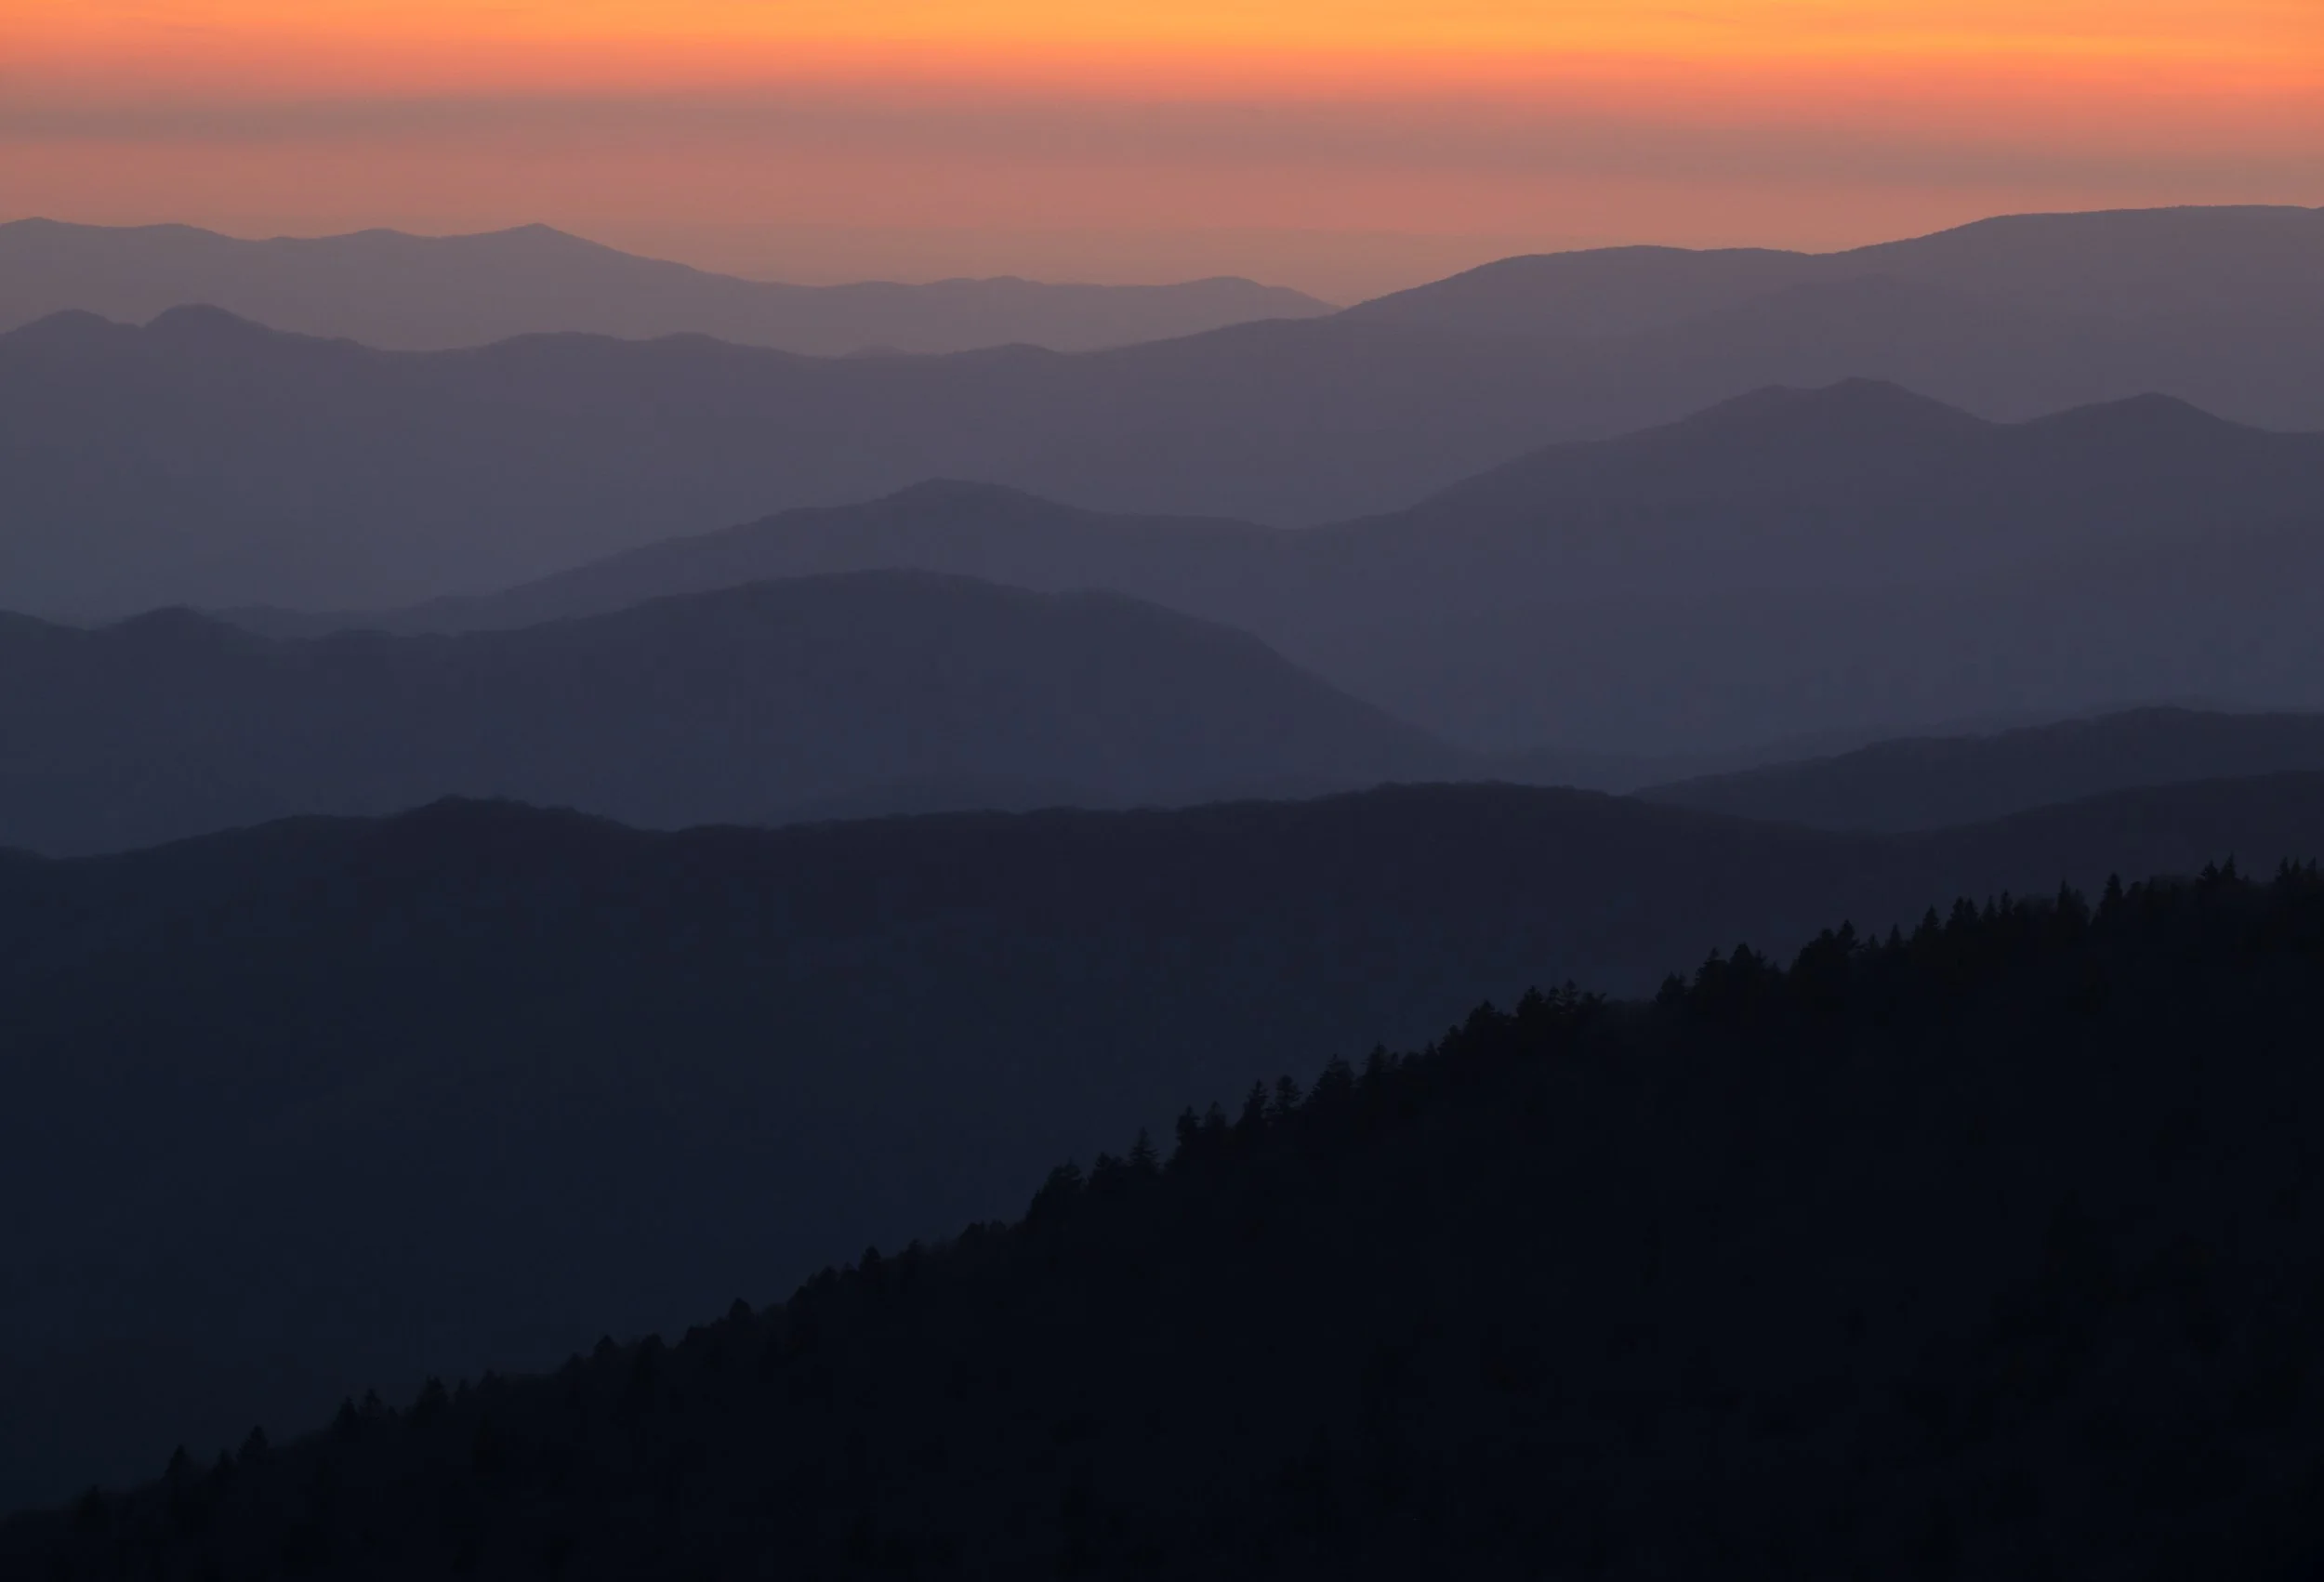
A fiery sunset over classic Smoky Mountain Ridges
There were other ways to capture the ridgelines. Many were closer at hand and provided opportunities for tighter shots of the mountains catching light against shadowed backgrounds.
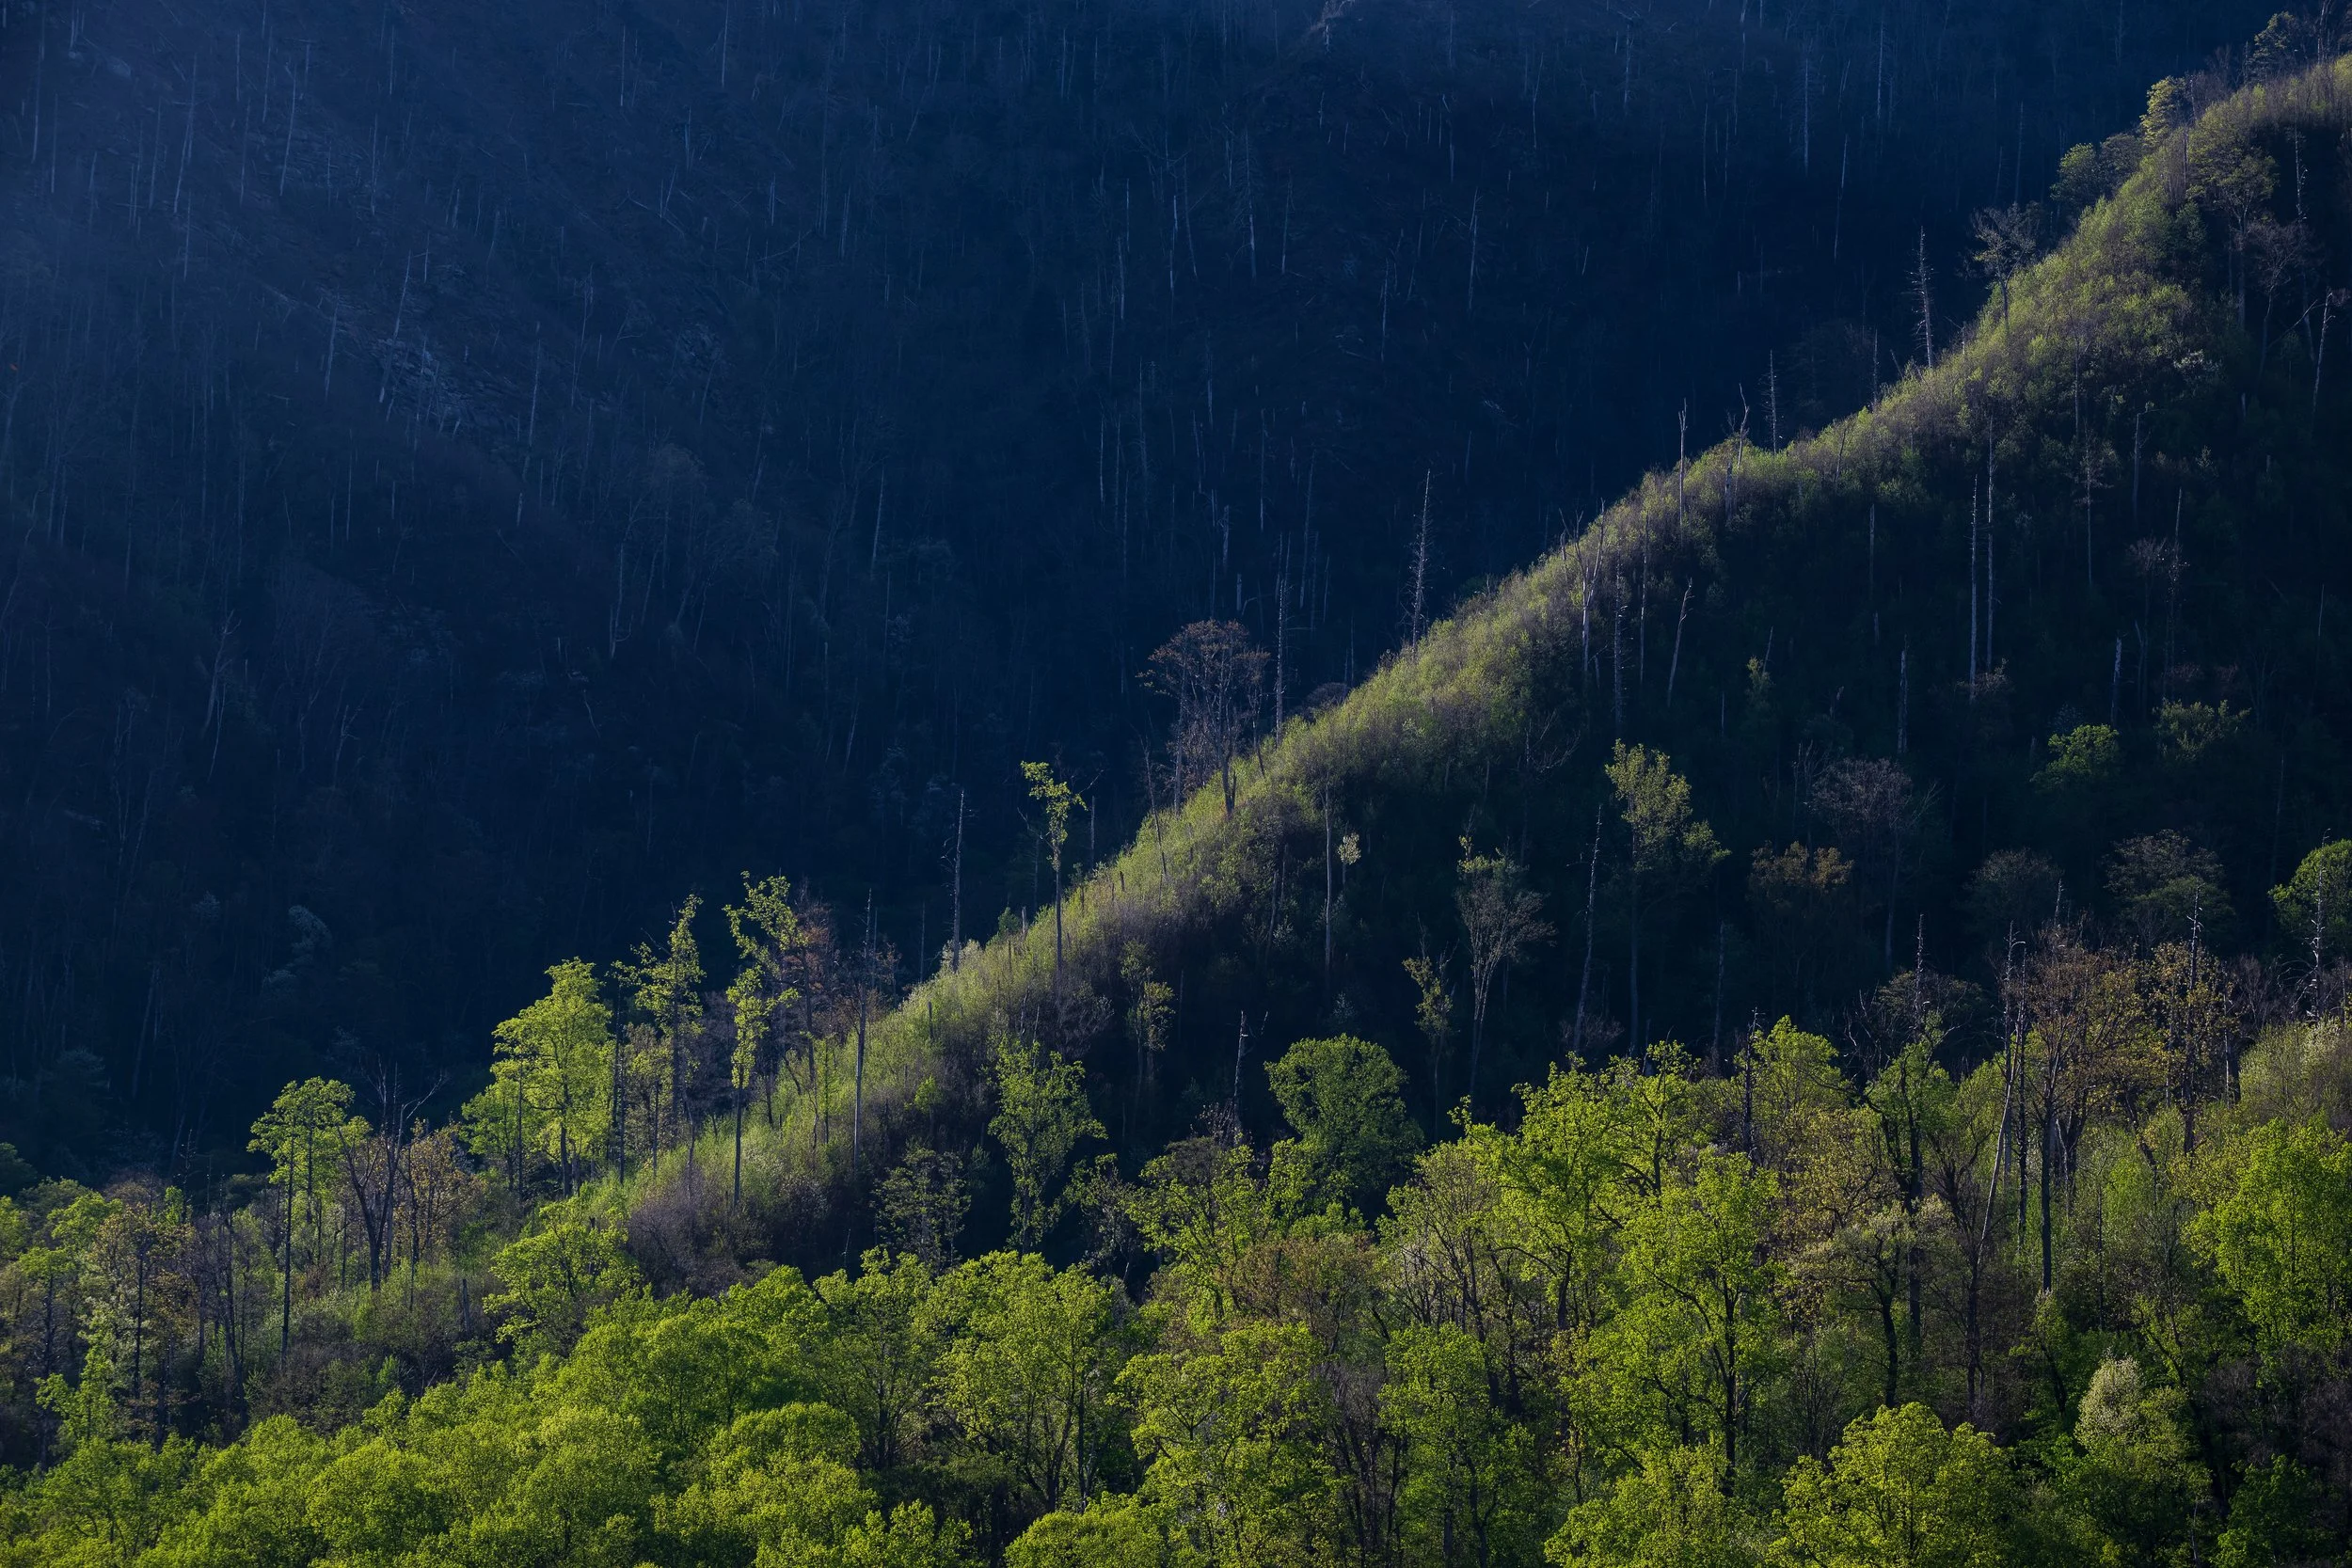
Fresh spring greens accentuate a lower ridgeline
The forests at elevations of five to six thousand feet were actually covered with spruce fir forests that reminded me of the northern boreal forest that I have back home in the higher elevations in New Hampshire. I tried to convey that surprise by capturing those trees along with some of those ridgelines.

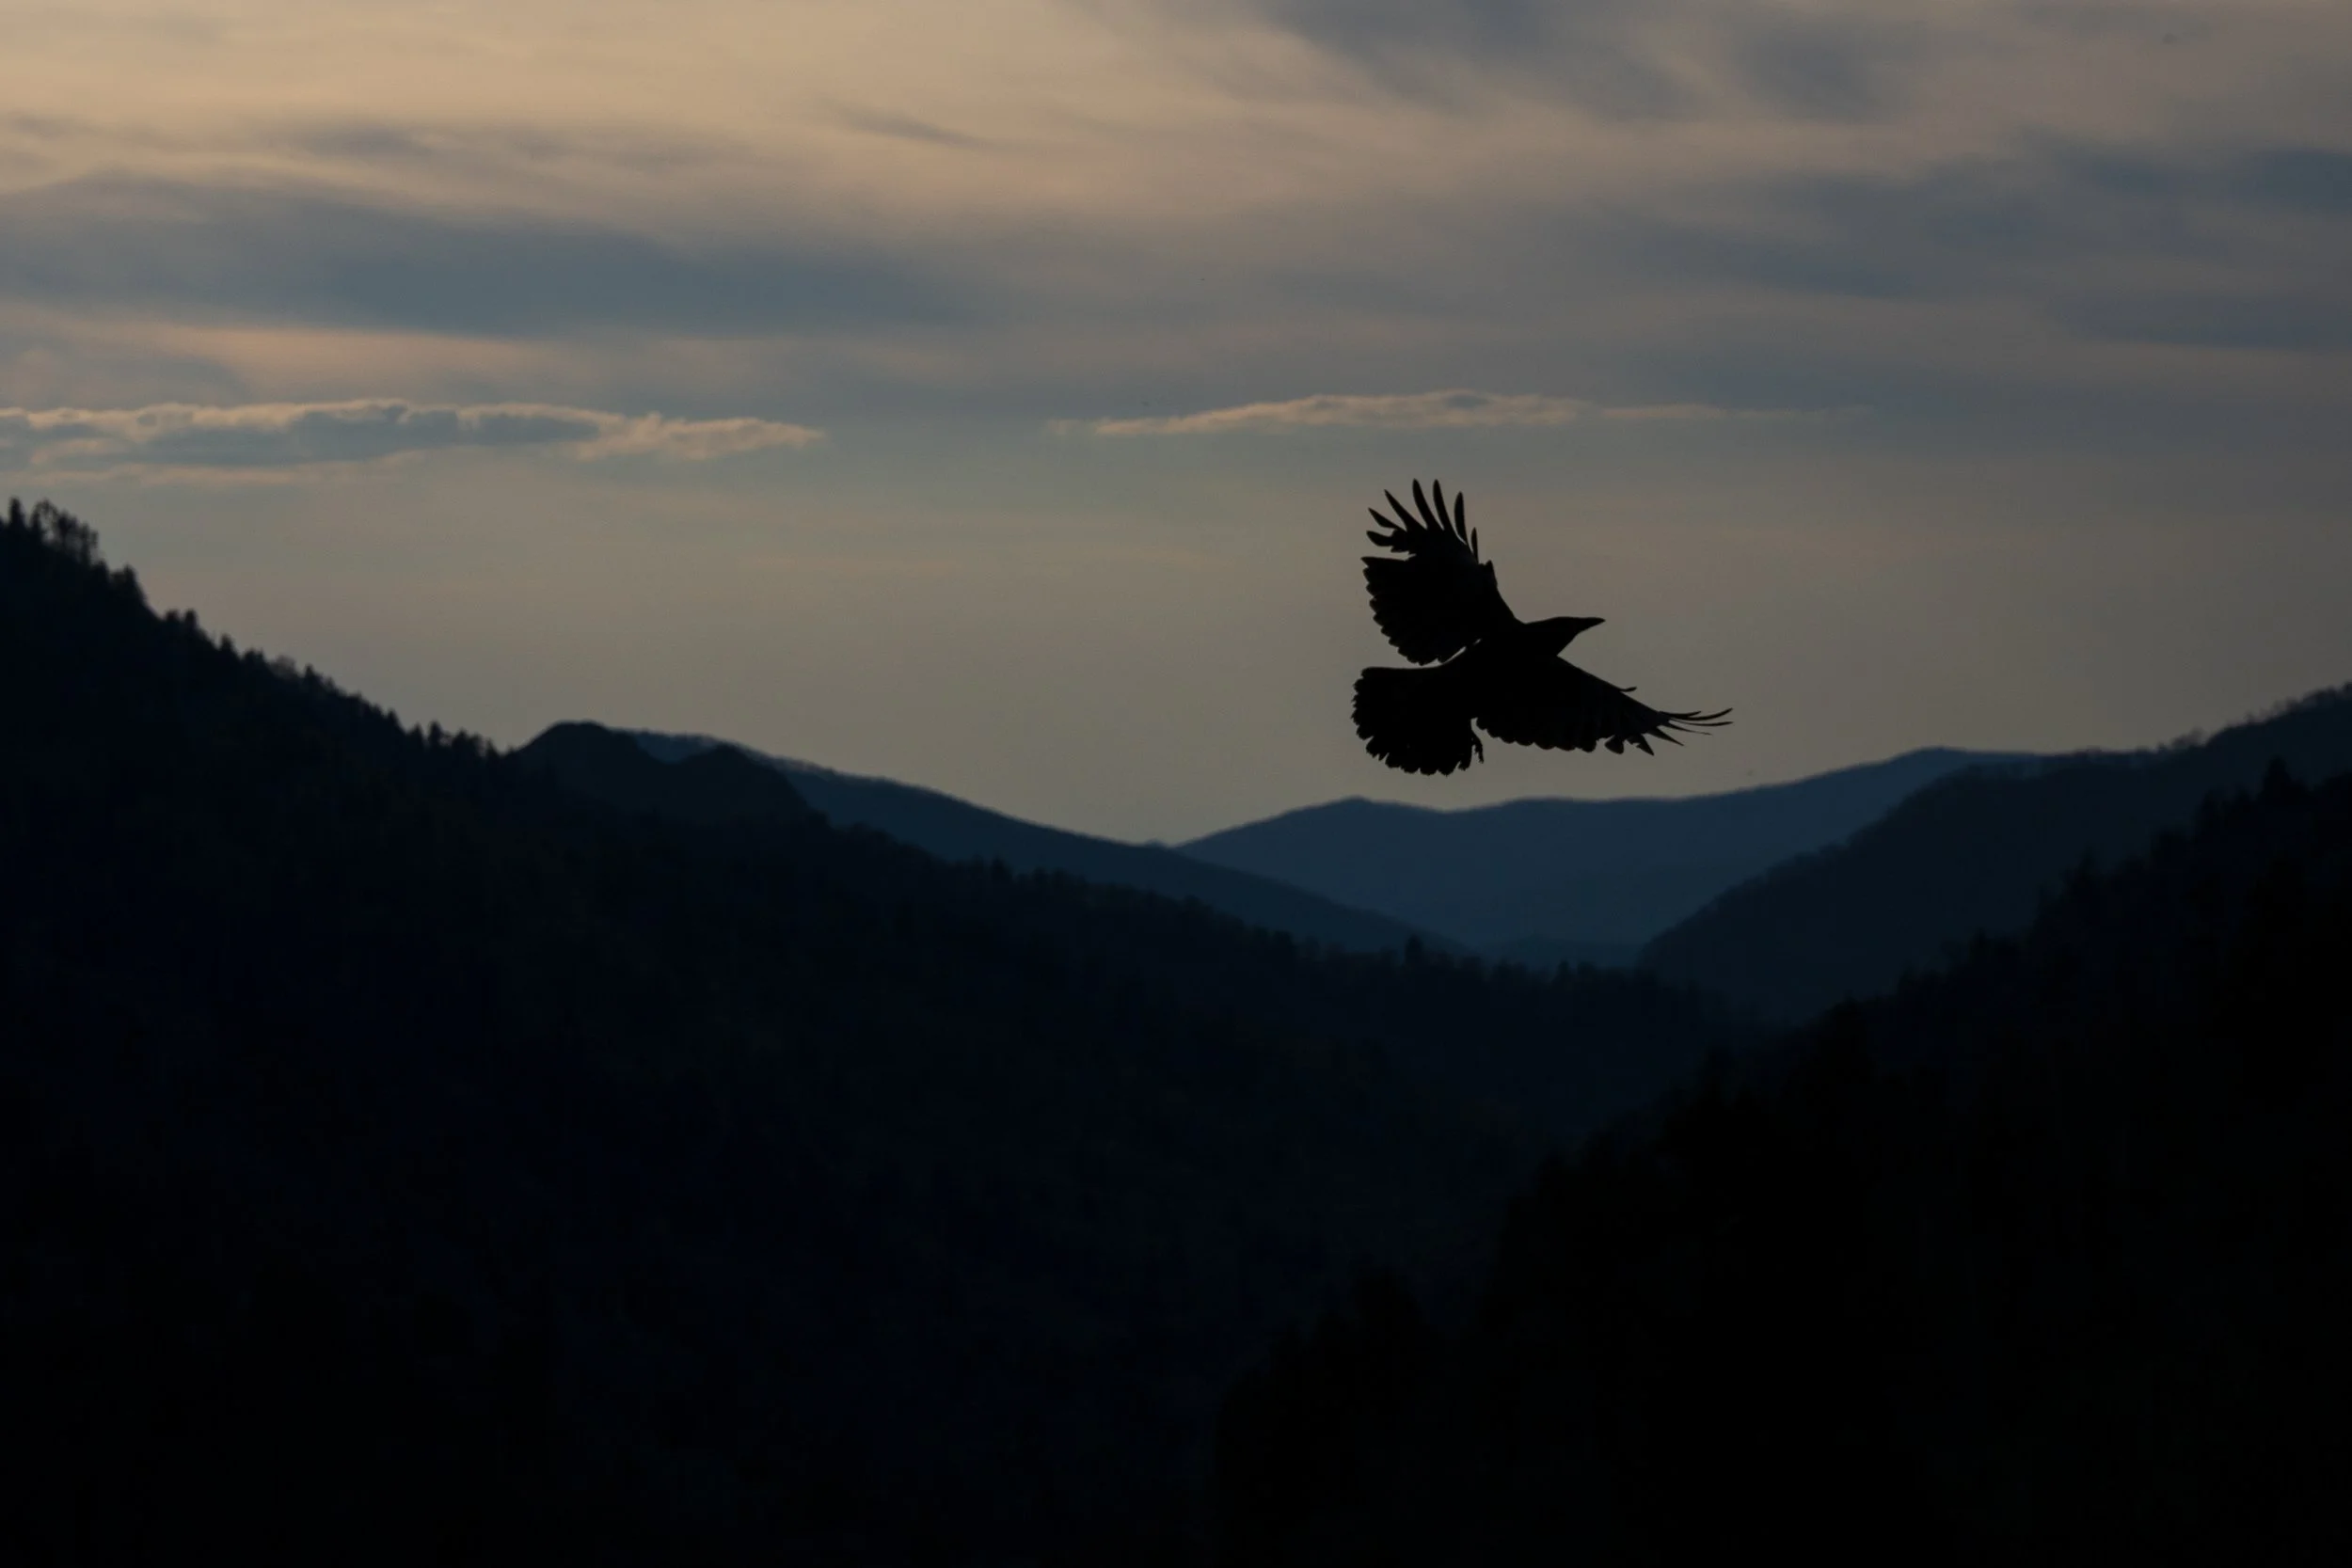
The ridgelines were home to many crows and ravens soaring along them. For this shot I waited until an American crow flew by at the right time.
Of course, if you are inclined and able, you can hike to the ridgelines yourself. There are many excellent hikes in the park. One of the most popular is the 4.6 mile round trip hike to Alum Cave, with the option to hit Mt. Leconte 6593’ to make it 11 miles. This hike is extremely popular so get to the trailhead early and mid-week.
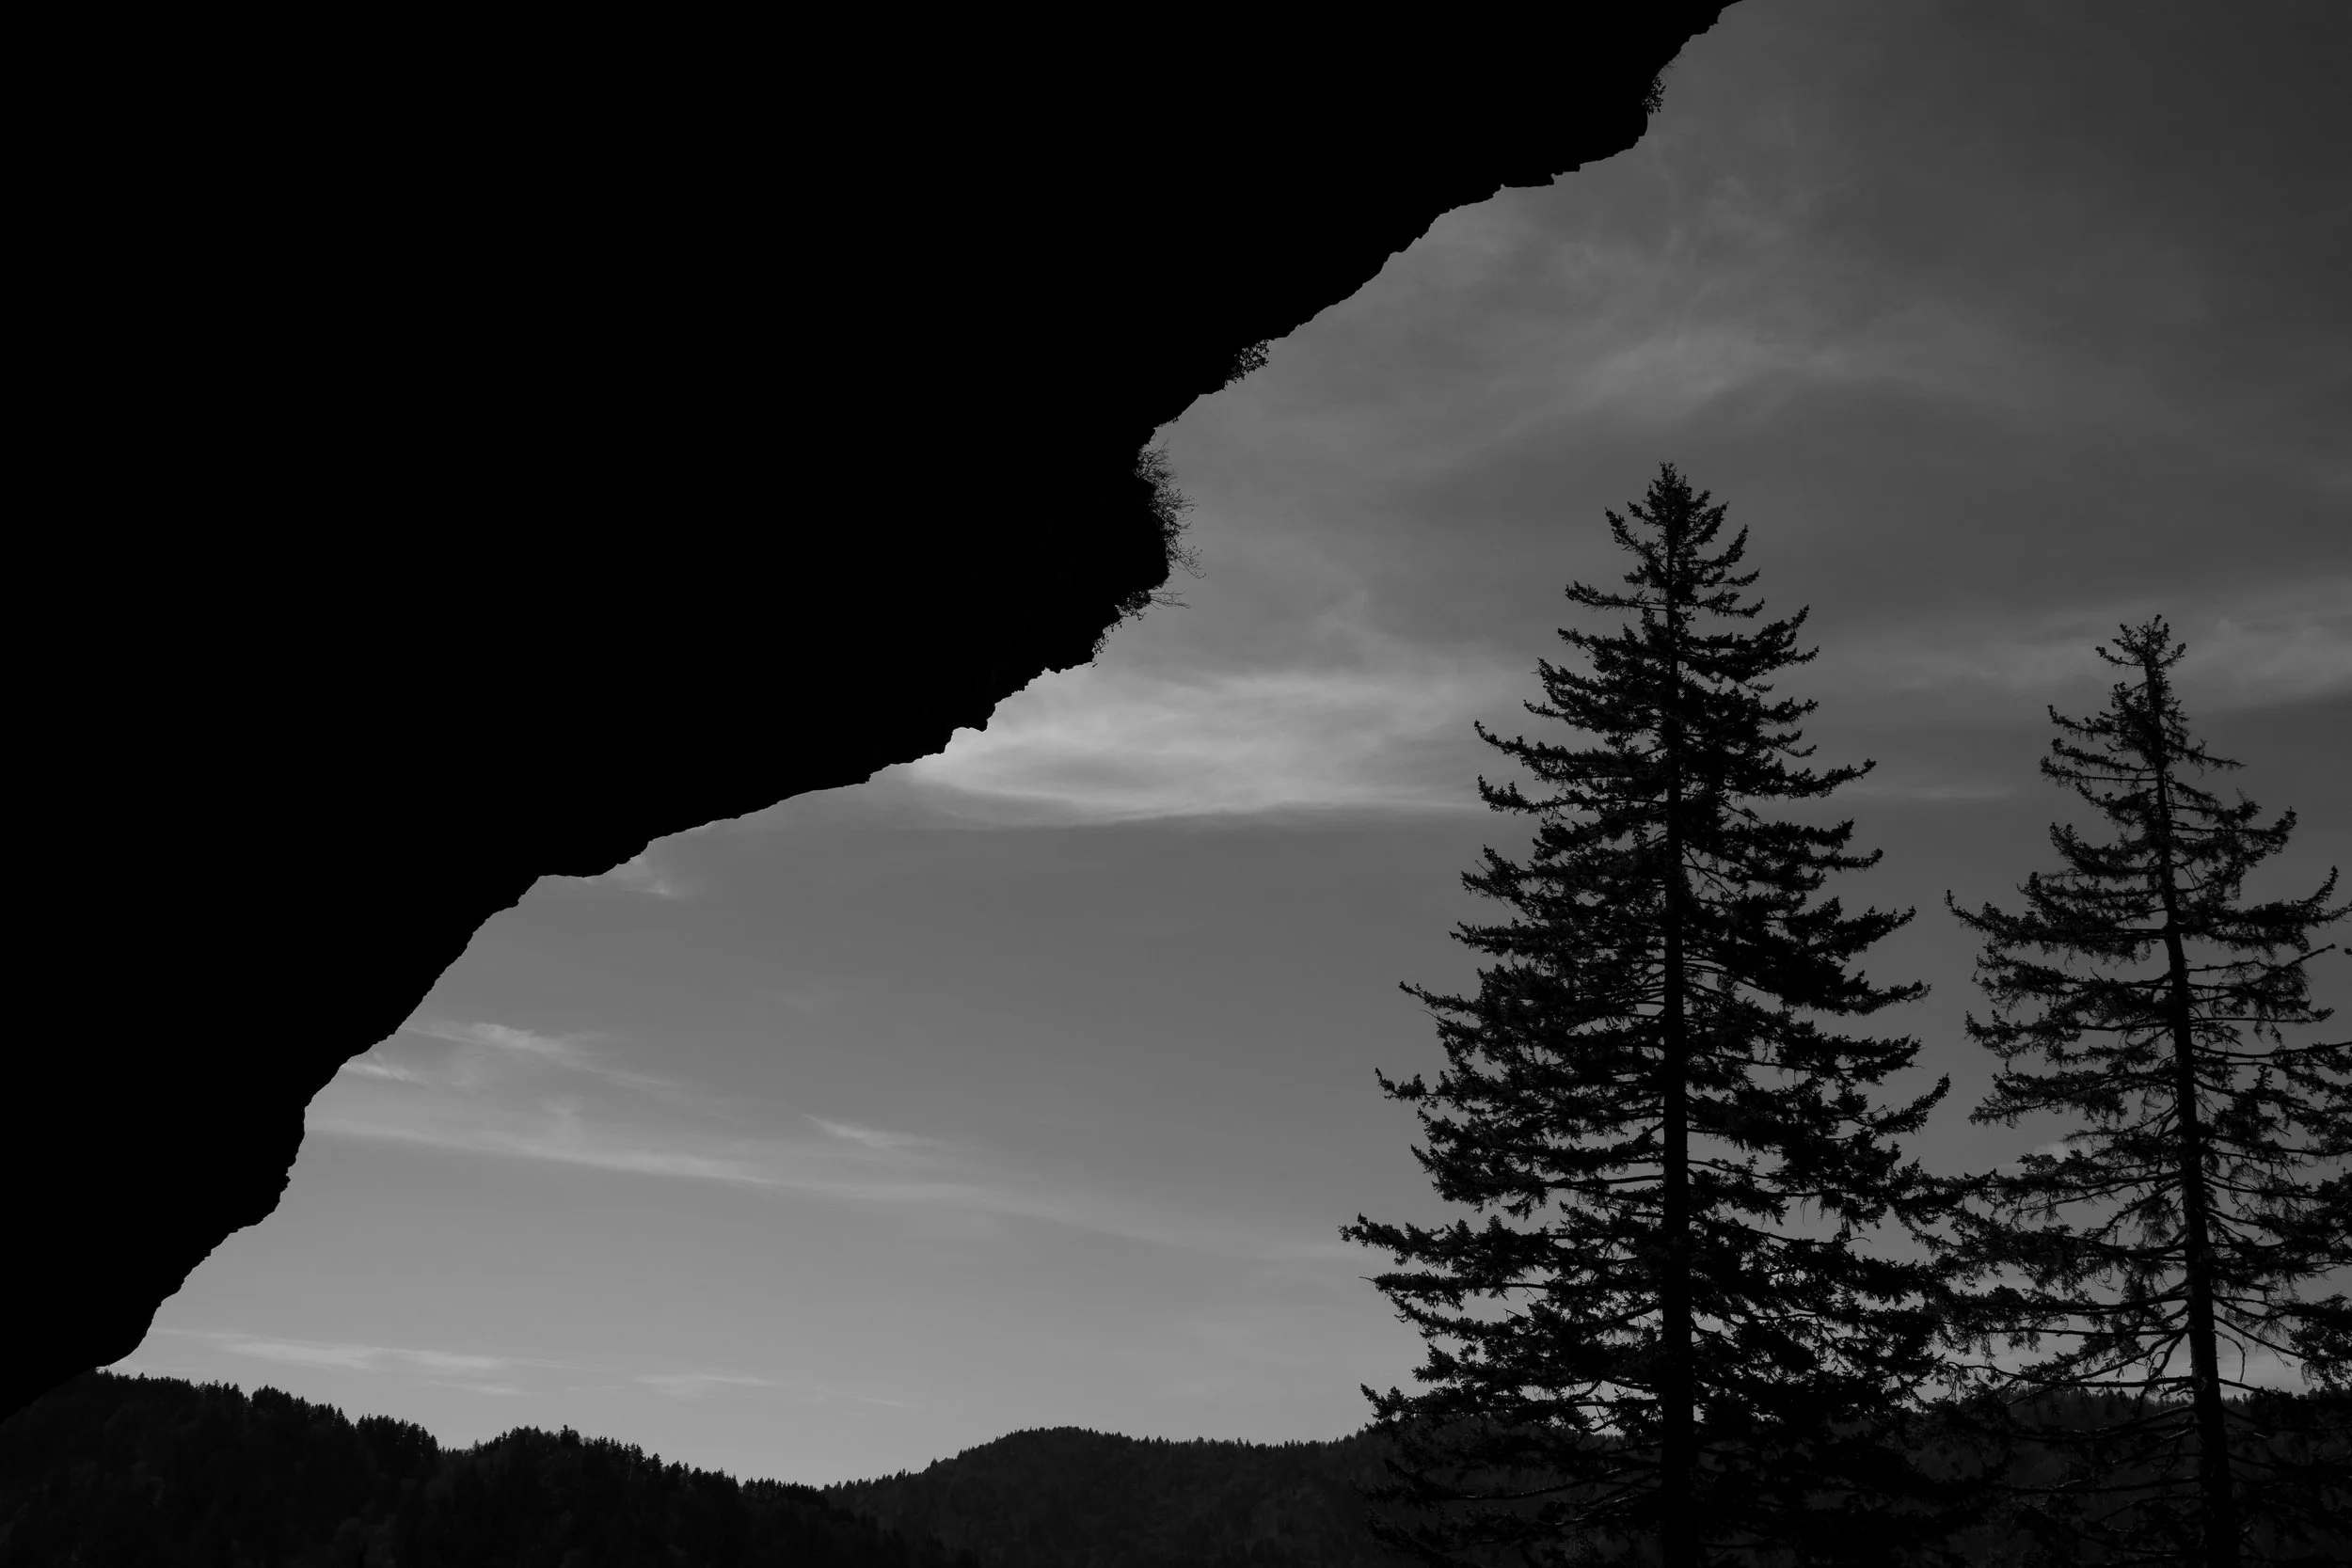
The view from inside Alum Cave at roughly an elevation of roughly 5000 feet
2. “Most Biodiverse National Park Title” is Highlighted in Spring
GSMNP has the greatest biodiversity in the United States National Park. There are more than 135 species of trees, more than the total on continental Europe. In 1998, scientists sought to inventory the total number of species of all lifeforms in the park, noting 19,000 total species including 10,000 that were not previously known to be in the park and 1,000 species that were never discovered anywhere in the world and brand new to science!
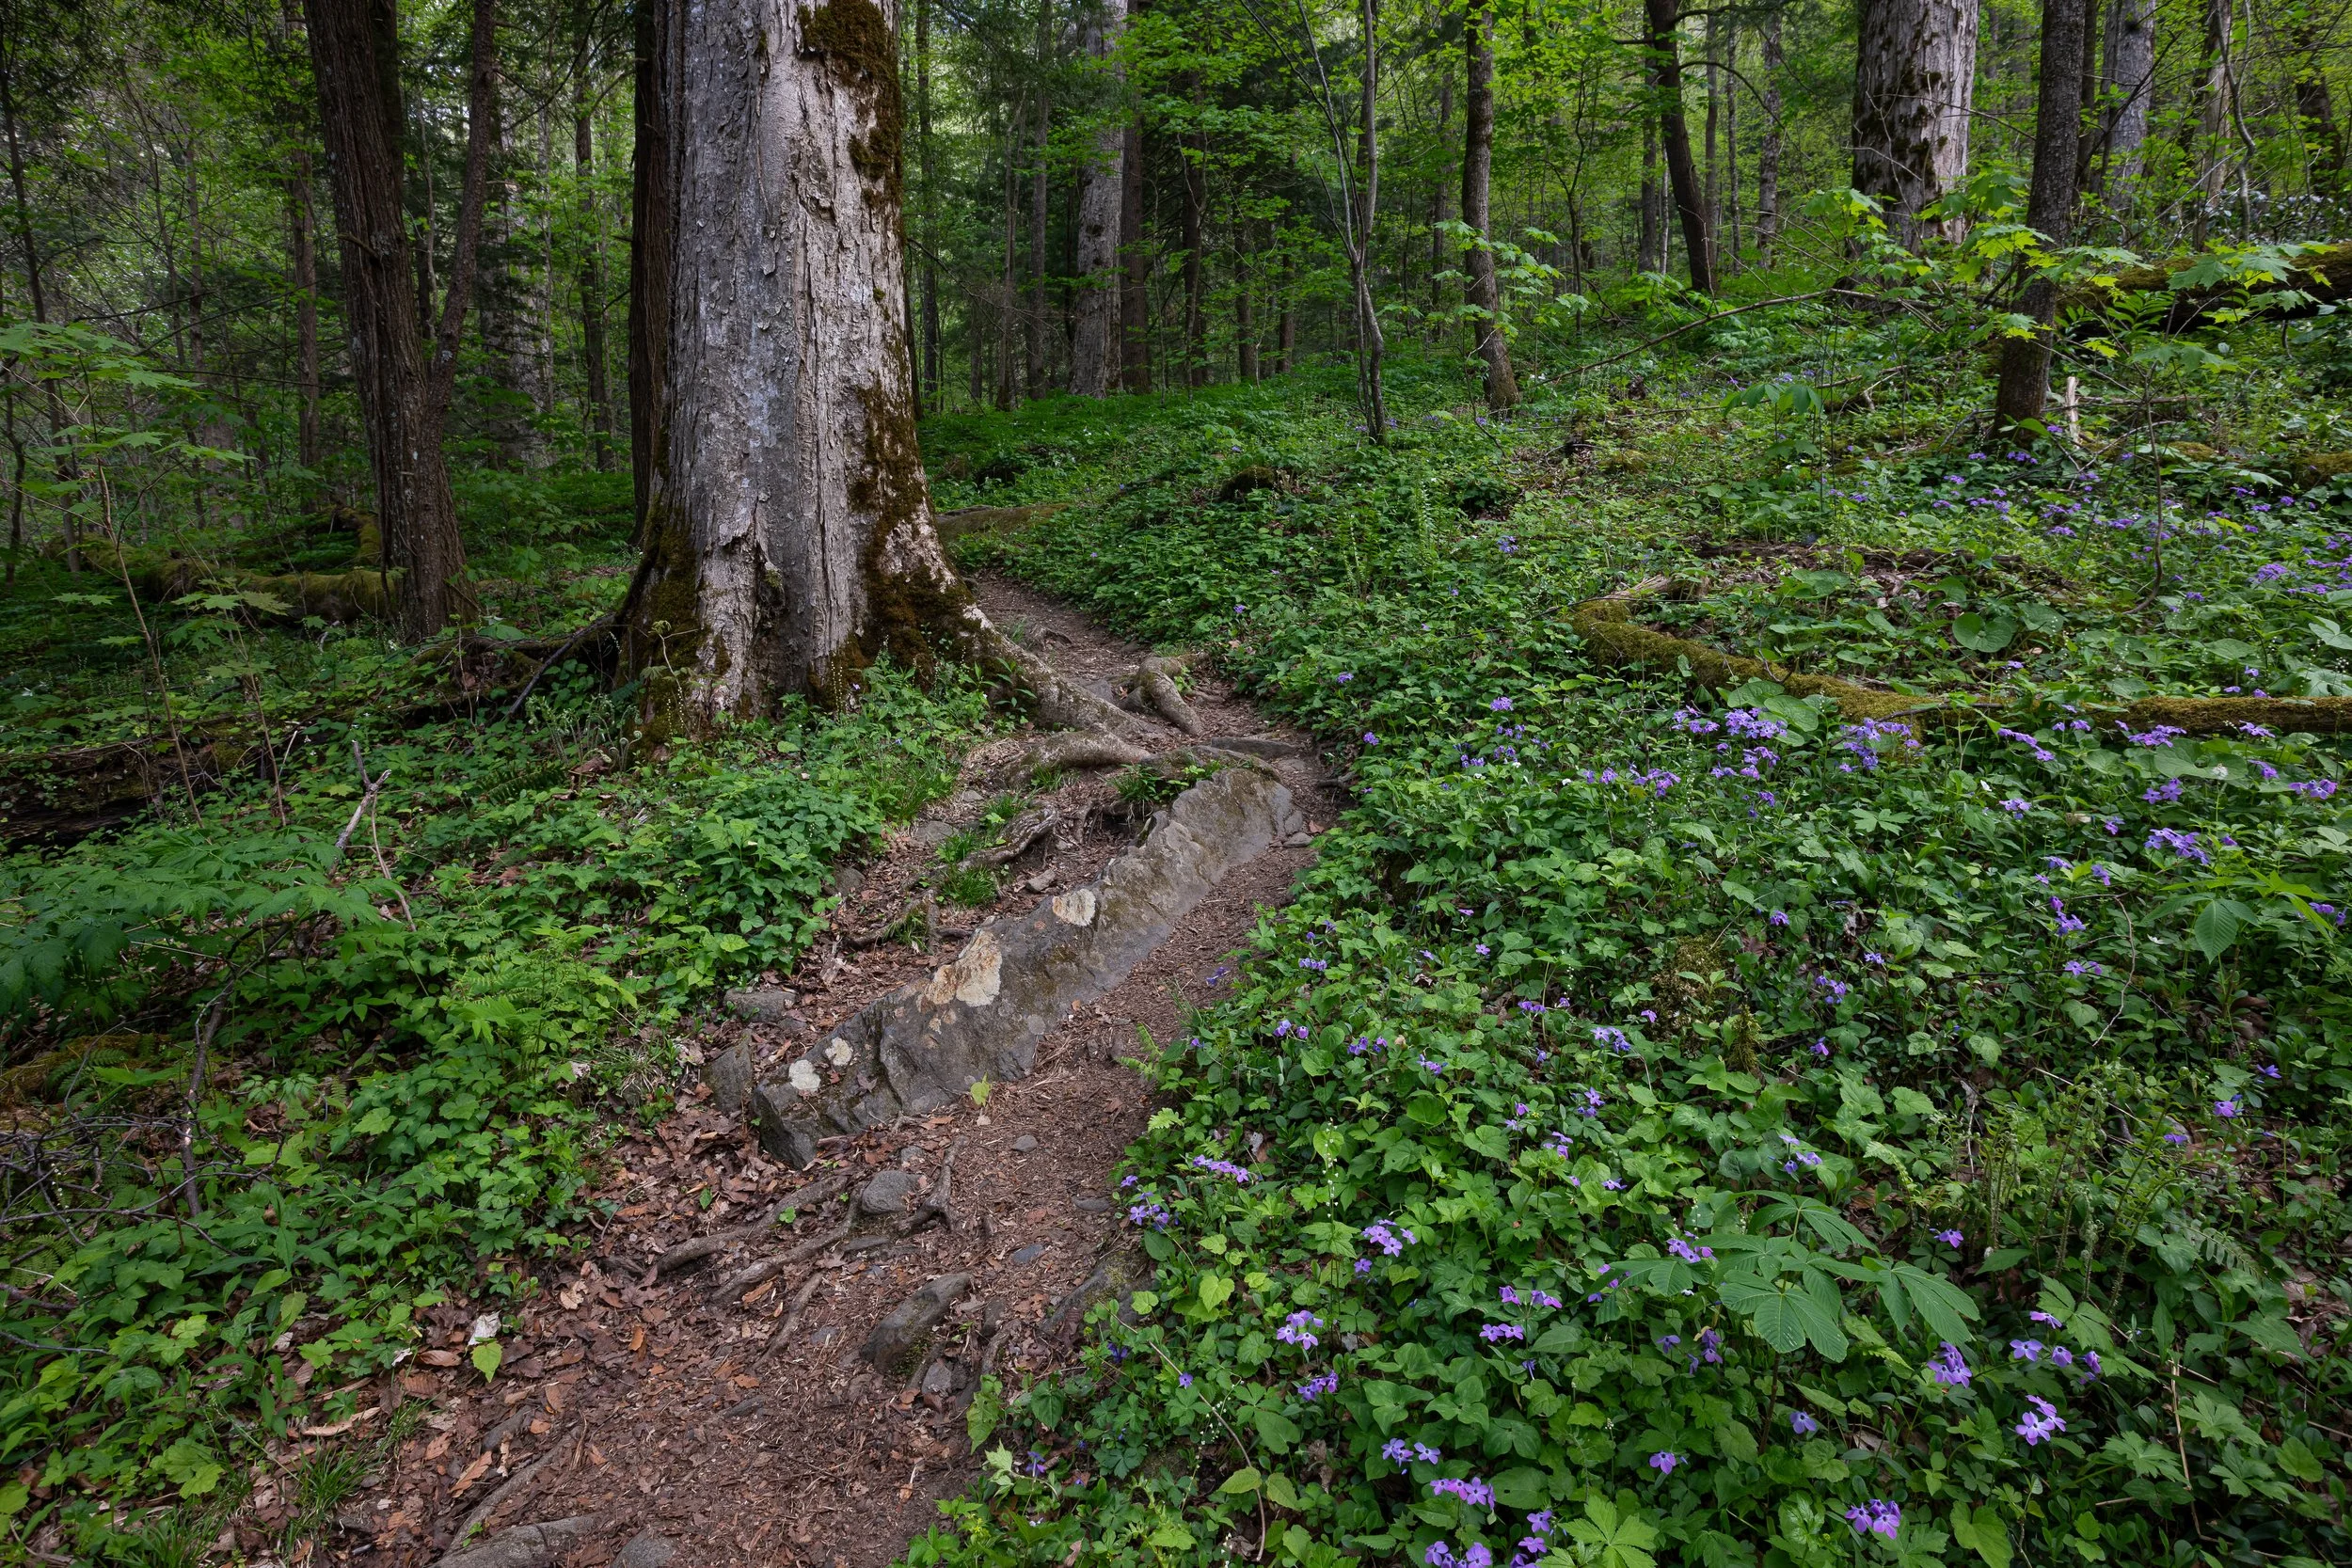
Spring is a great time to call attention to this biodiversity and the wonder it inspires because its emergence is so visible and in your face.
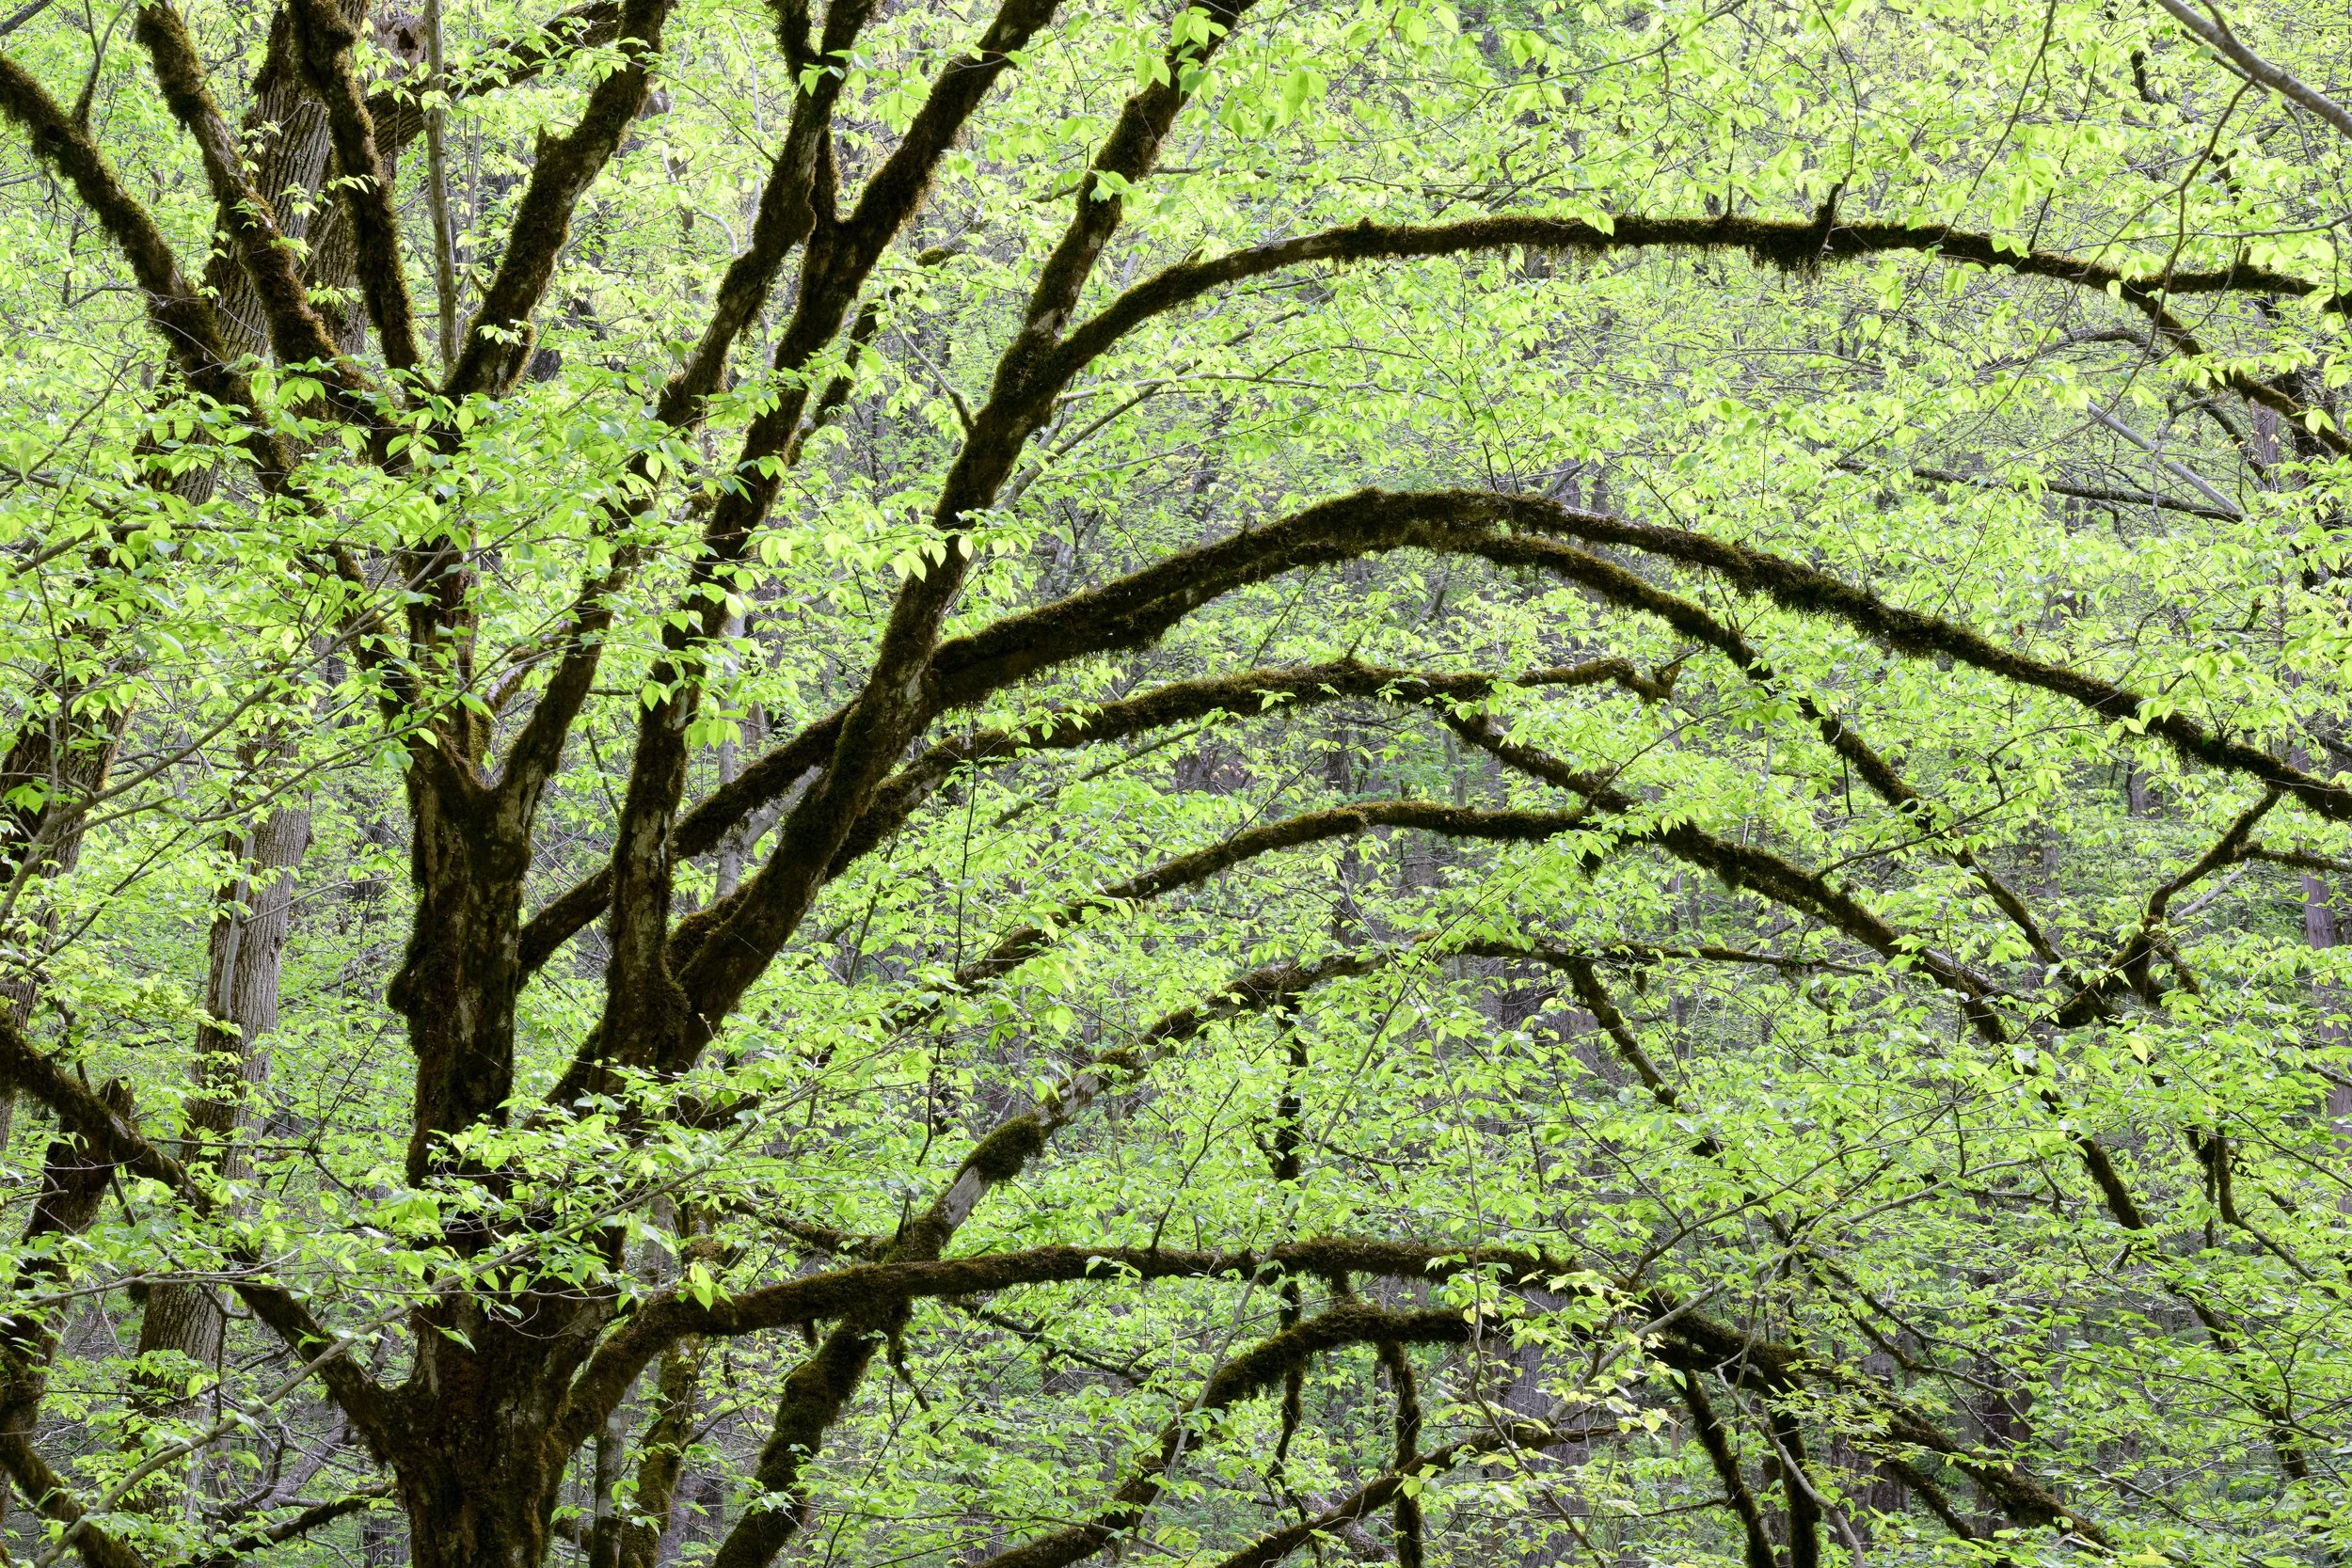
Vibrant new leaves emerge from a tree with moss draped branches.
Spring ephemeral flowers carpeted the trails.
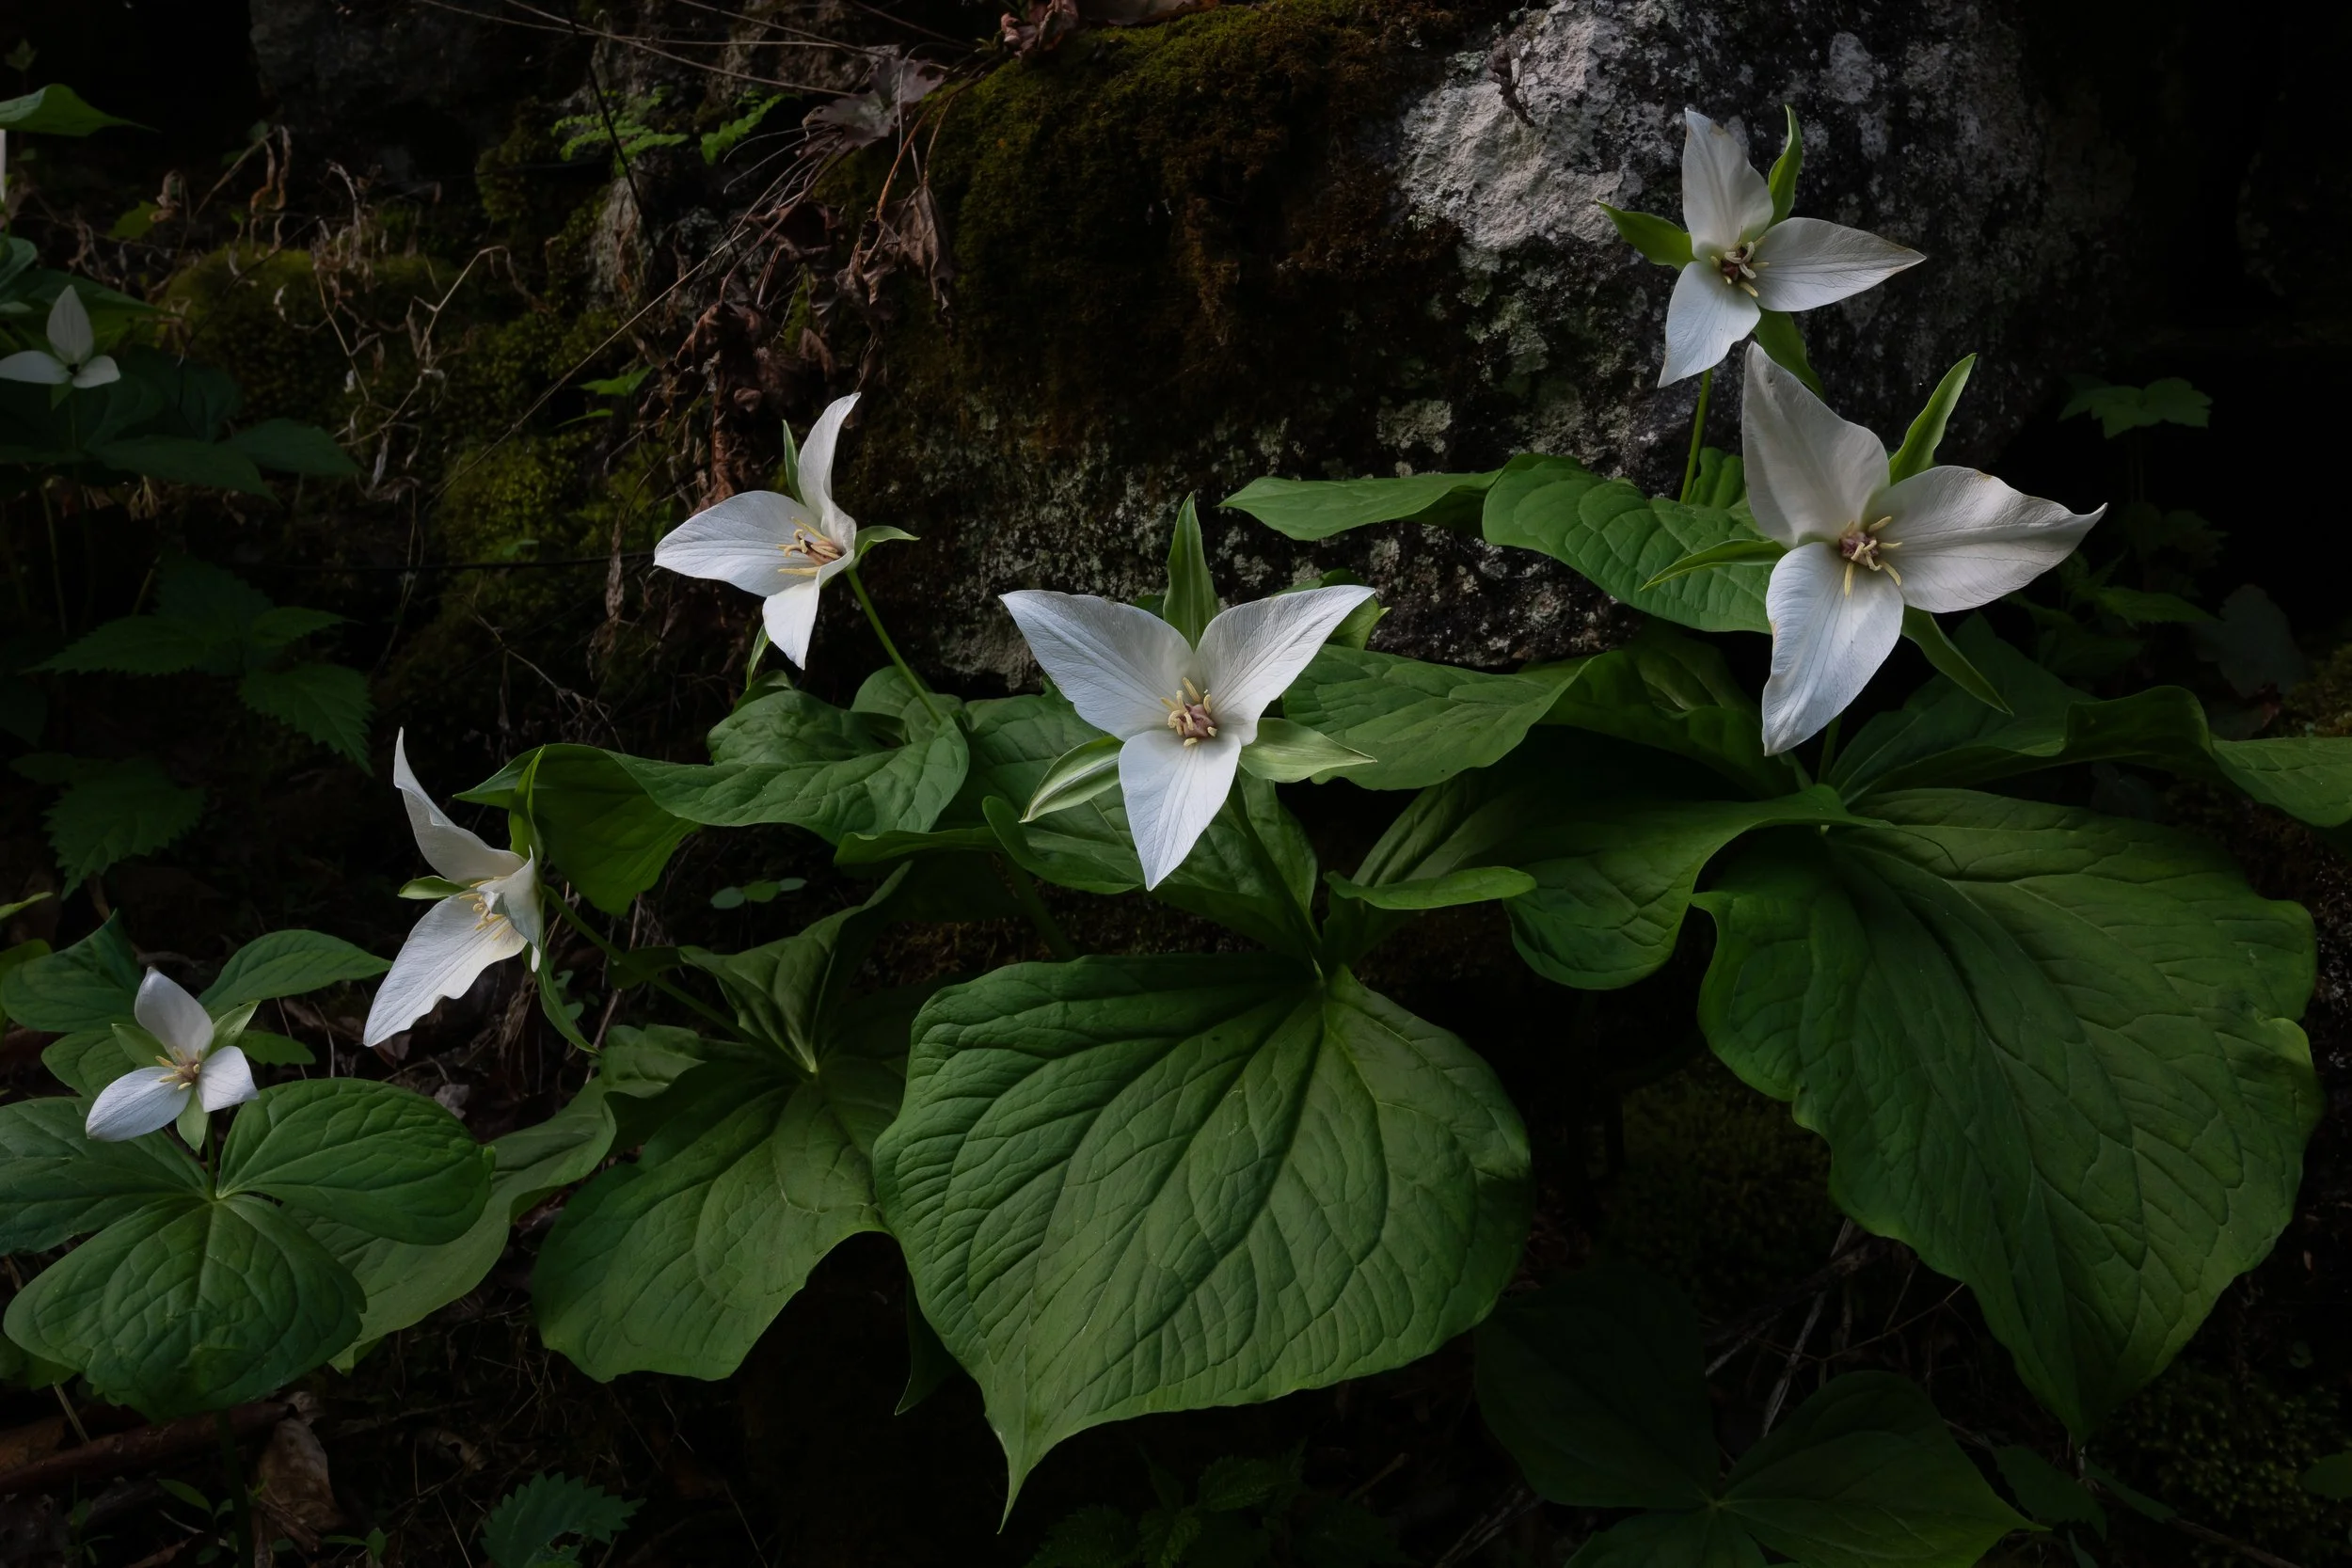
White Trillium flowers were abundant.
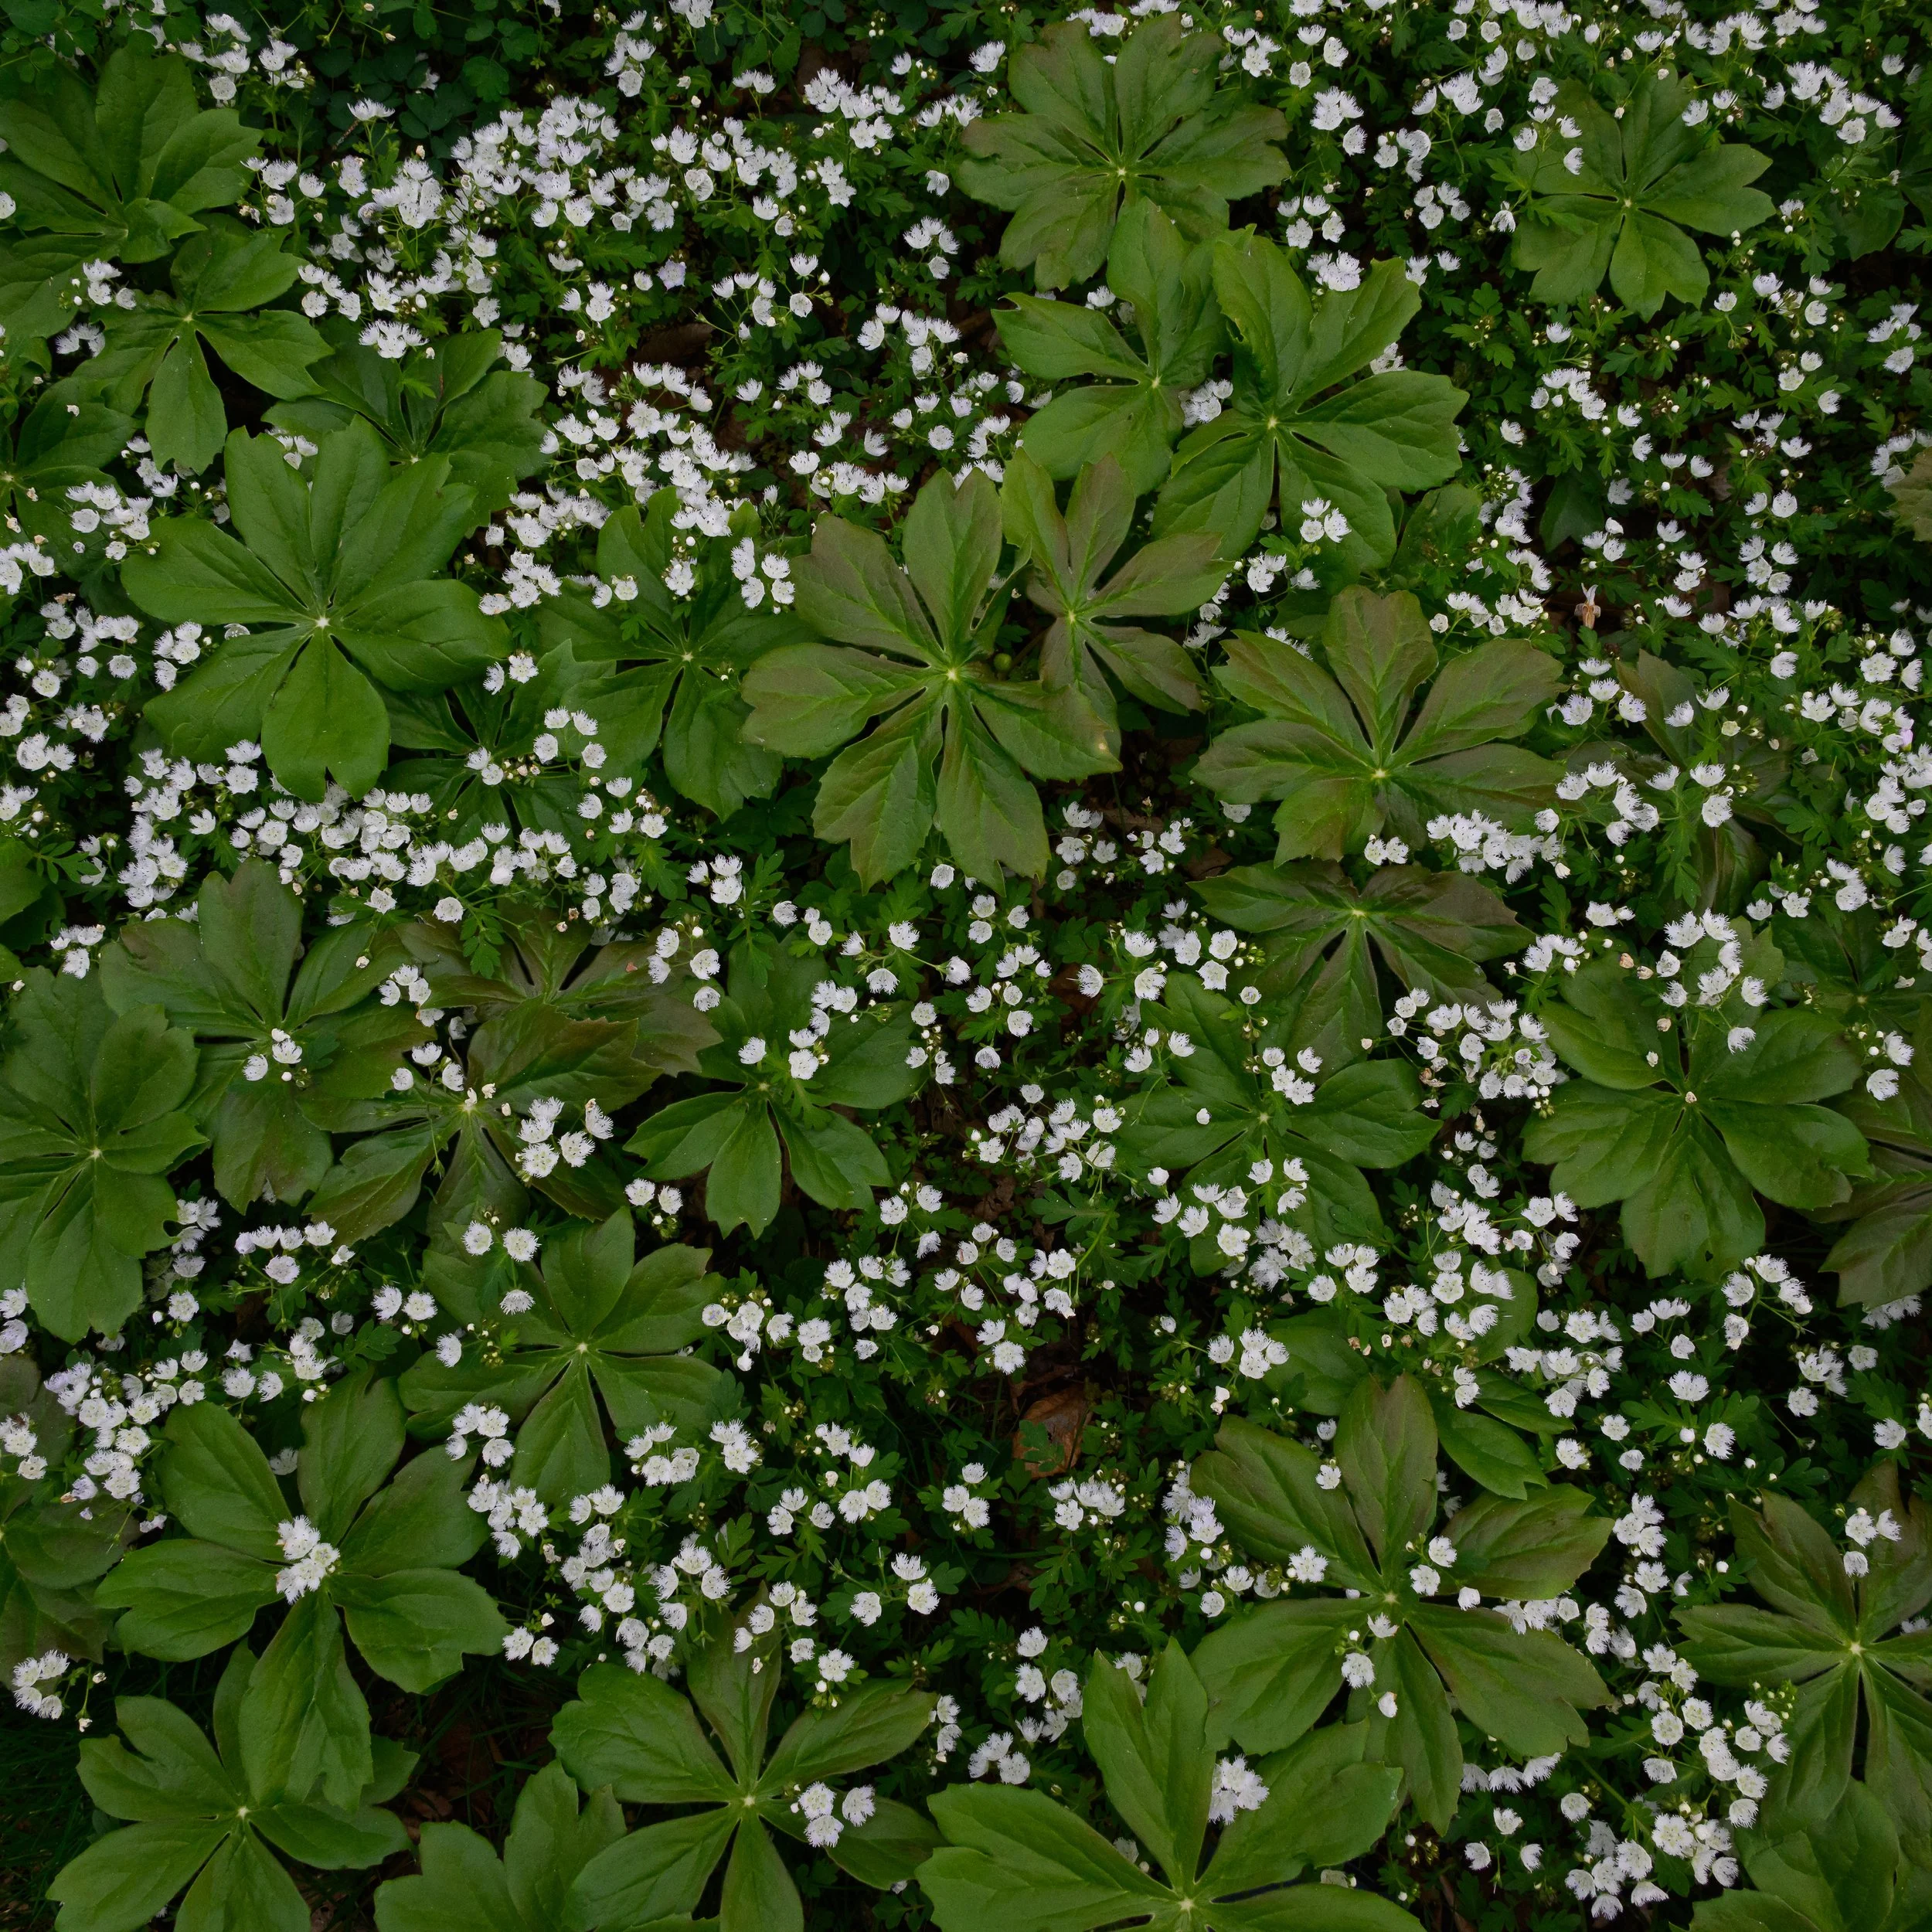
The rich forest floor:
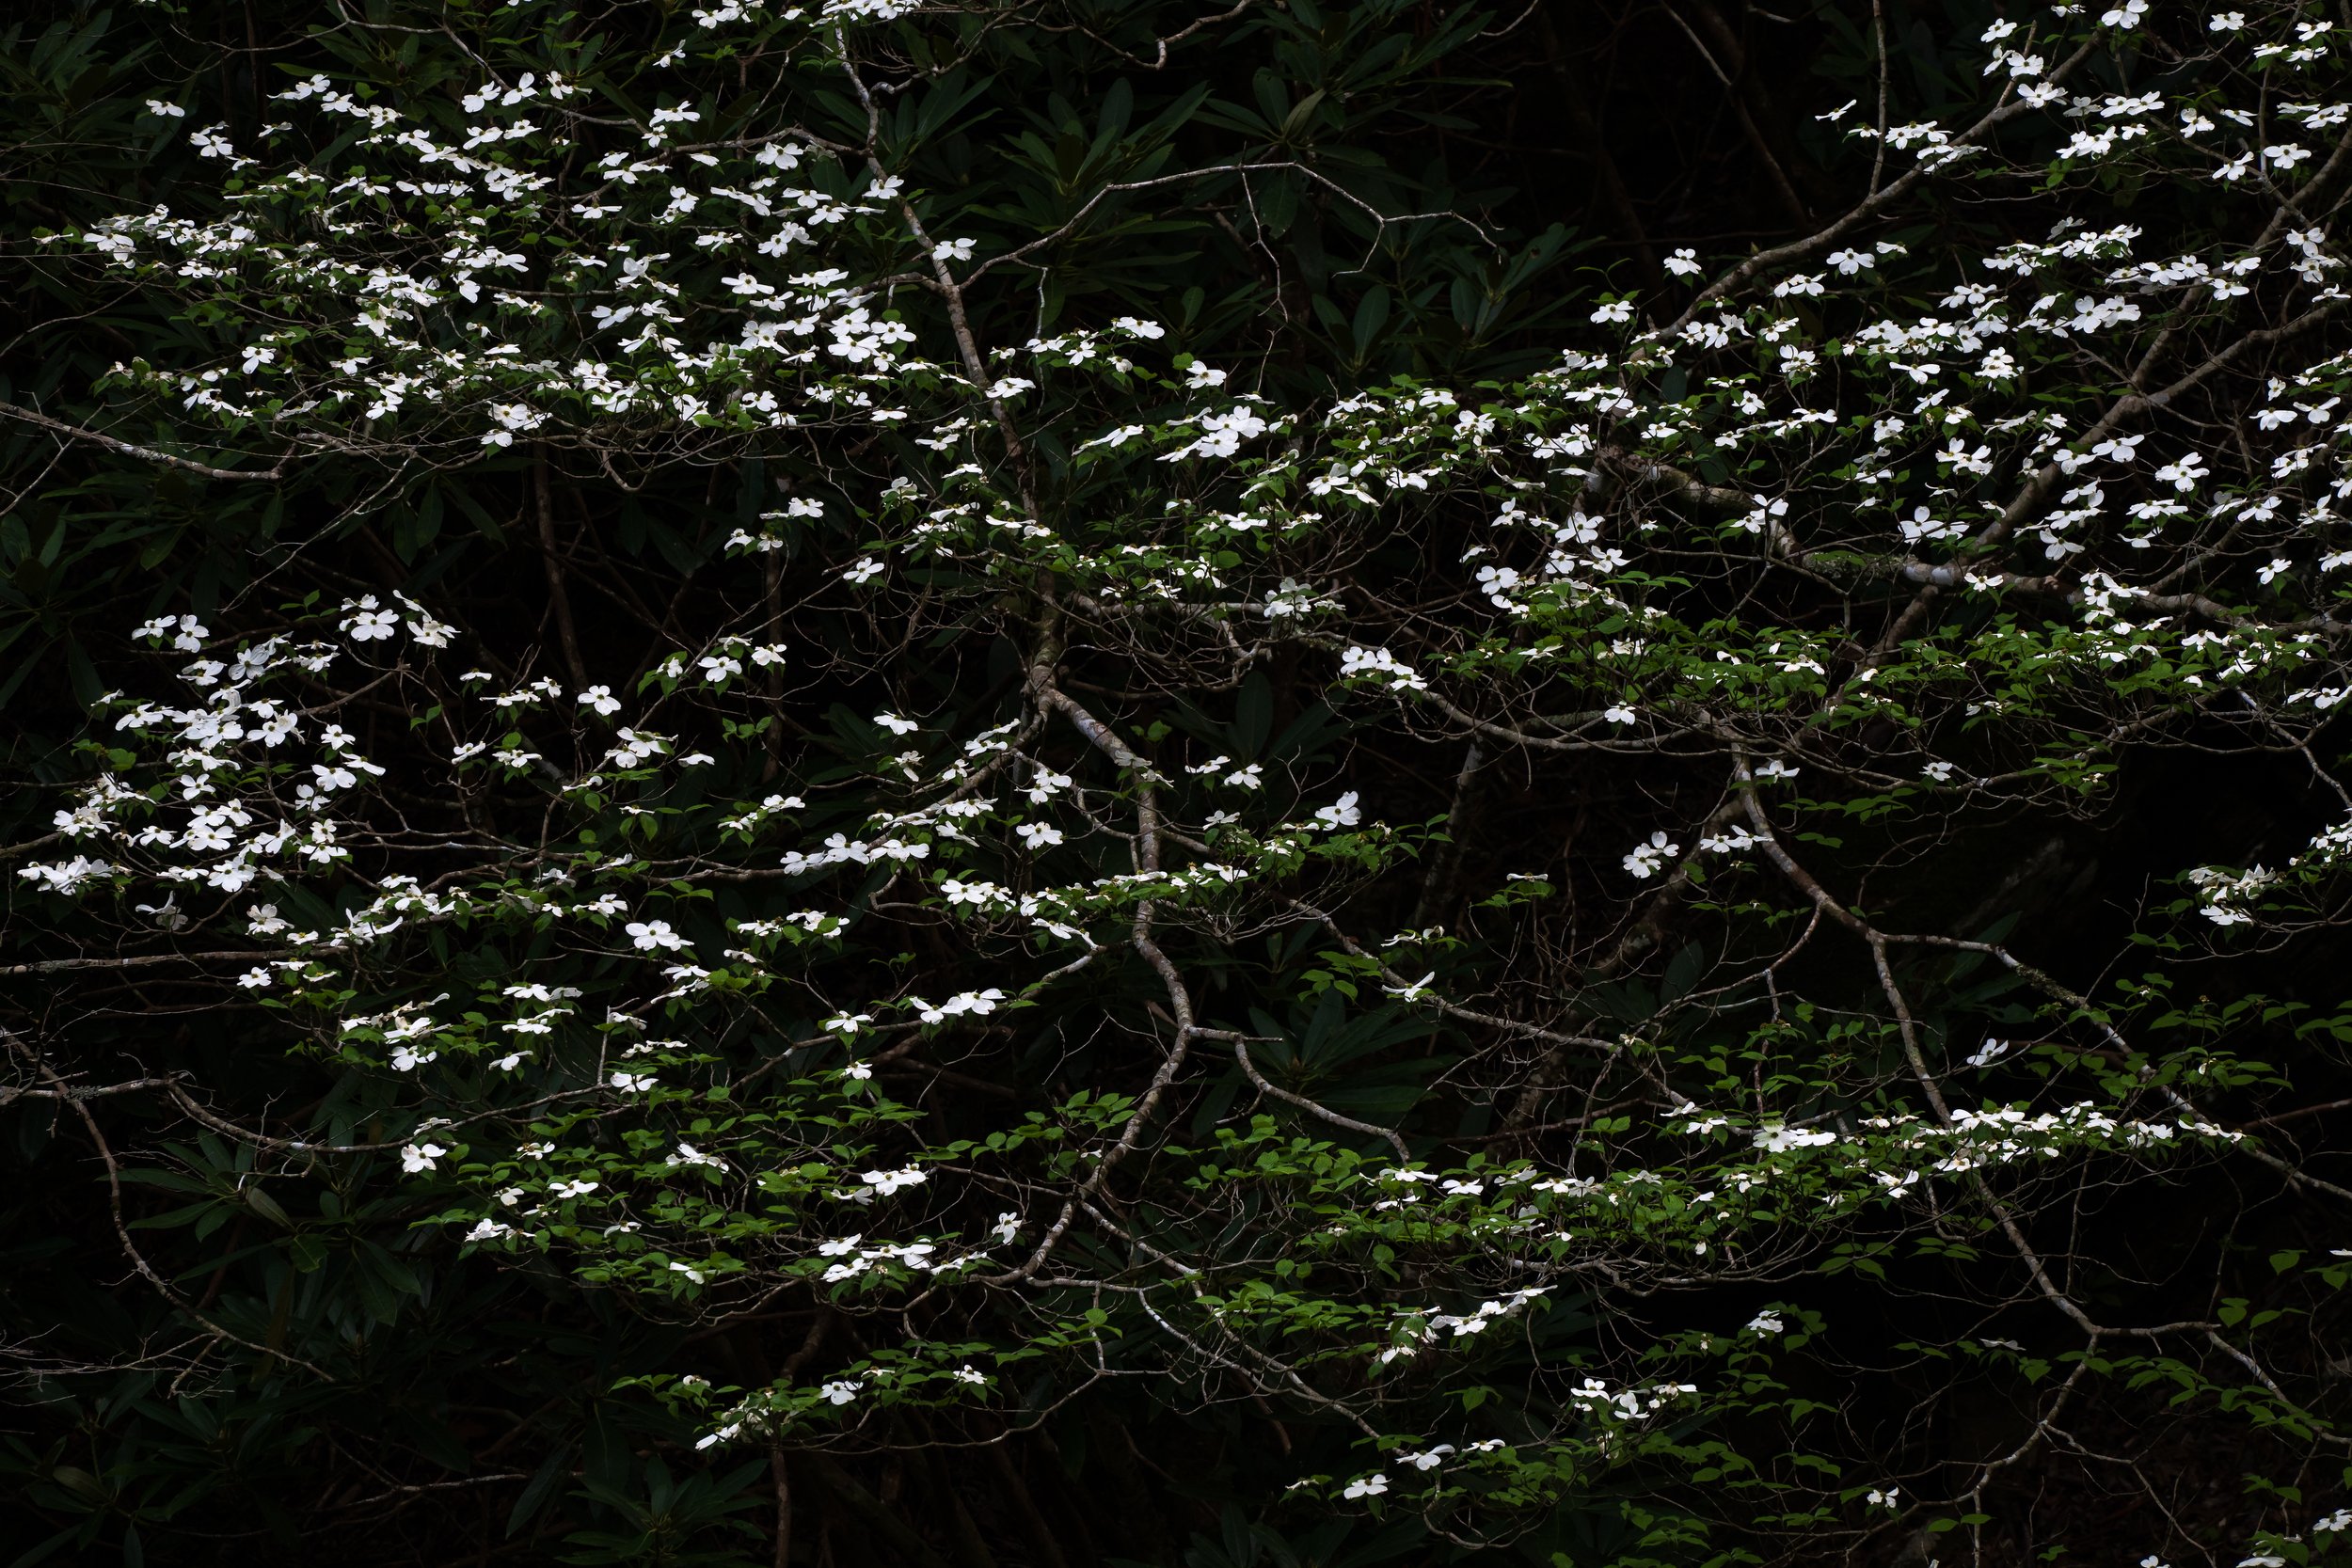
Early to mid-April is a great time to catch the dogwood trees in bloom.
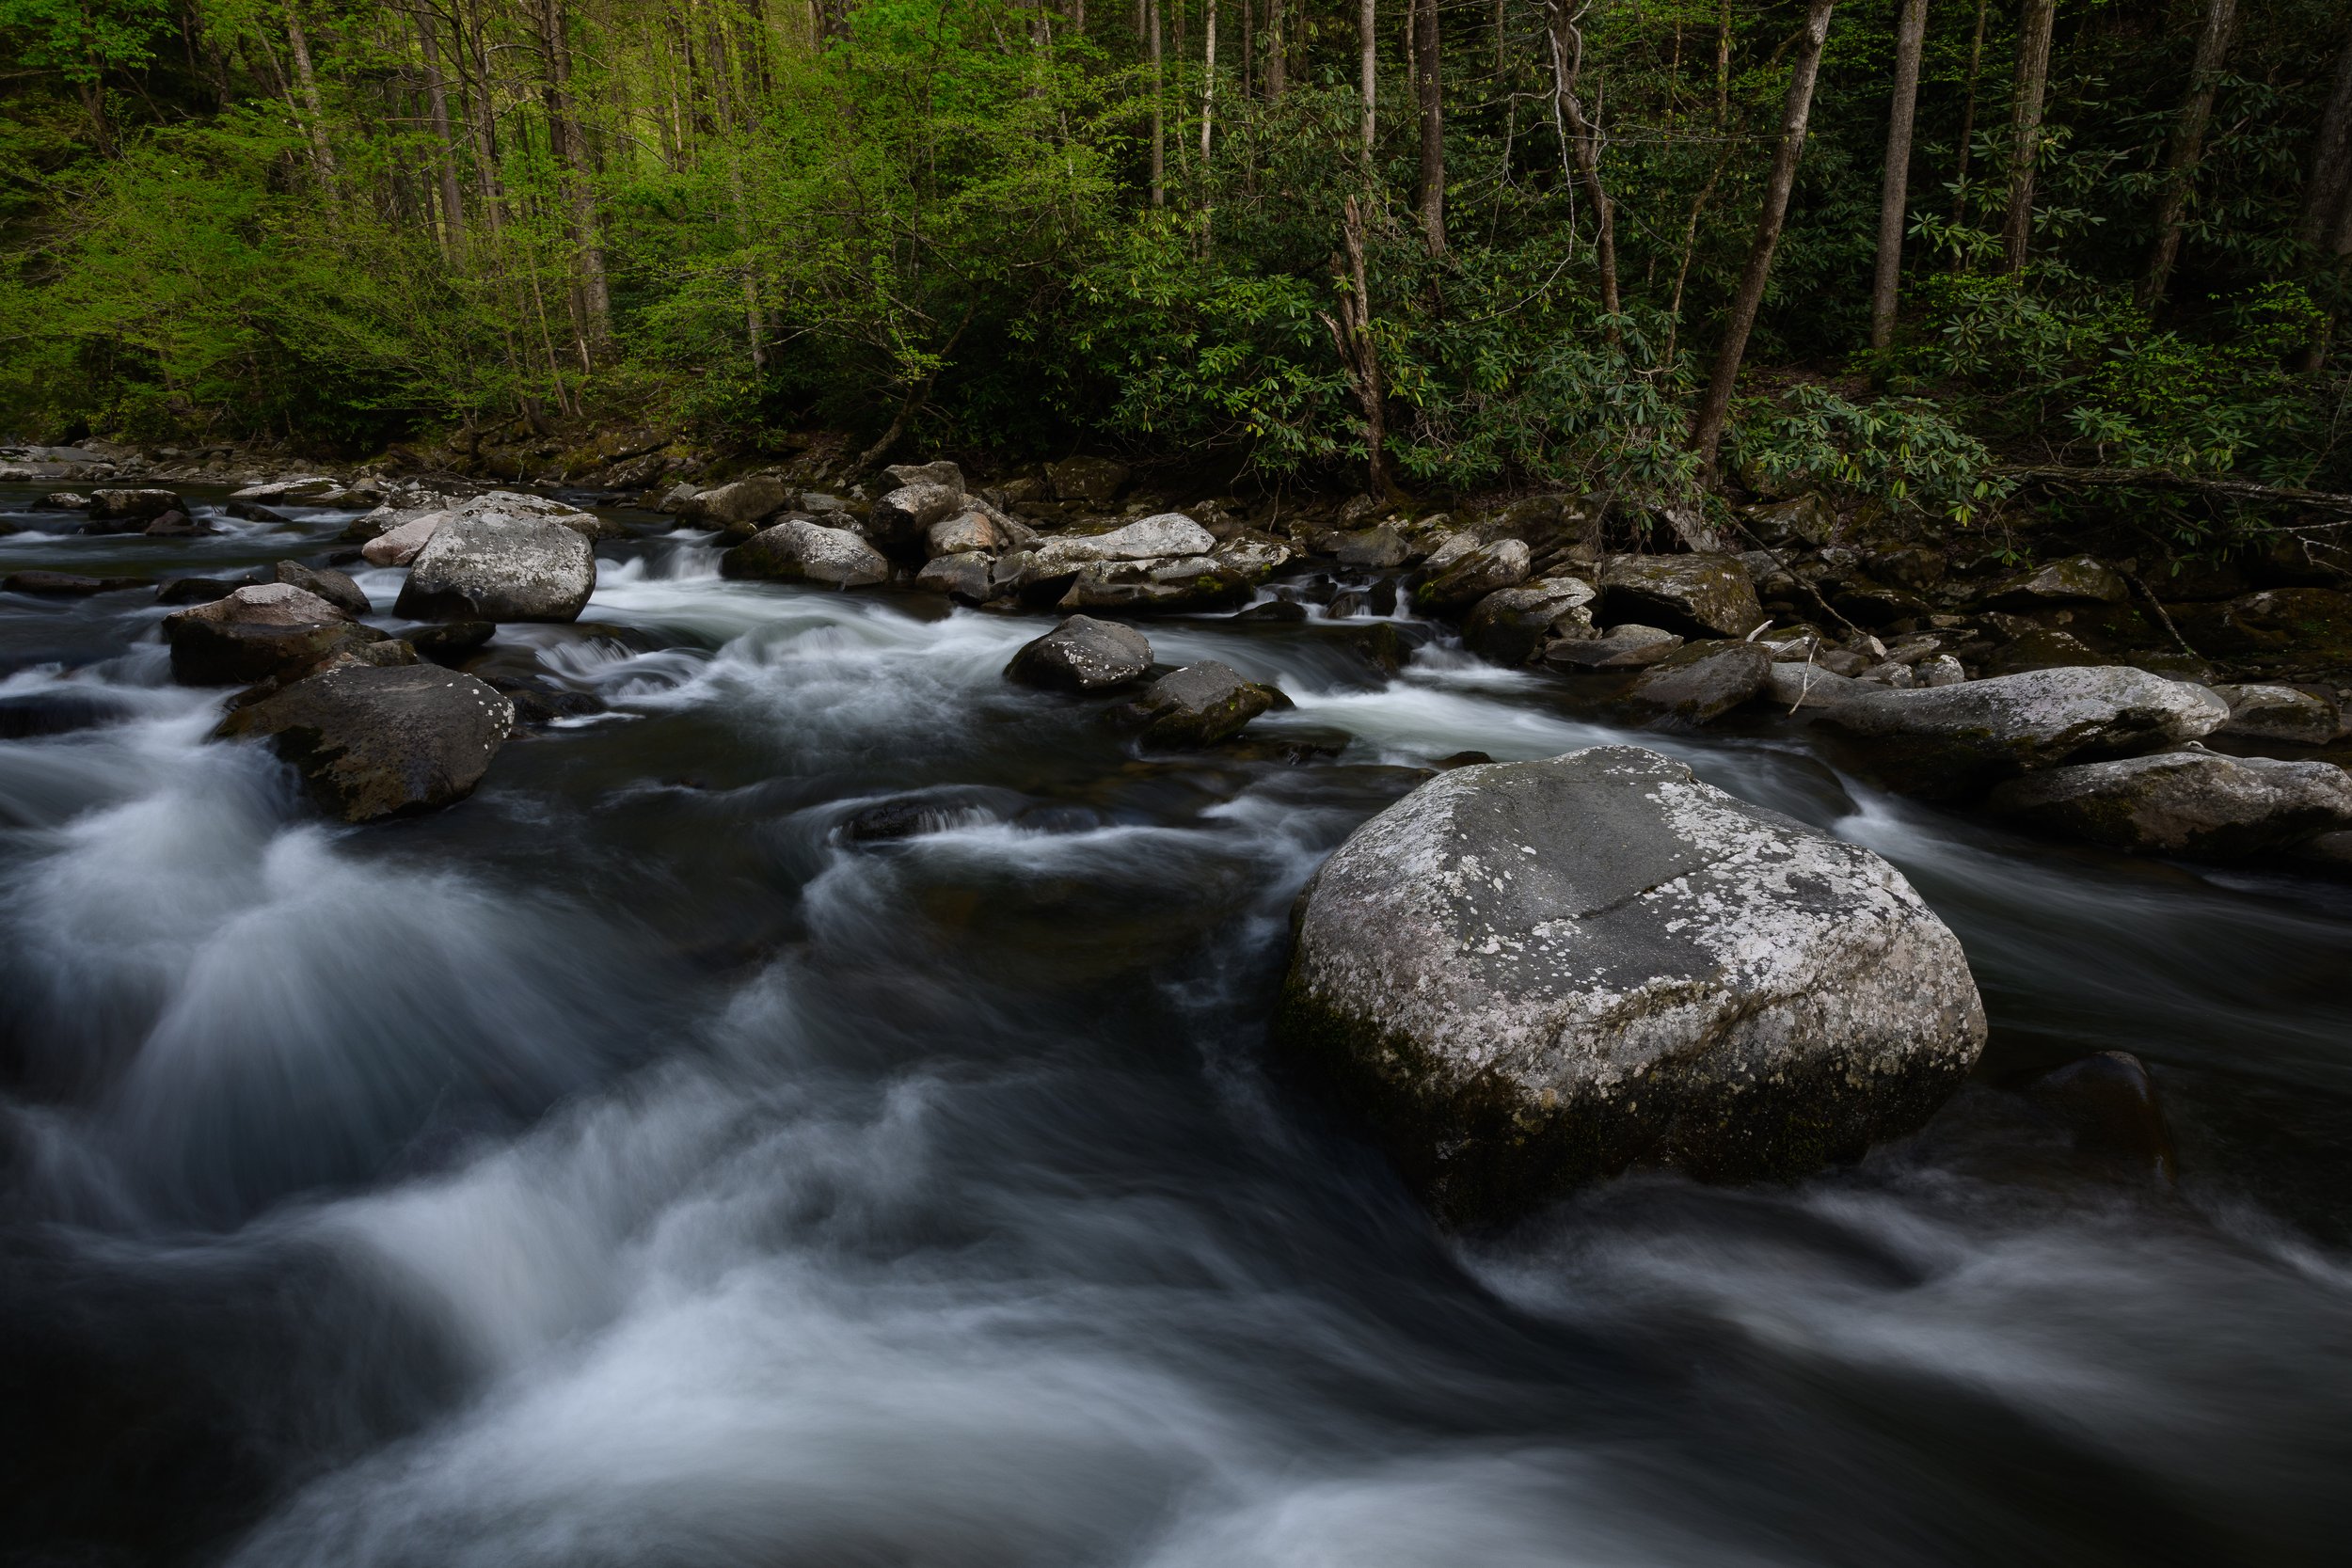
Vibrant new foliage lined to streams conveying the energy and flow of spring.

Sorry I didn’t capture all 19,000 lifeform species. Let’s move on to one that is the star of the show: black bears!
3. The Bears of the Smokies (and other critters)
Check out this image below. Can you see the two bears?
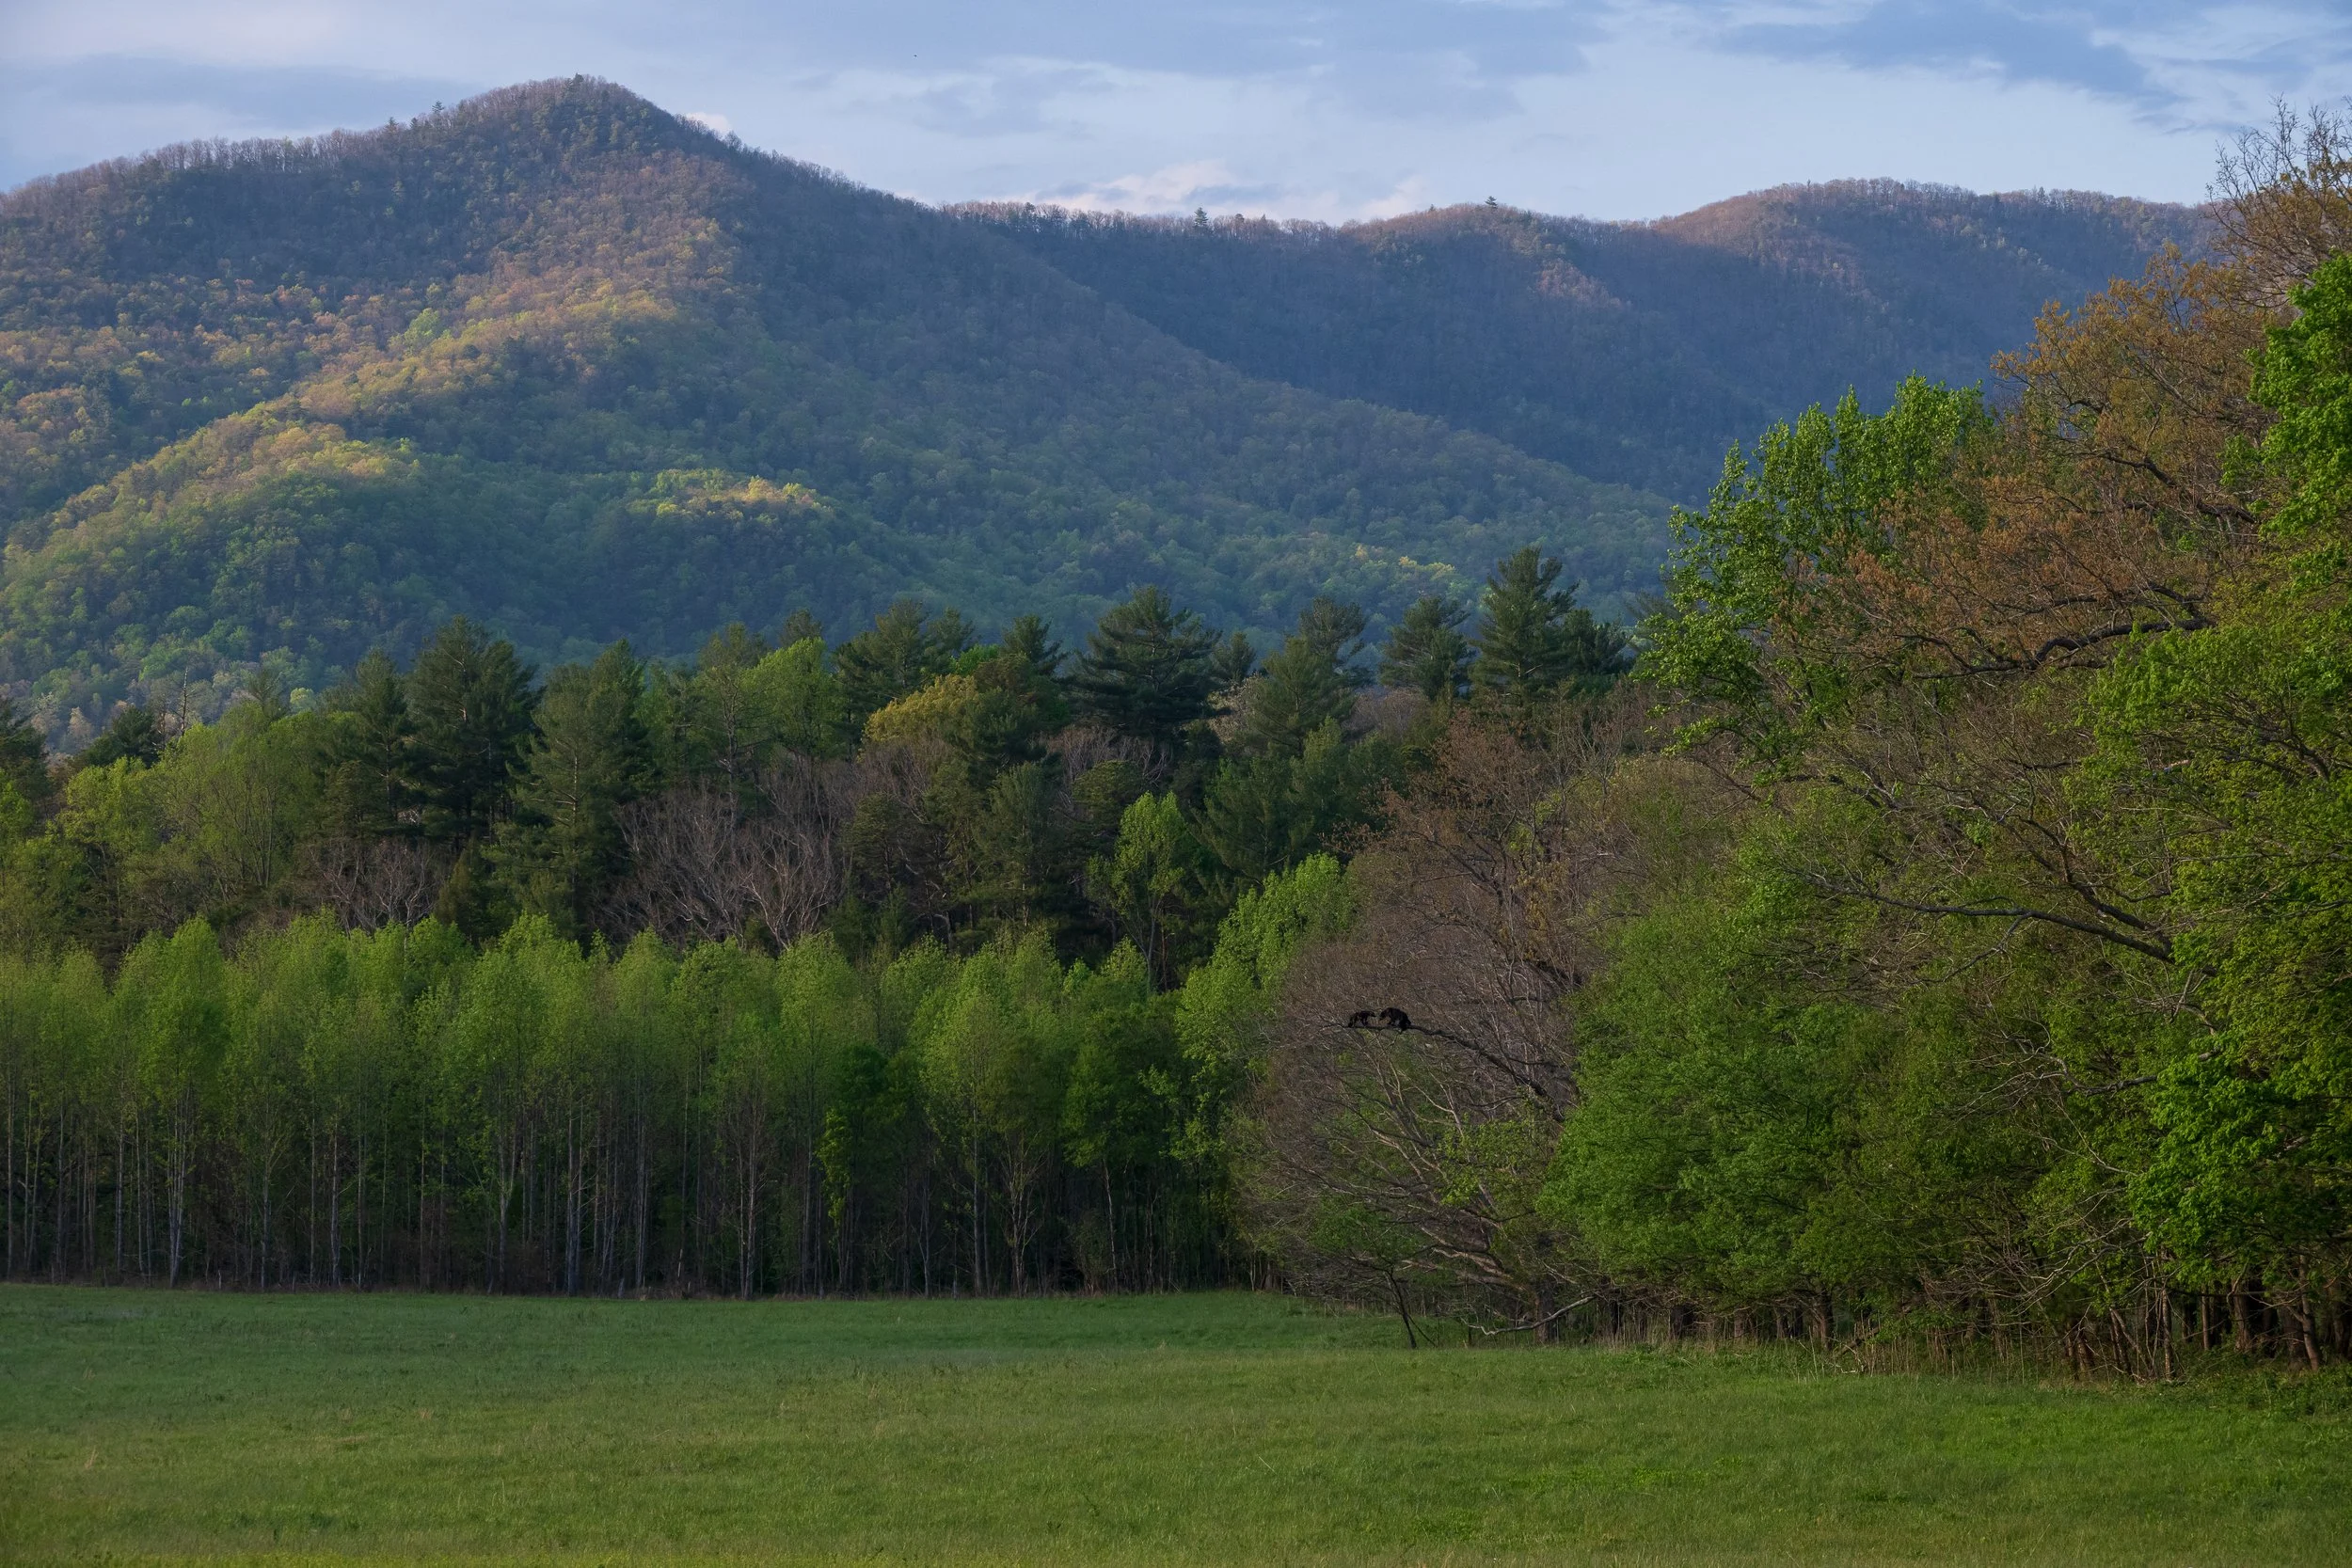
Two bears tussle on a limb dwarfed by the Great Smoky Mountains
Now can you see them?
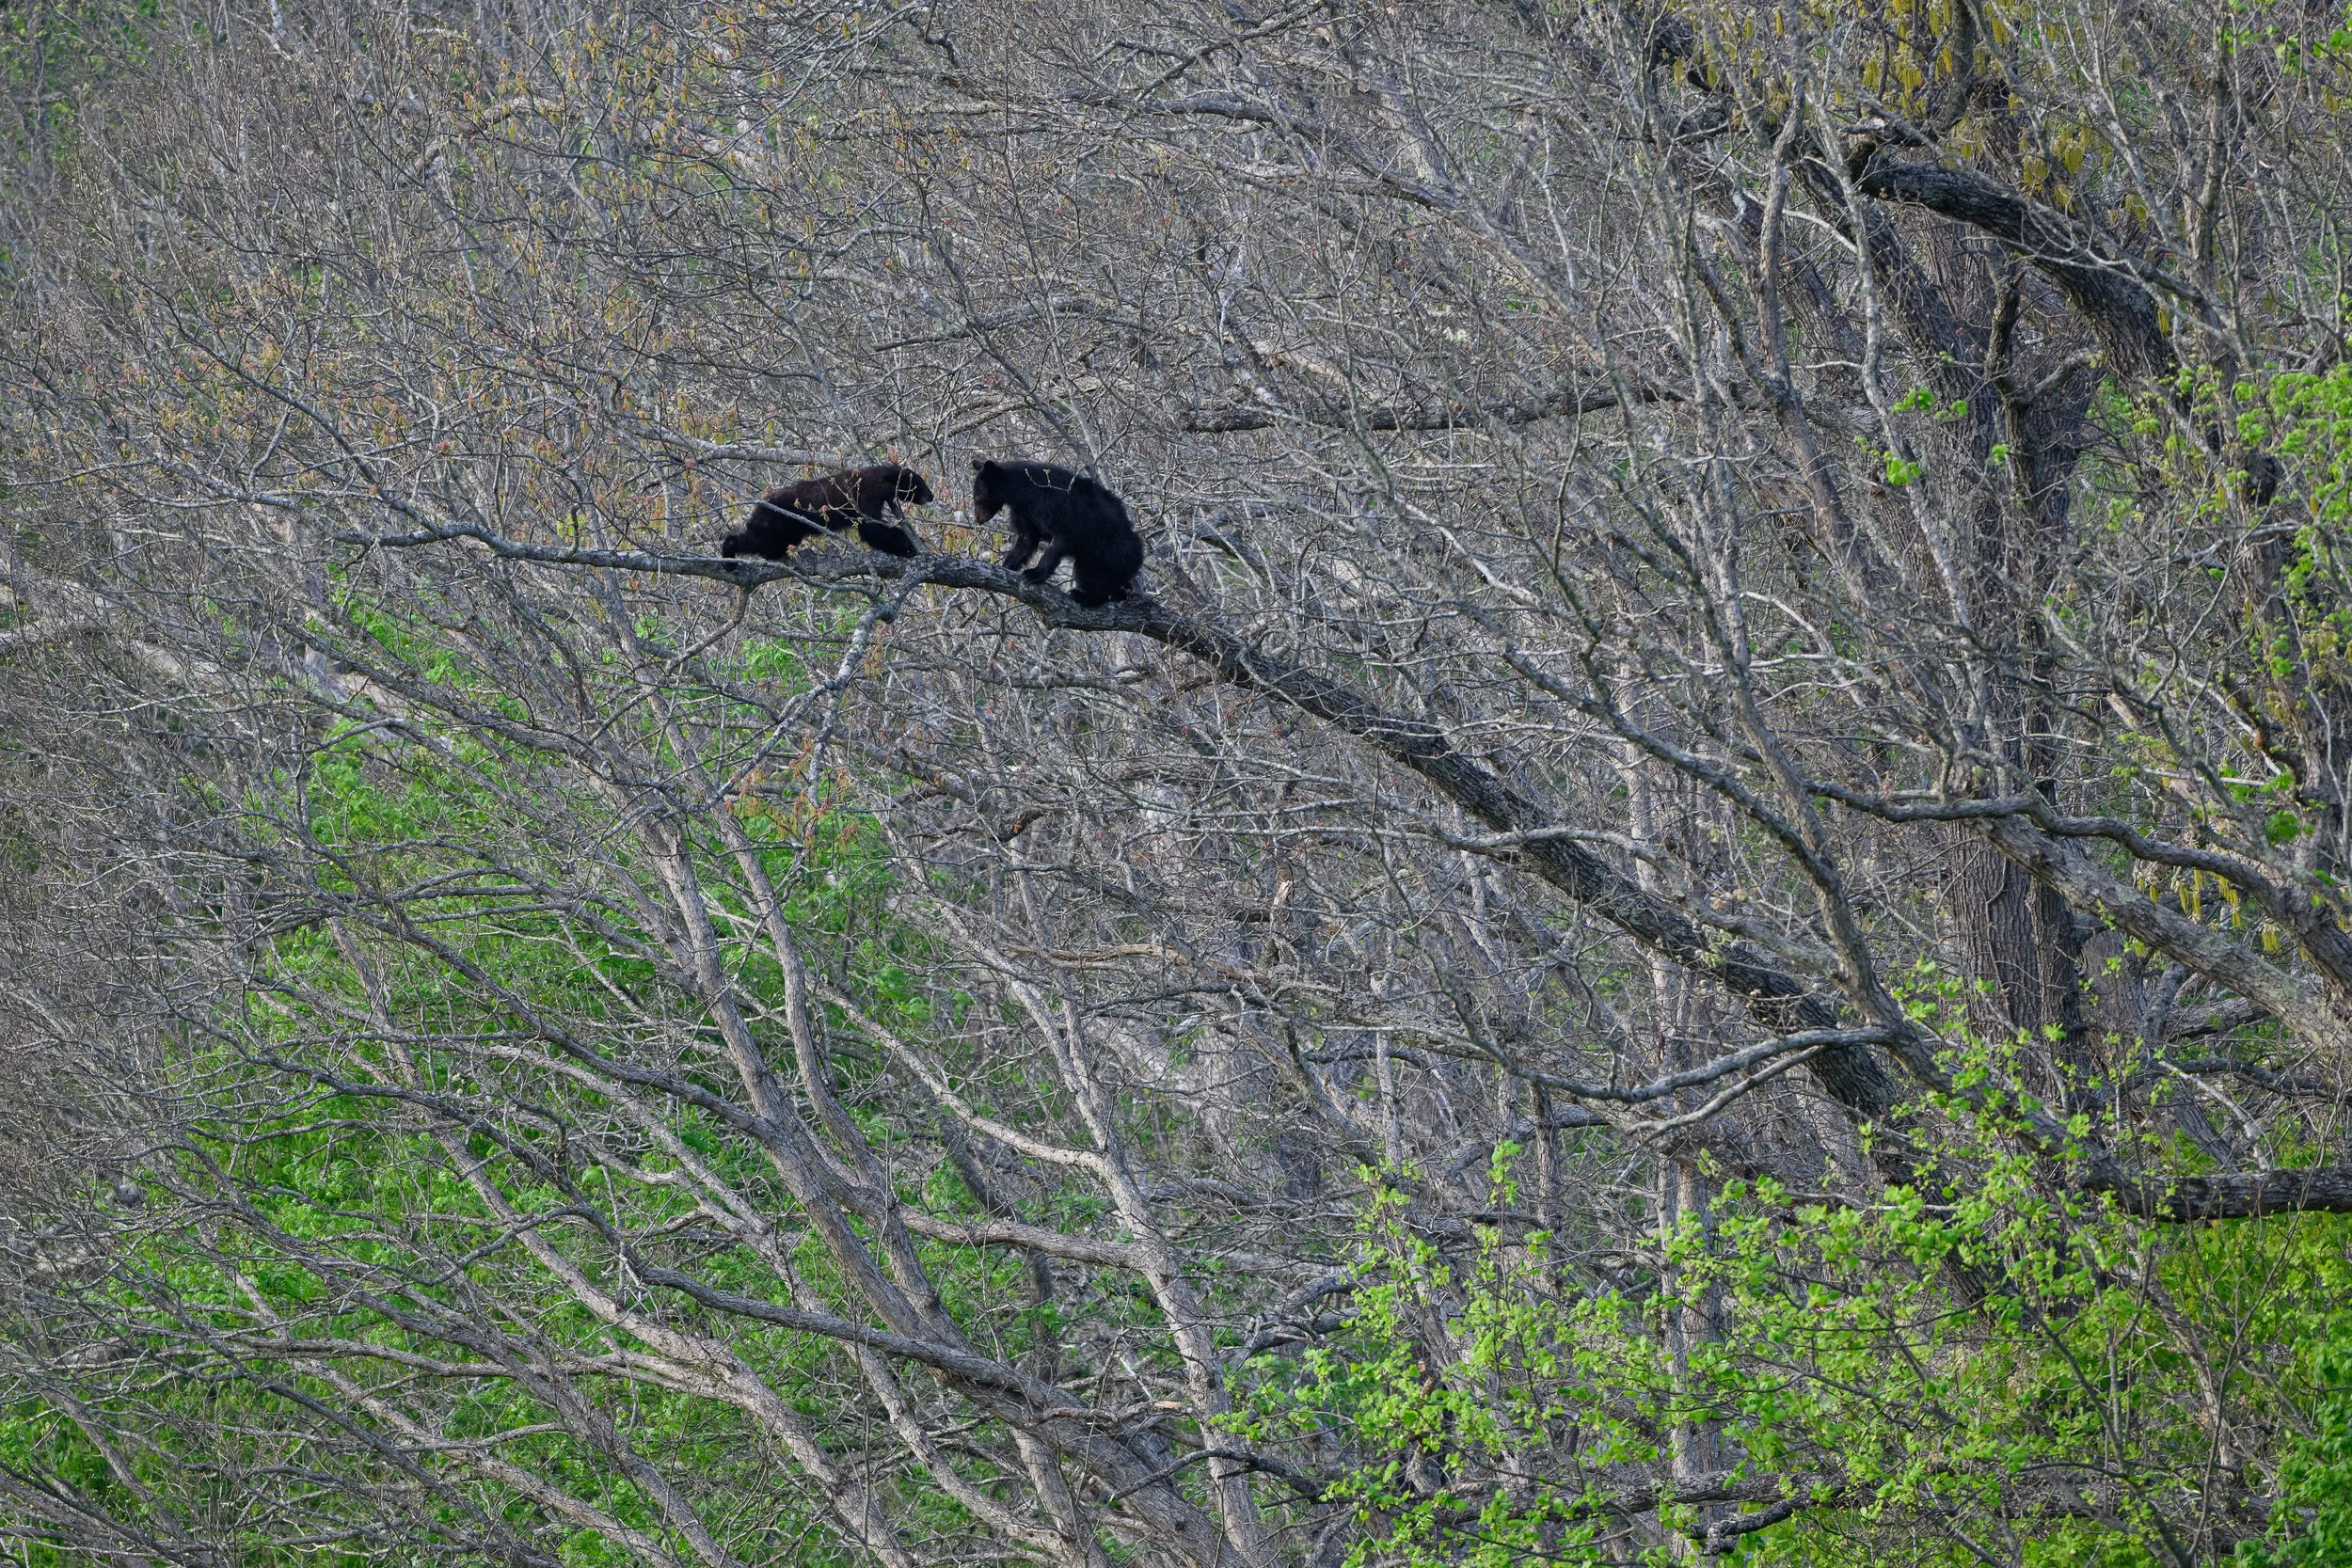
I think this was a mother and her yearling (born the previous year), but it got tense and there was some growling so I feared it might have been a male bear. That would be a threat to the youngster’s life.

Thankfully things settled down. It was amazing how that branch was supporting what must have been at least a total of 500 lbs between the two bears!
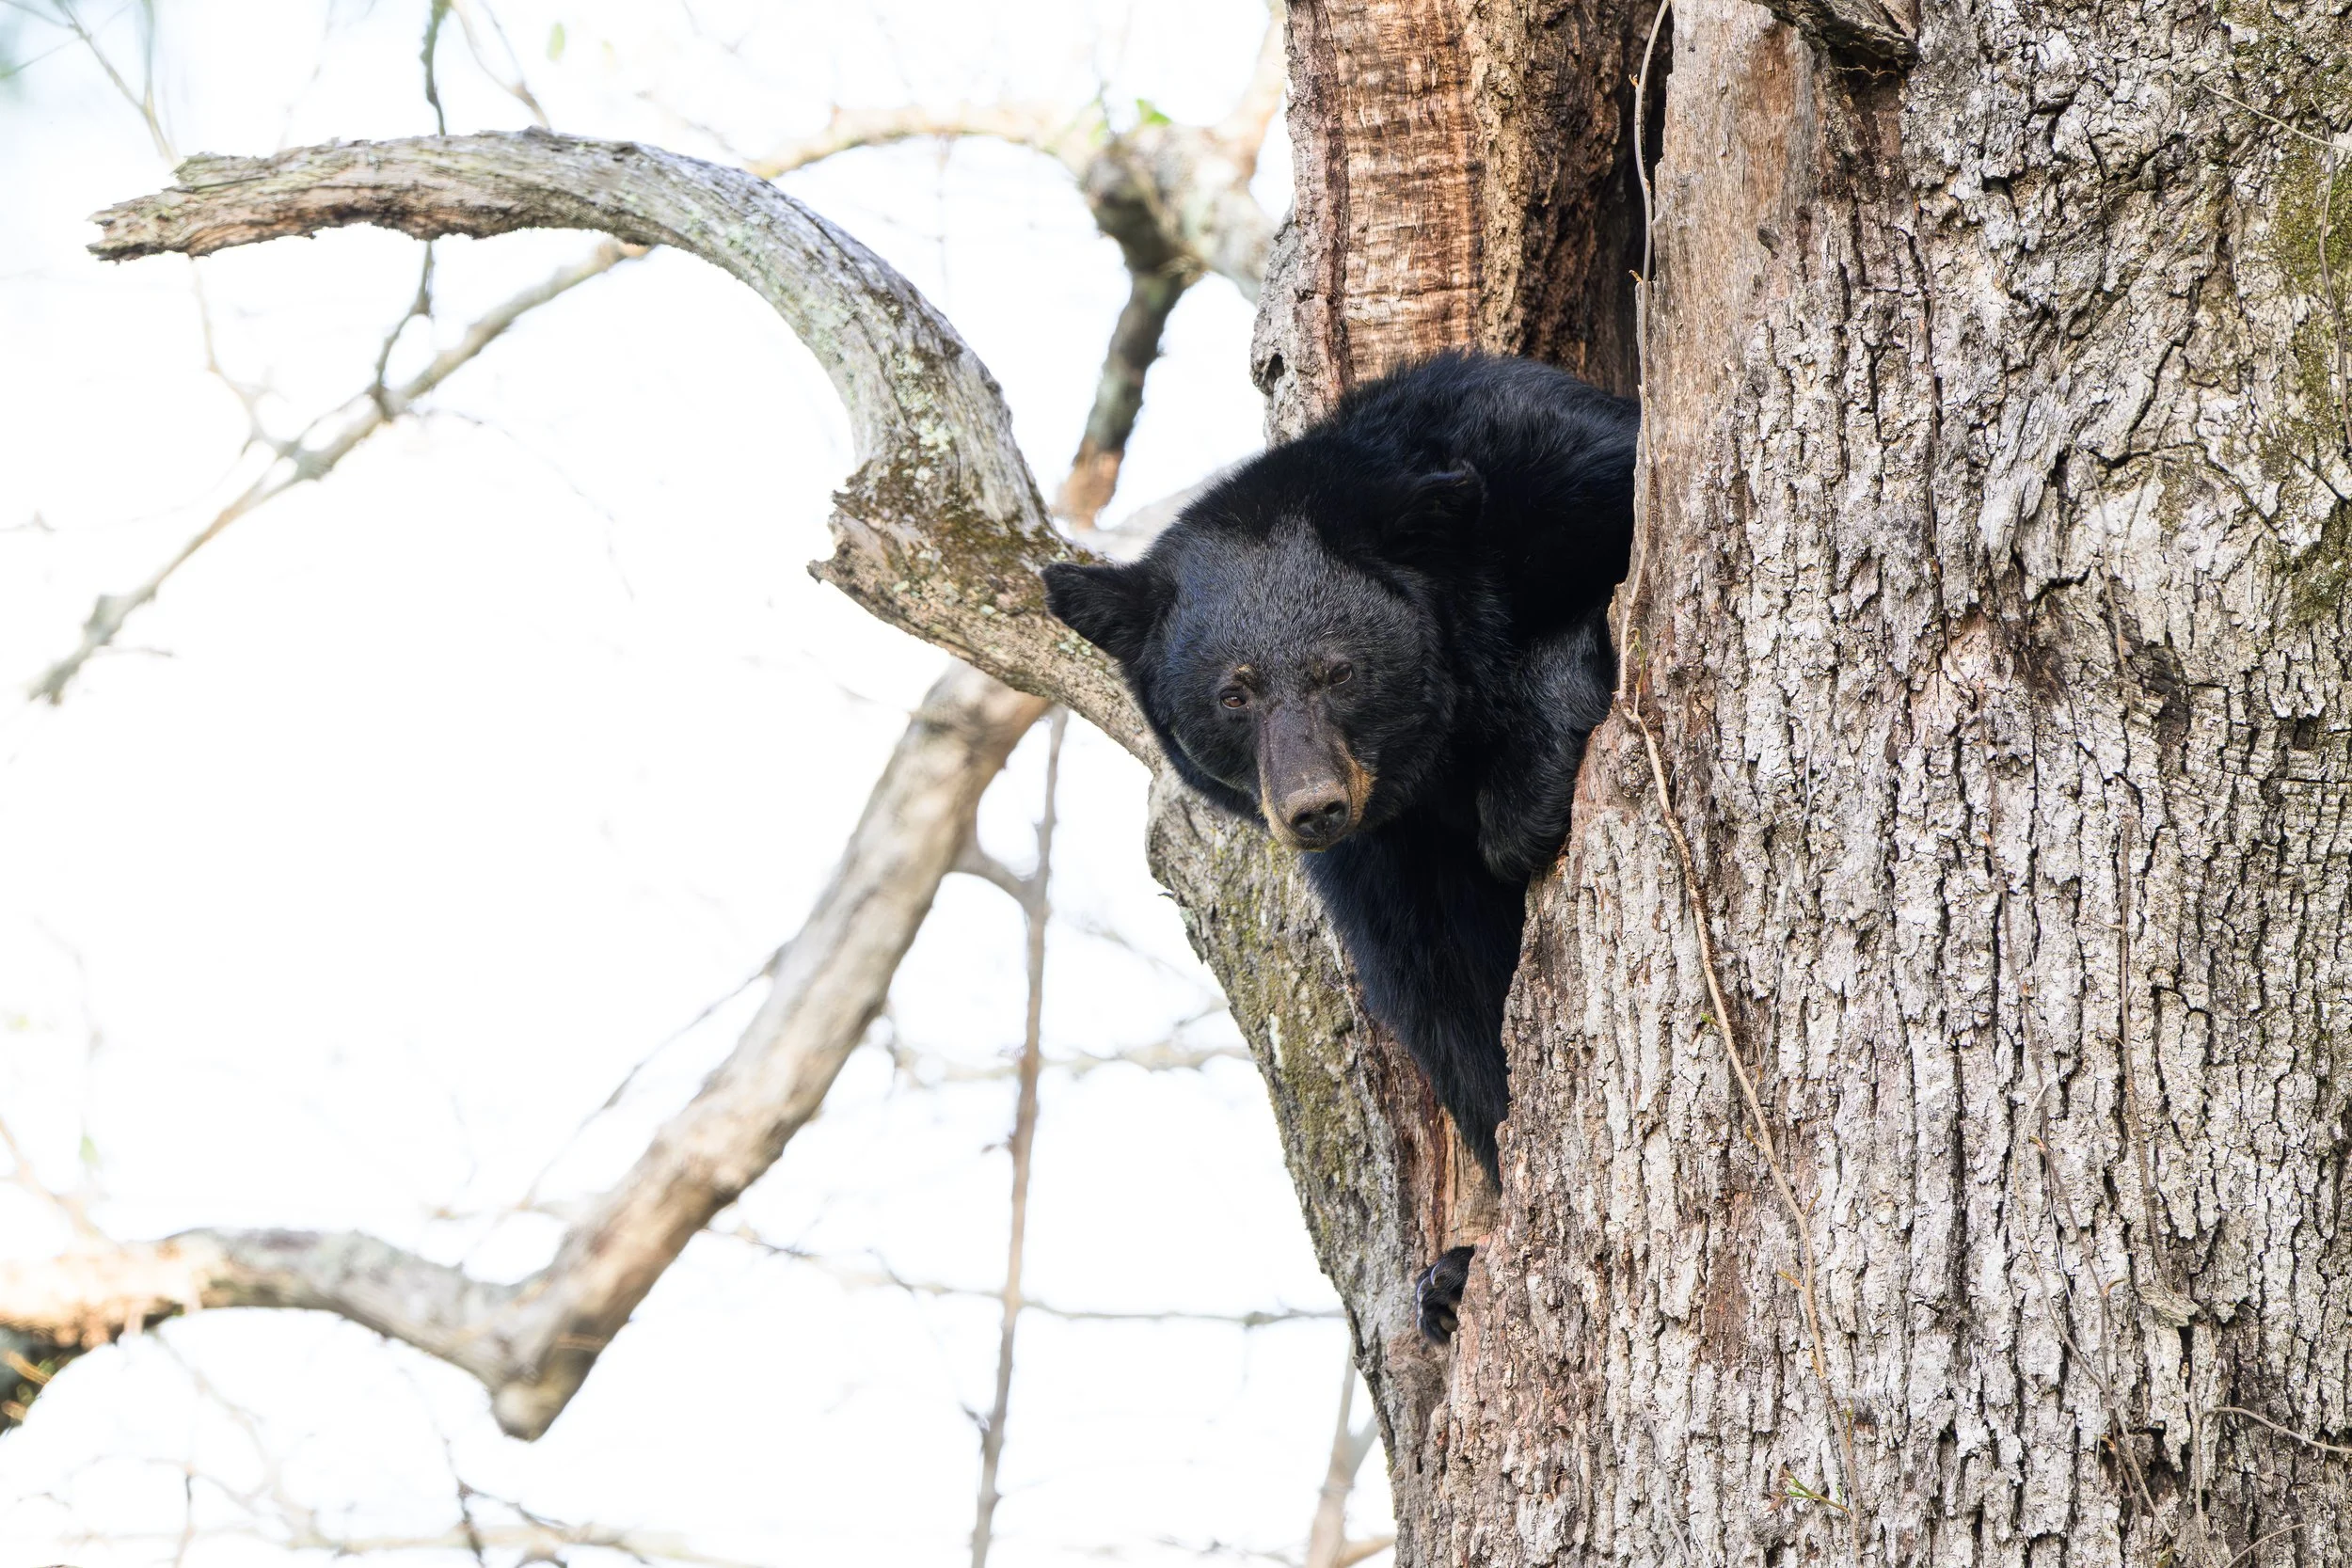
Bears obviously use this landscape. For example, this mother used a huge hallow split tree as a den site. Her cubs are down in that hole as she pokes here head out to stand guard.
A yearling out for a stroll.
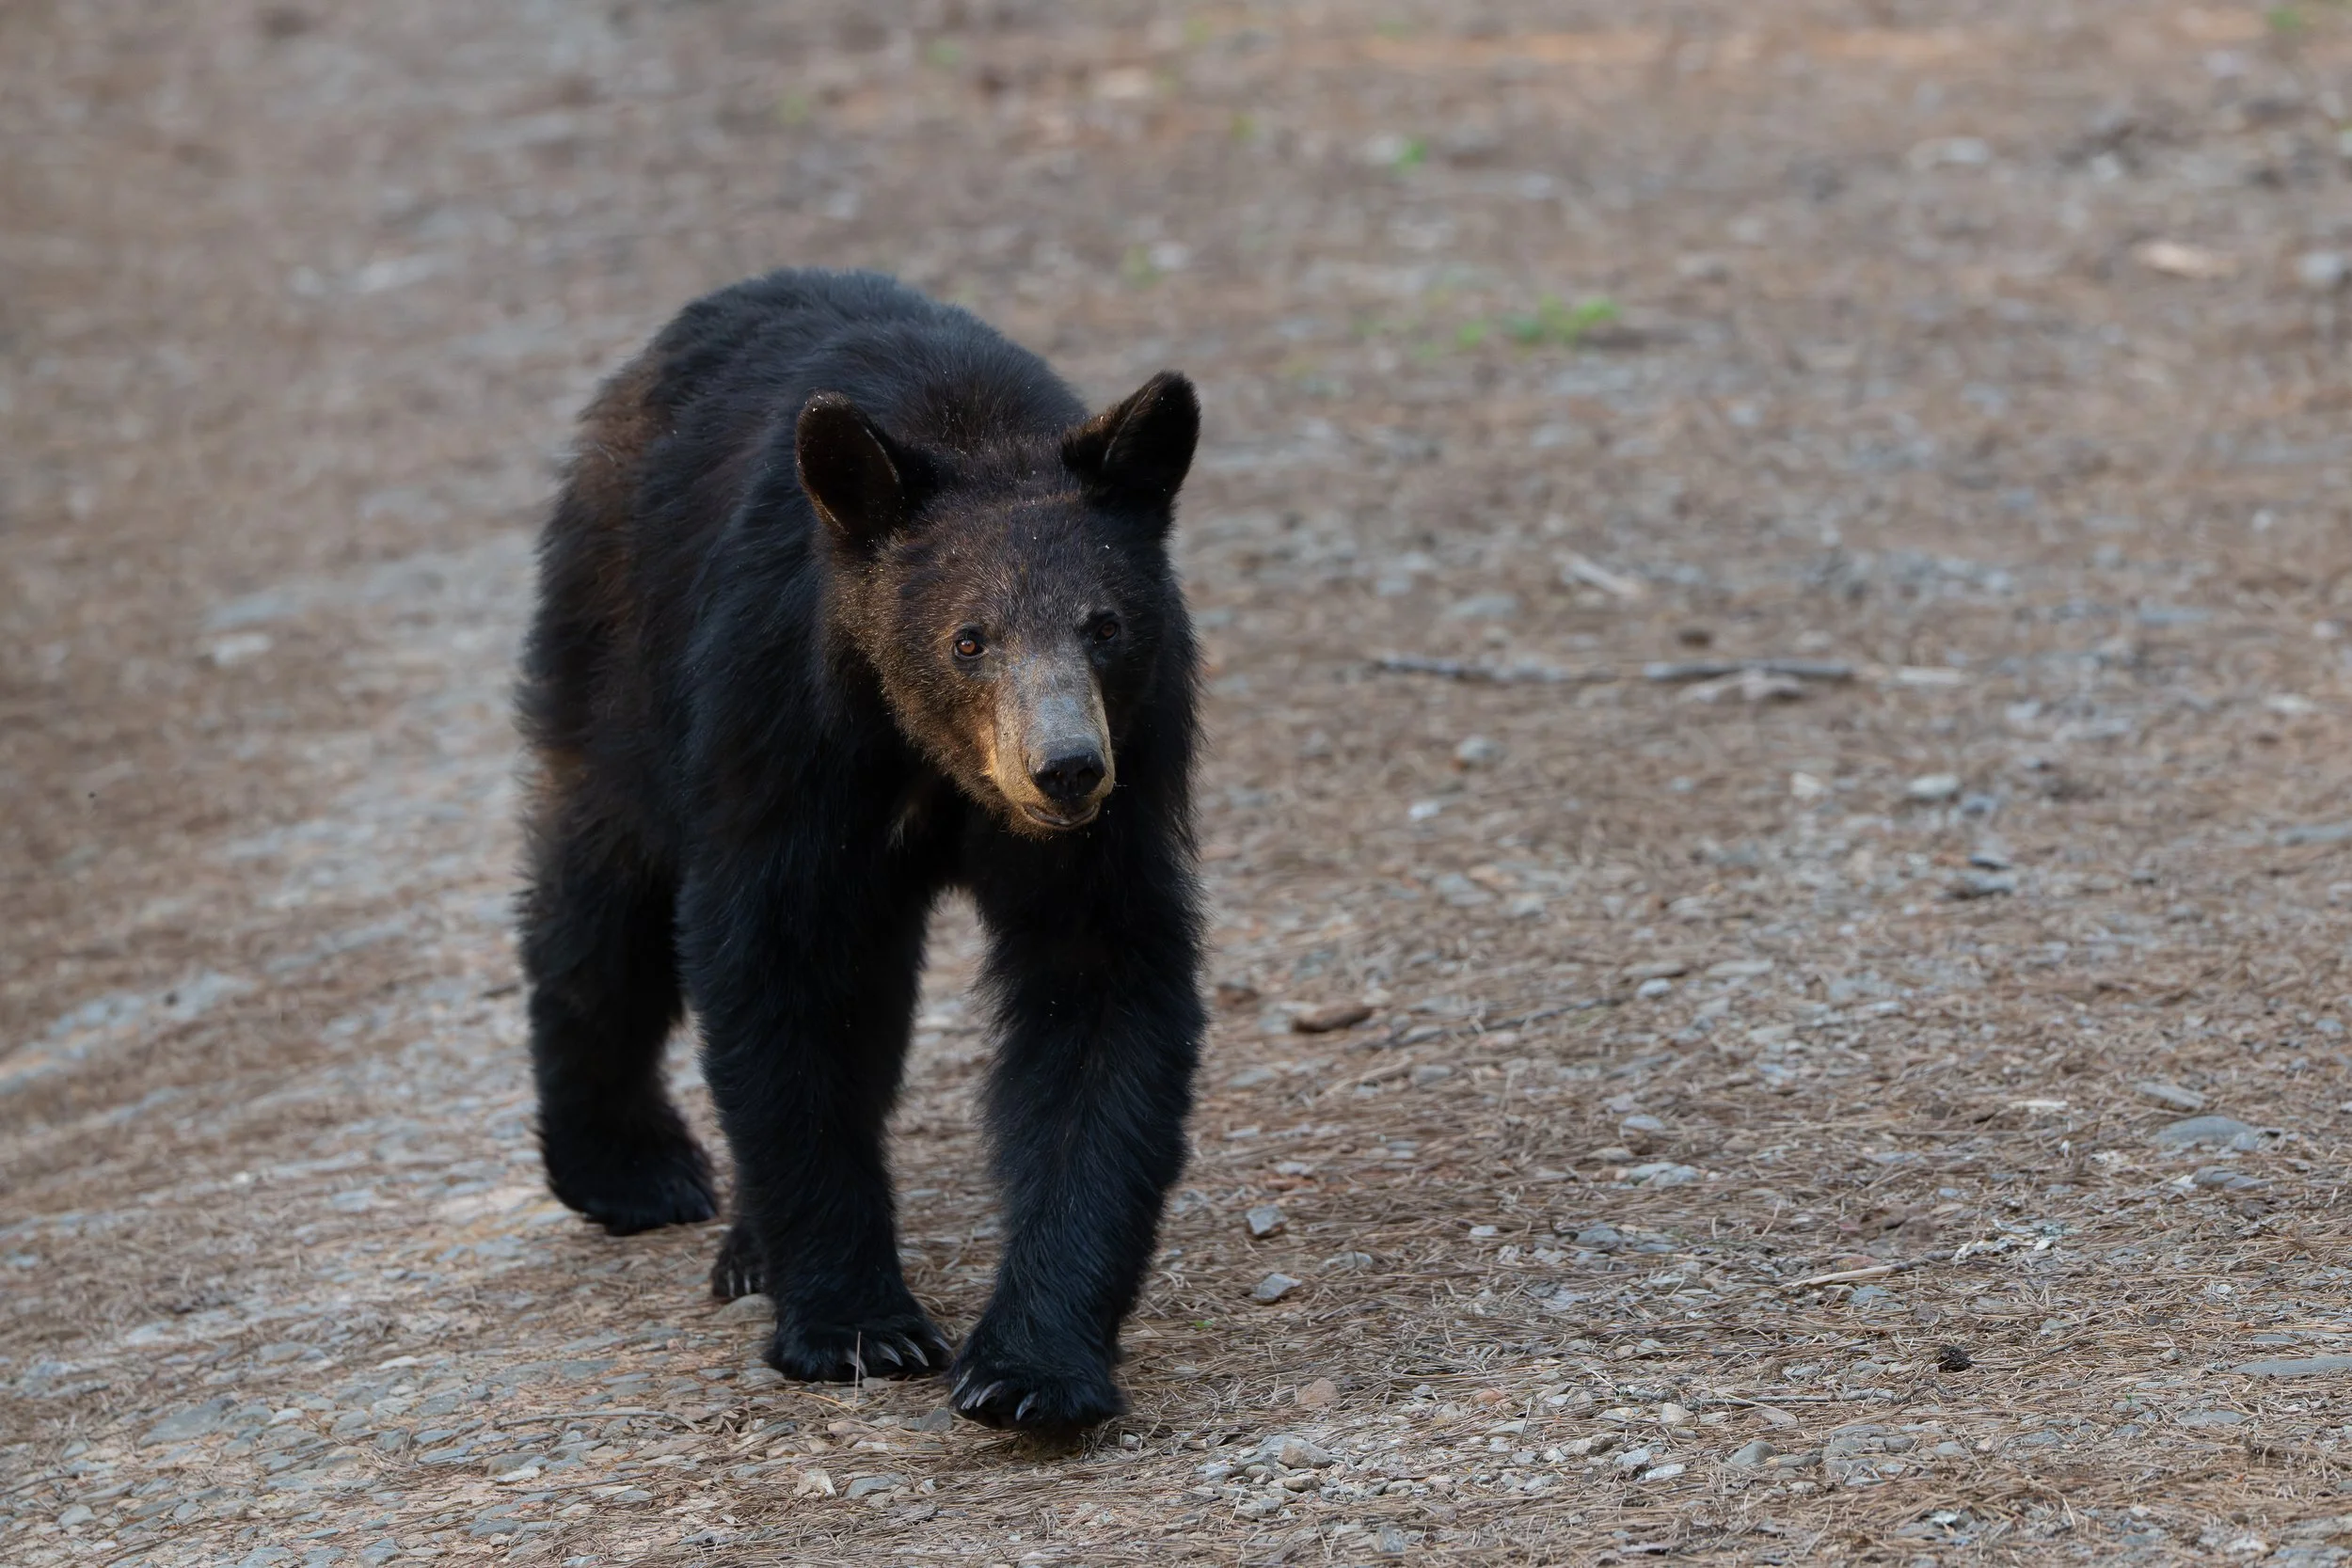
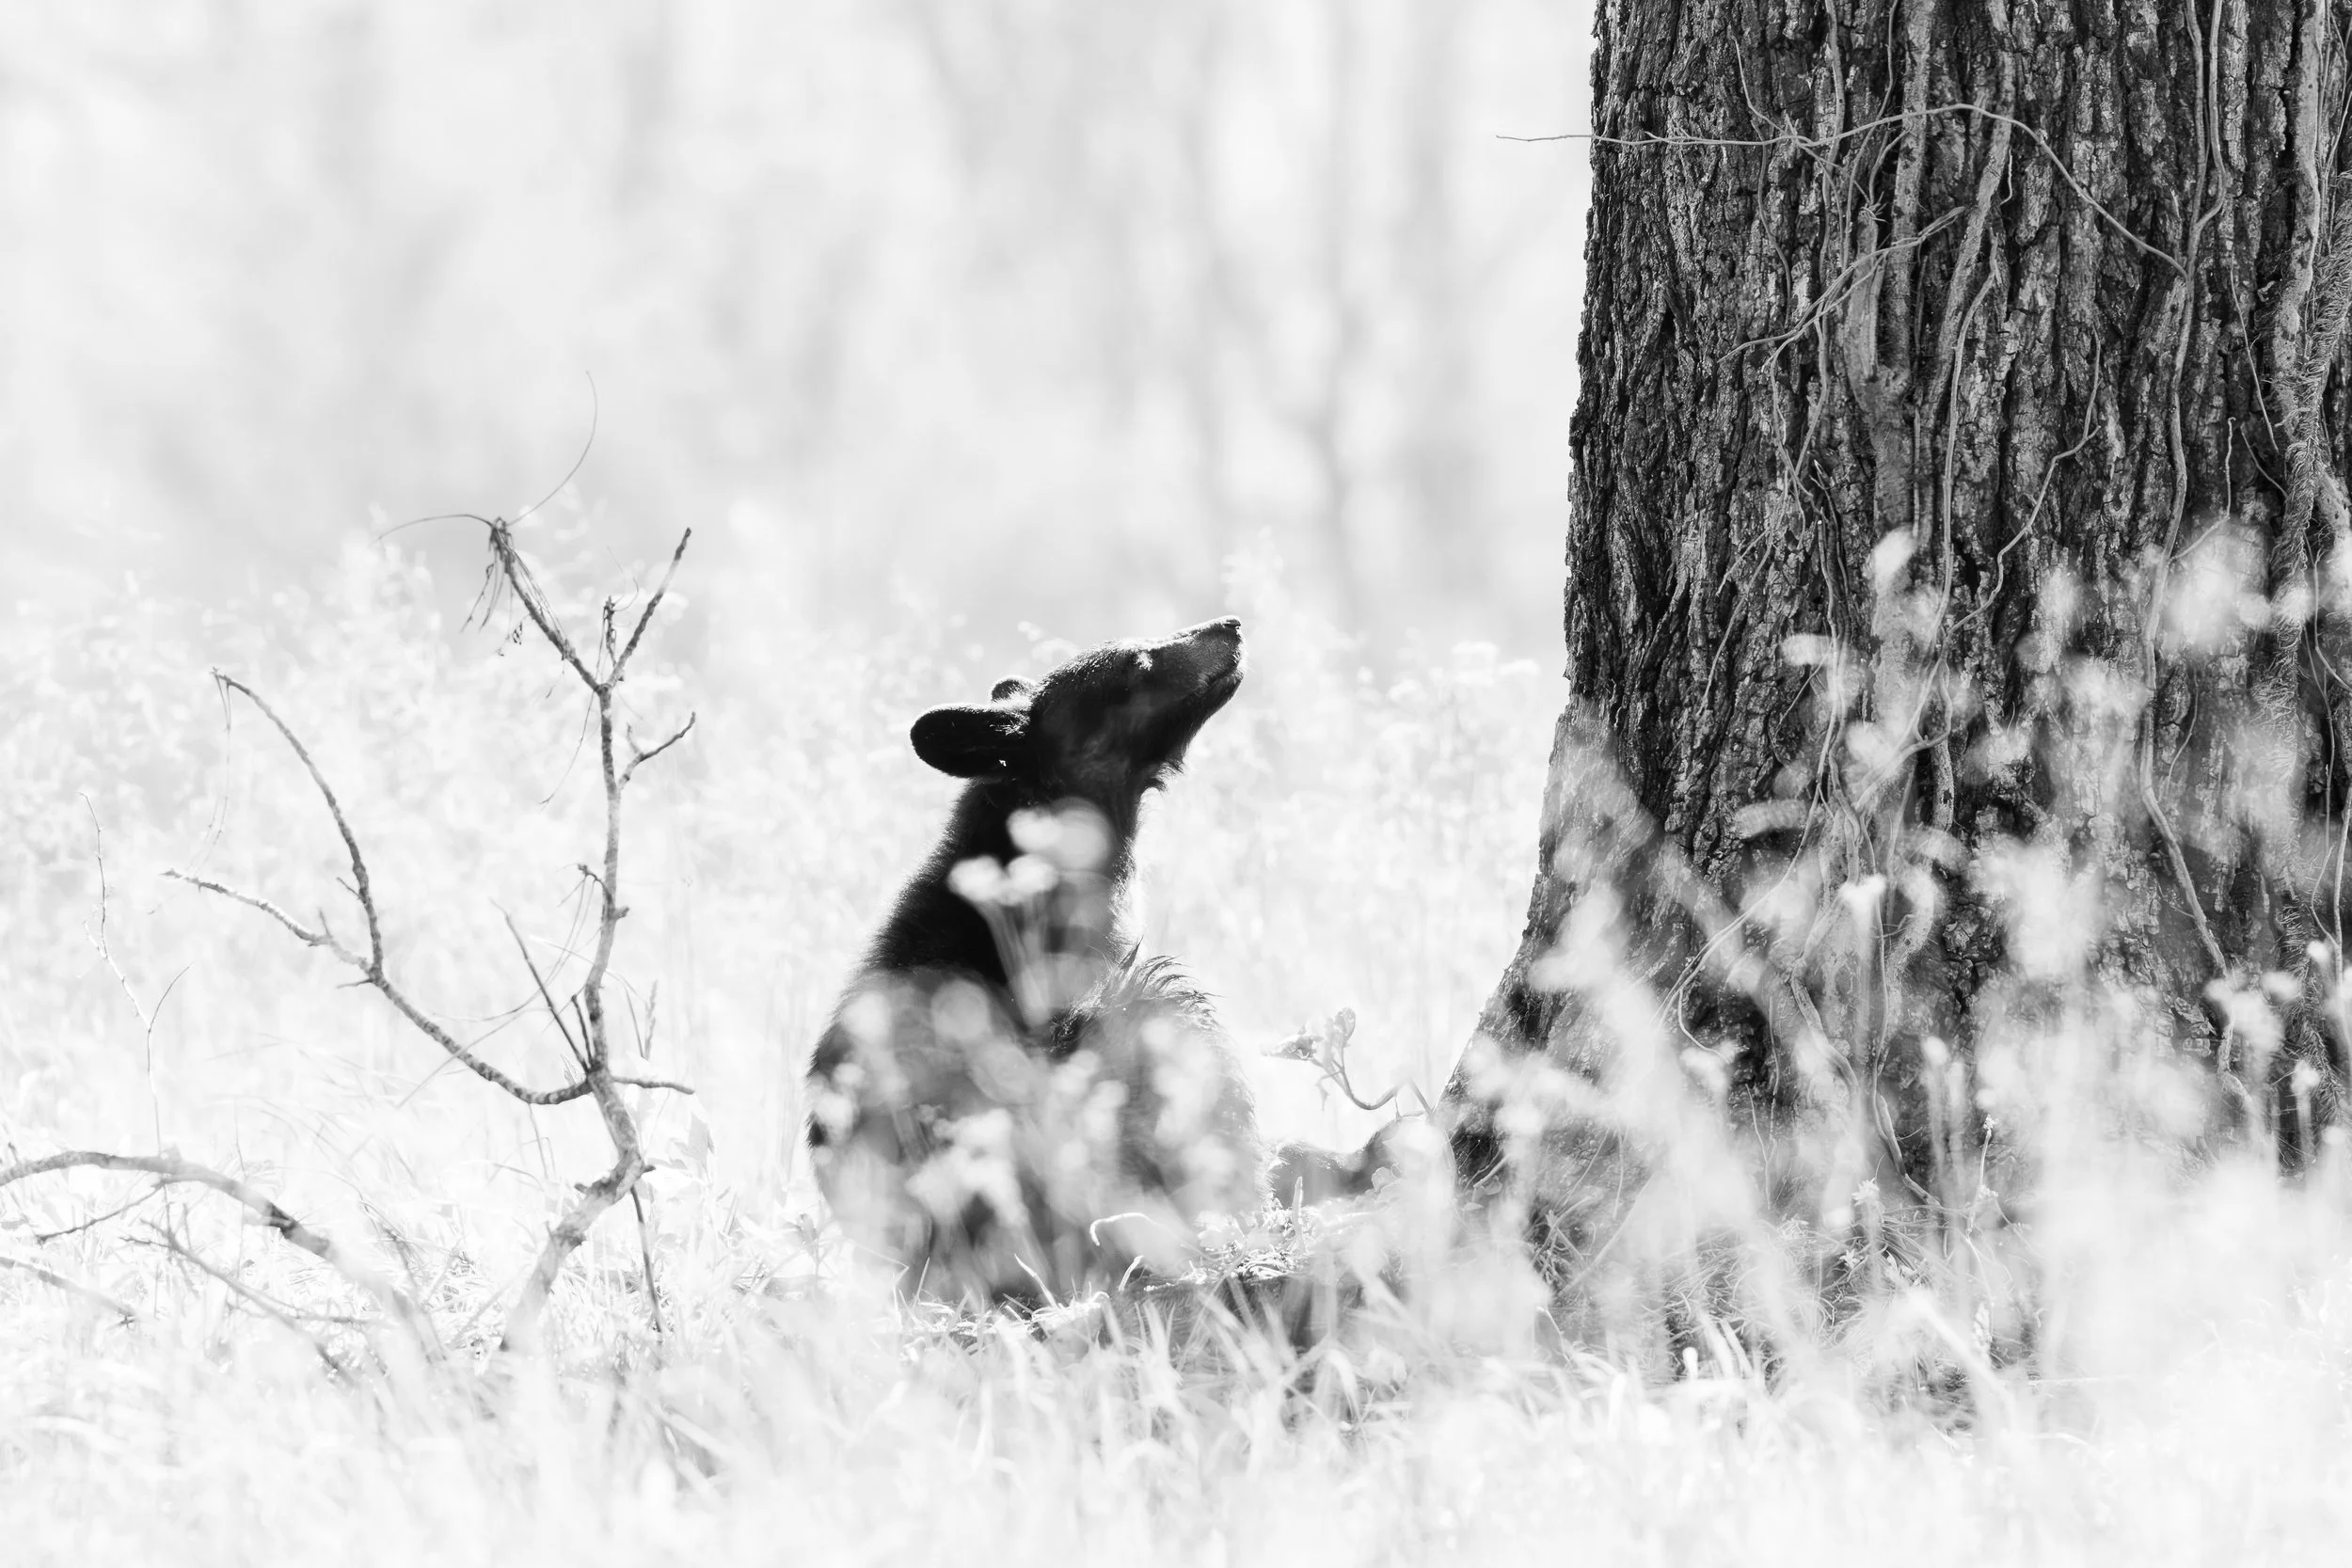
Another yearling content in the golden afternoon sun.
The bears will often be in grass and sticks and autofocus struggles to grab the eye of this all black animal so be ready to manually focus. Turn on focus peaking to see where you are manually focusing. That is how I shot the above image.
The park requires that you stay at least 50 yards (150 feet) away from the bears and wildlife, for your safety and theirs. This is strongly enforced. Rangers and volunteers are very quick to the scene when a bear is present. Don’t push your luck! Many modern cameras will show you your distance to subject in frame often expressed in meters which is a little longer than yards but close. I kept about 60 meters at all times. For this reason, I would recommend something that gives you at least 500mm reach to stay at this distance. I was very happy with my 180-600mm for the bears and shot the first bear image with my wide angle. The bears are more active at dawn and dusk, but they were often out at all times of the day, so keep looking!
4. Human History
Though most of the park is wild it did have human inhabitants at various point. The Cherokee were the first inhabitants. An area known as Cades Cove was once the home to an independent American settlement that started in 1820 topped out at about 132 families and about 685 total inhabitants by 1850. In the Smokies, a “cove” is a broad flat area of land between the mountain ridges, and Cades Cove was isolated by the surrounding mountains. The residents eventually either sold their land to the state of Tennessee in the 1920’s or later the federal government in the 1930’s when GSMNP was established in 1934. Some families stayed on their land and were allowed to do so until they passed away. The last man living in Cades Cove, Kermit Caughron, remained until his death in 1999!
When I was watching some bears by the side of the road, I serendipitously met a woman who was the daughter of the last generation that lived in Cades Cove. We chatted for an hour as she translated what I was looking at into the living past of the families that called this place home. What families lived where, what they did, the special nooks and crannies of the place and the memories connected with each. I felt so connected so quickly to this place and took to add the work of these families to my photo story. Thank you!
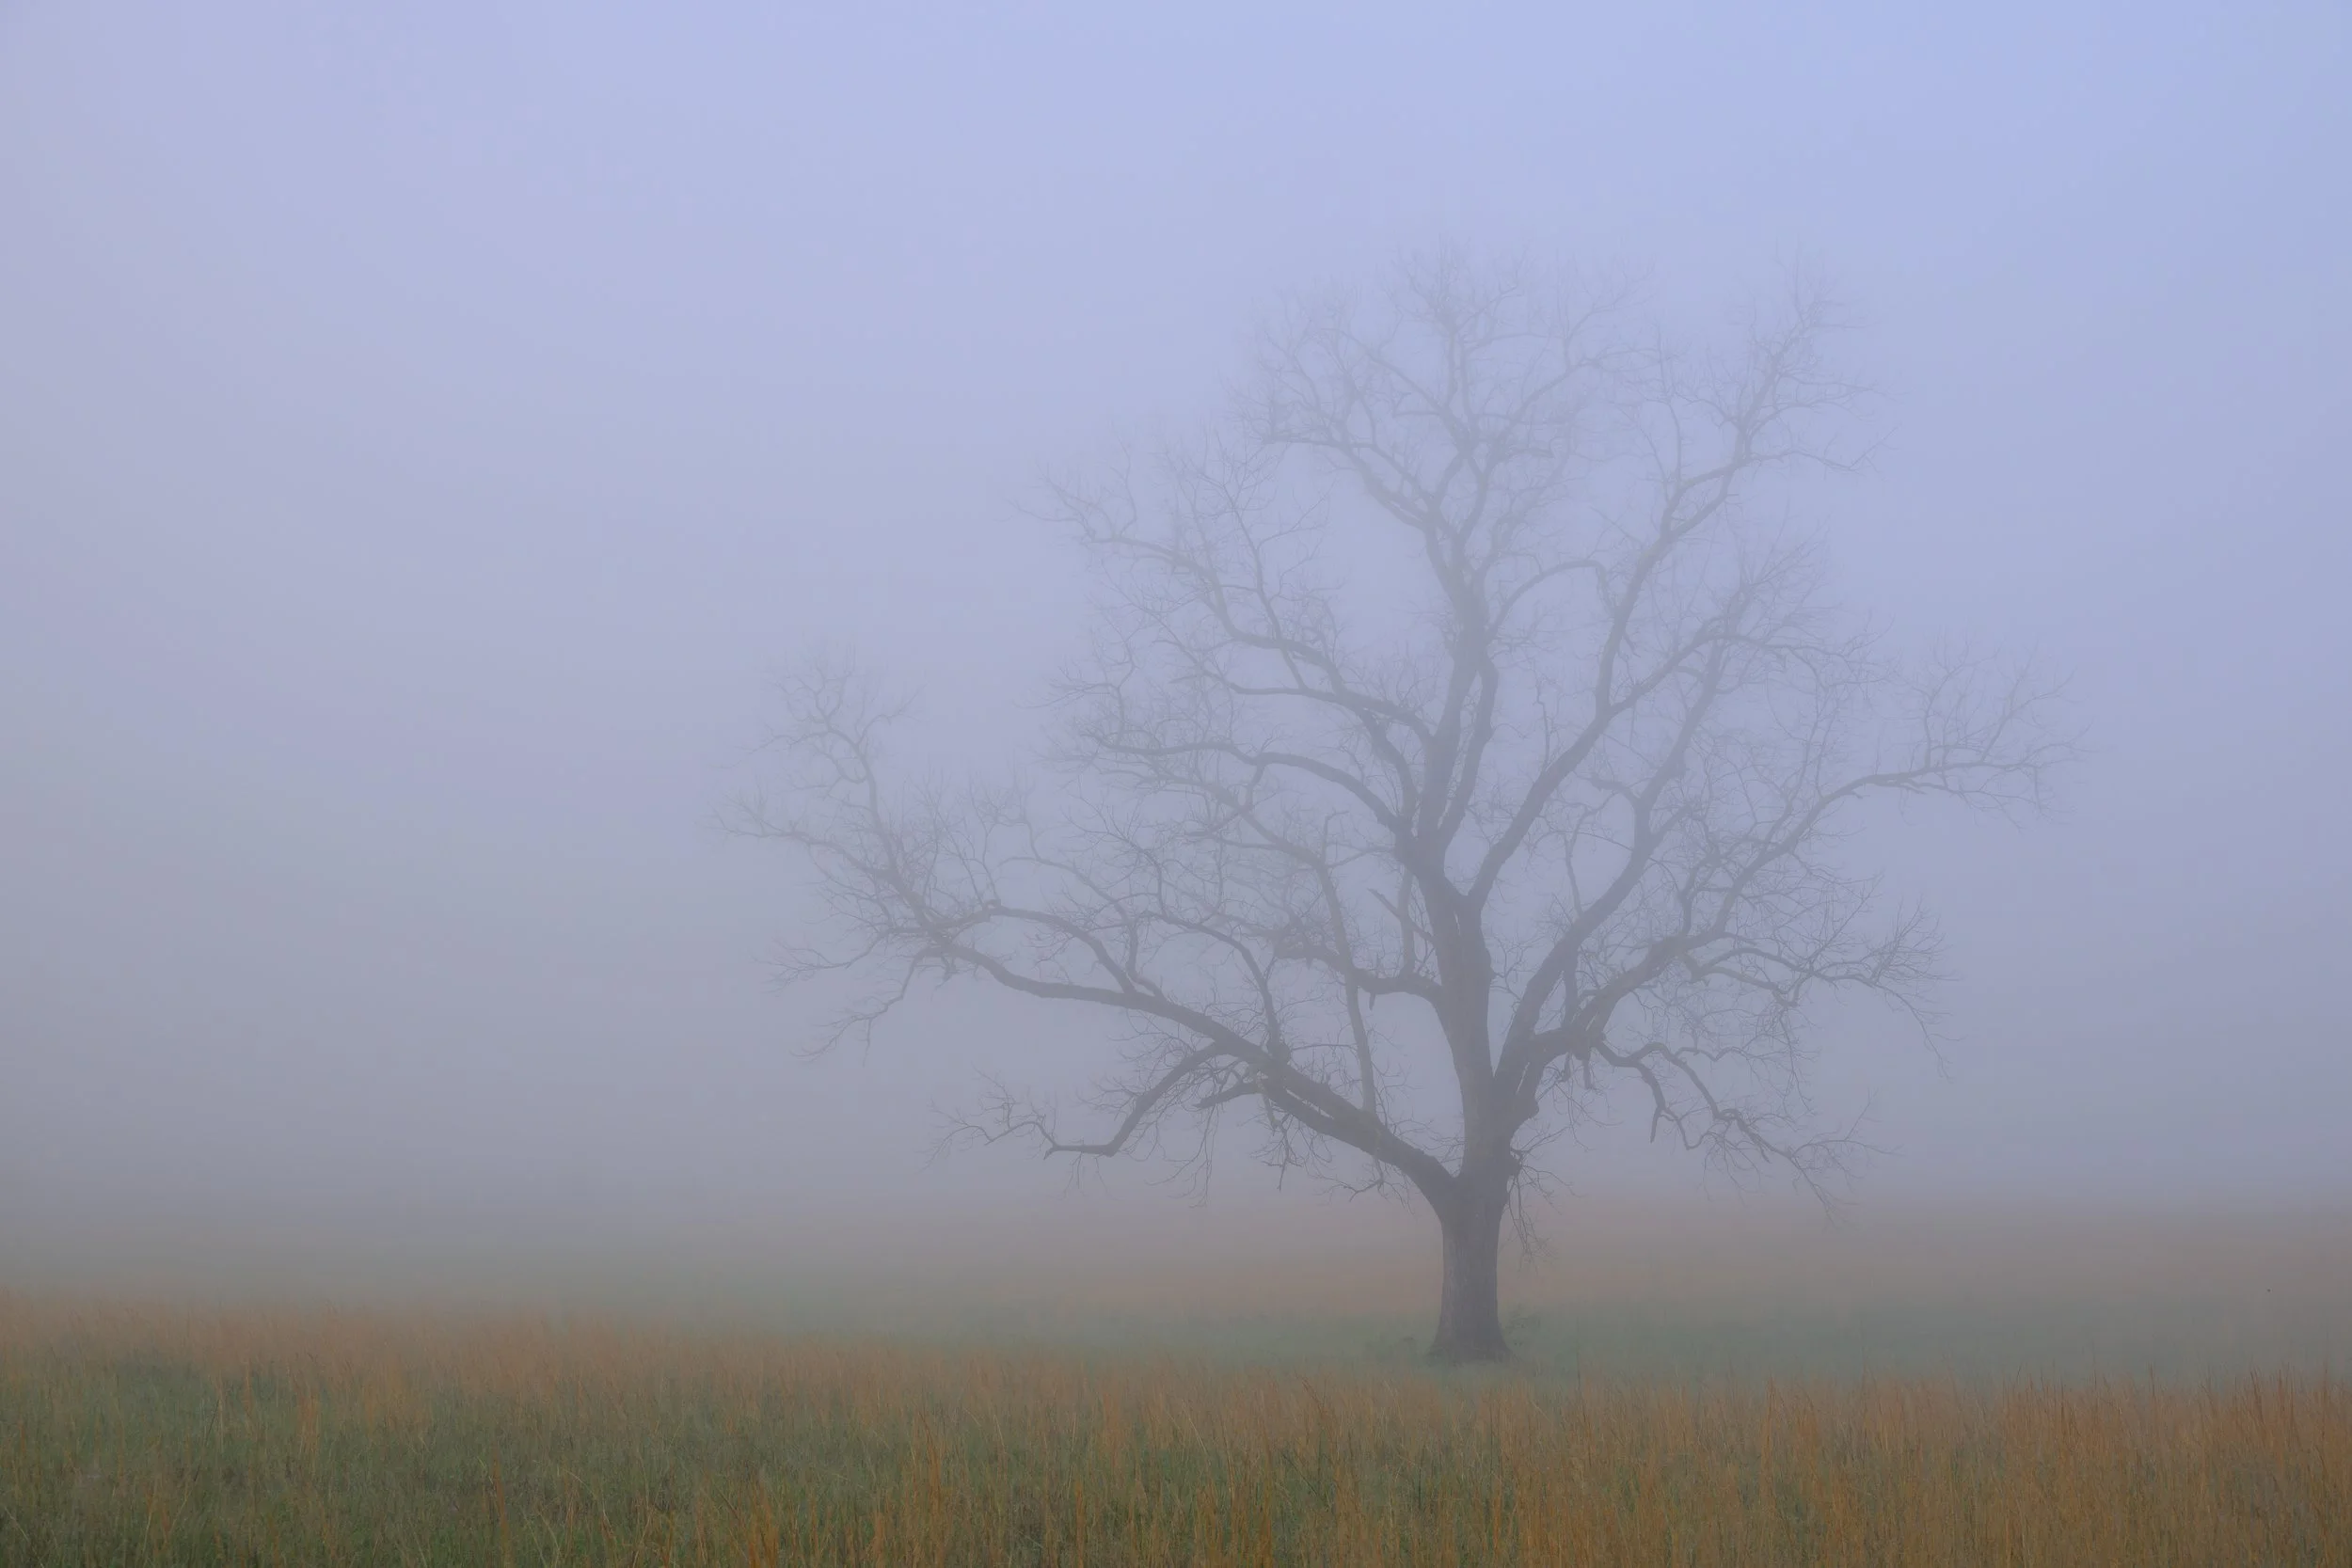
The open fields were of course cleared by these families for farms. The legacy of this work enabled this beautiful and haunting scene on a fog bound morning.
There were several roads connecting the homes in Cades Cove that remain to this day.
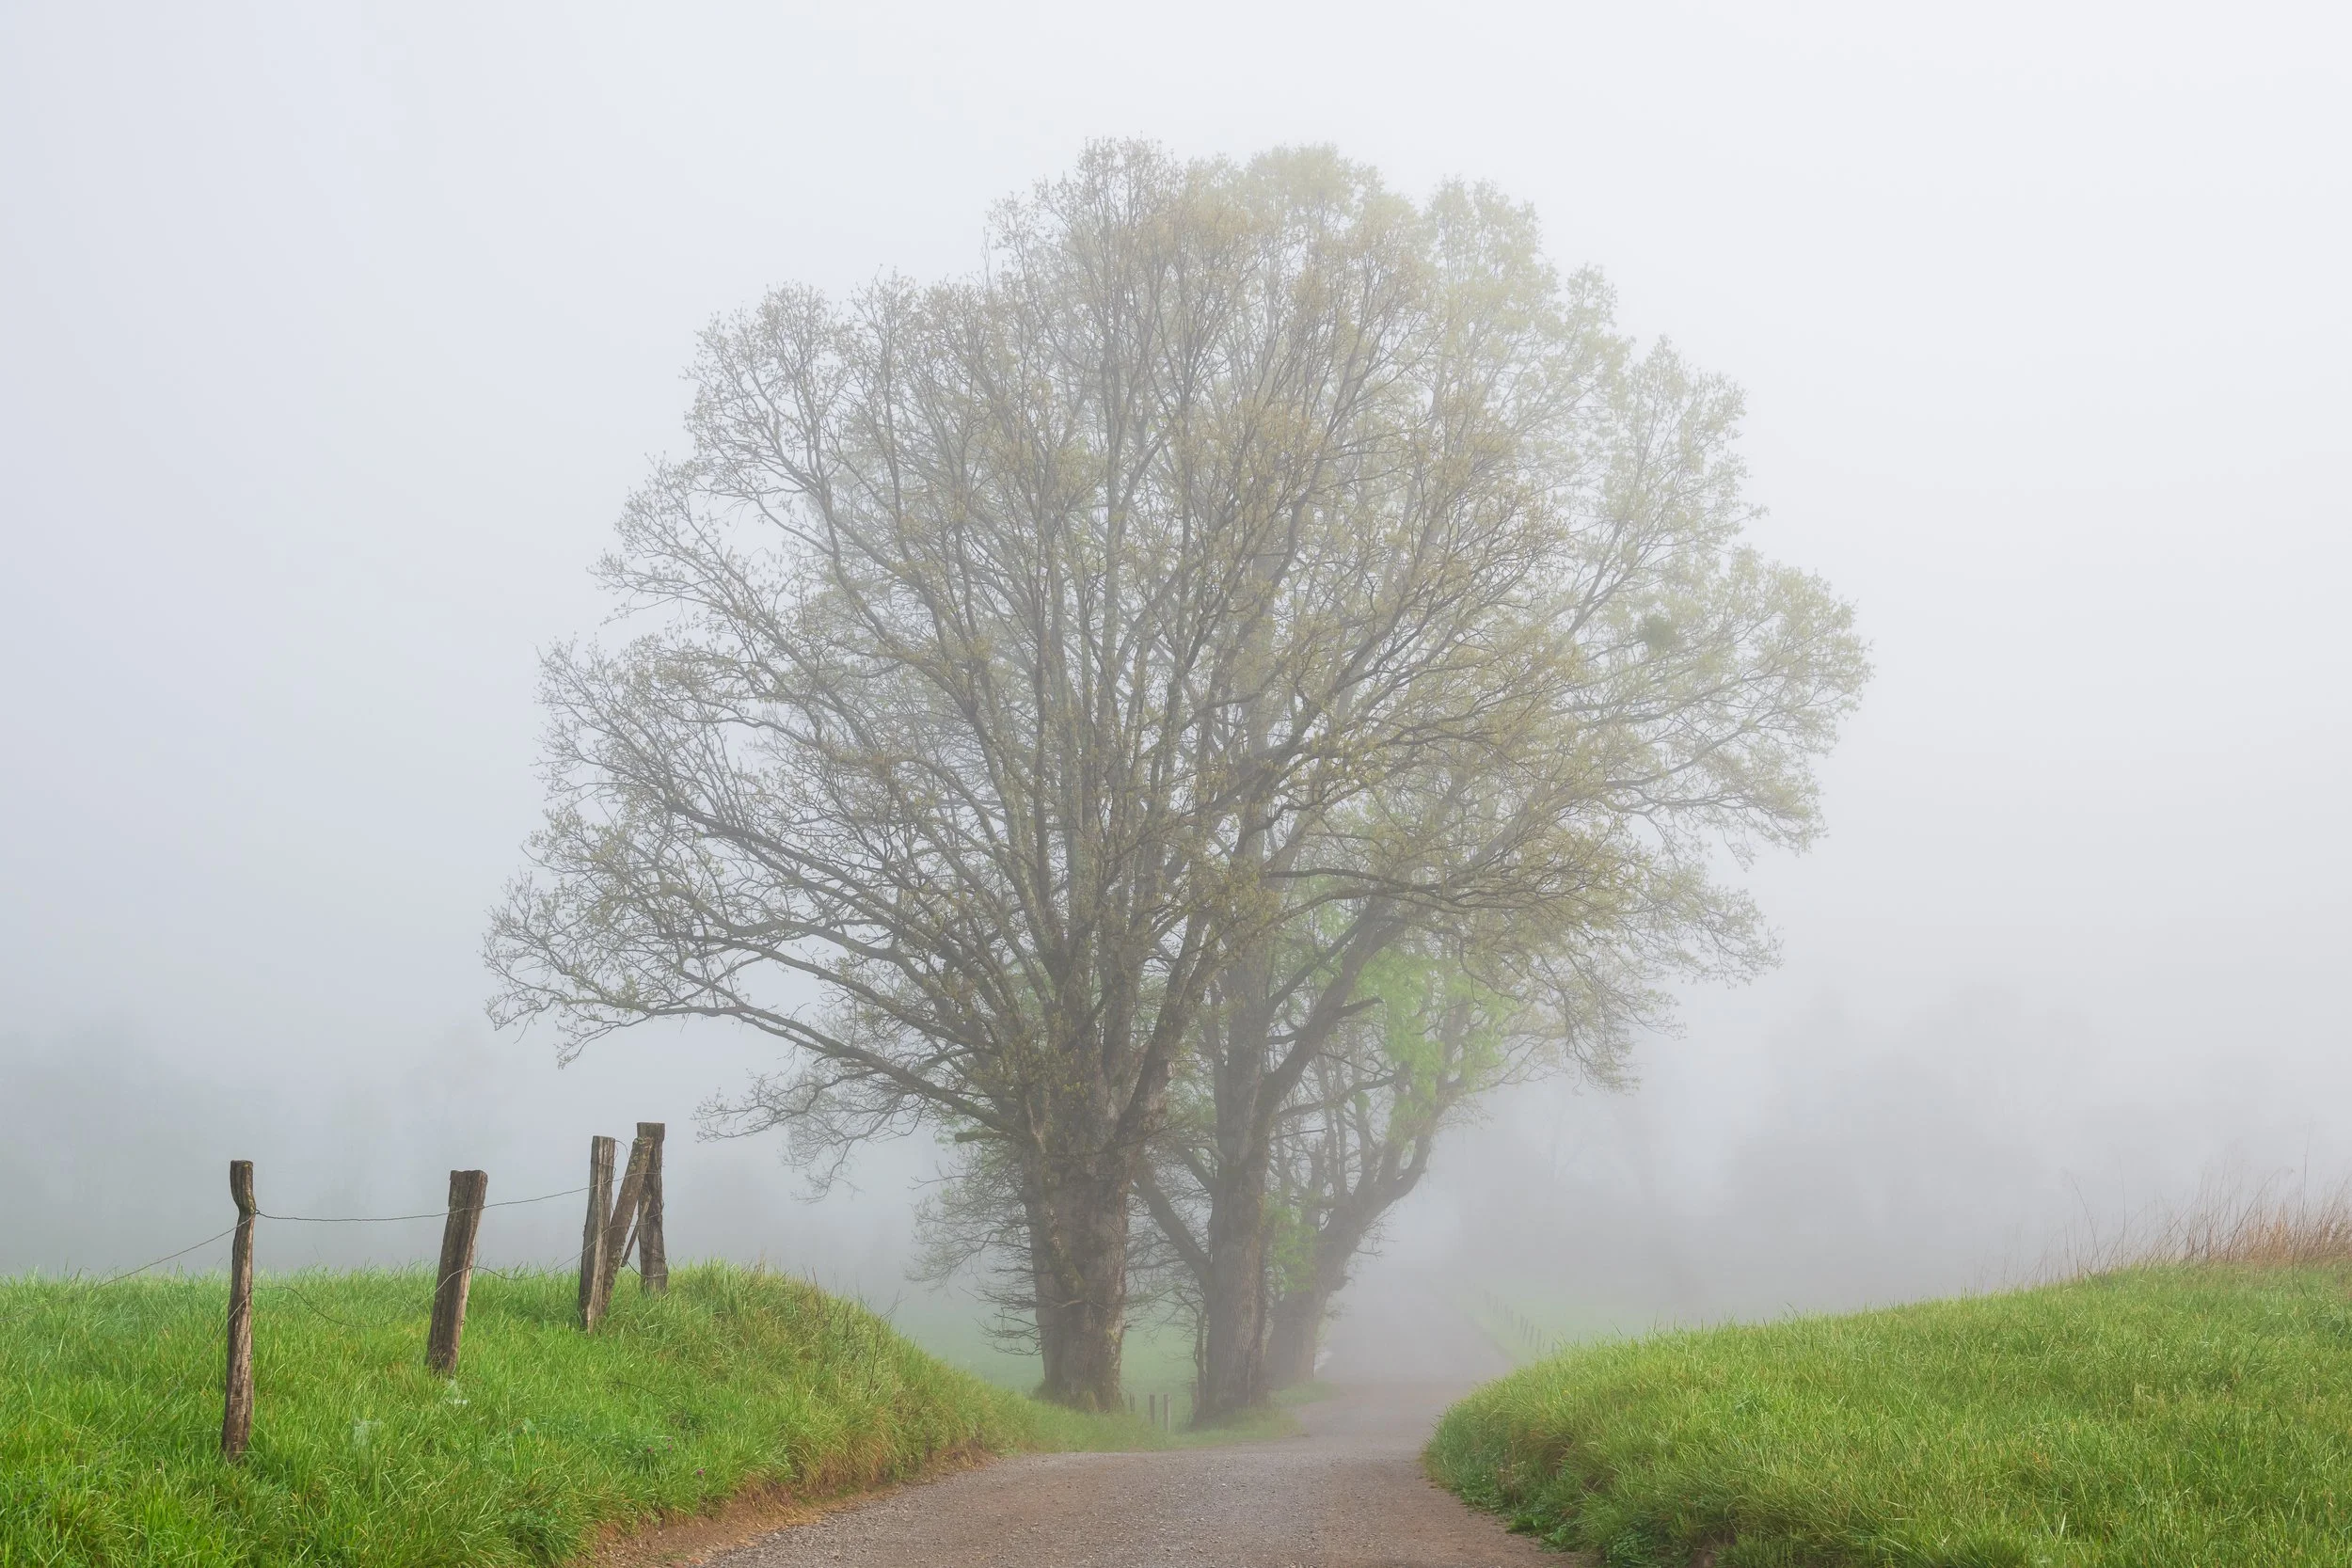
Hyatt Lane
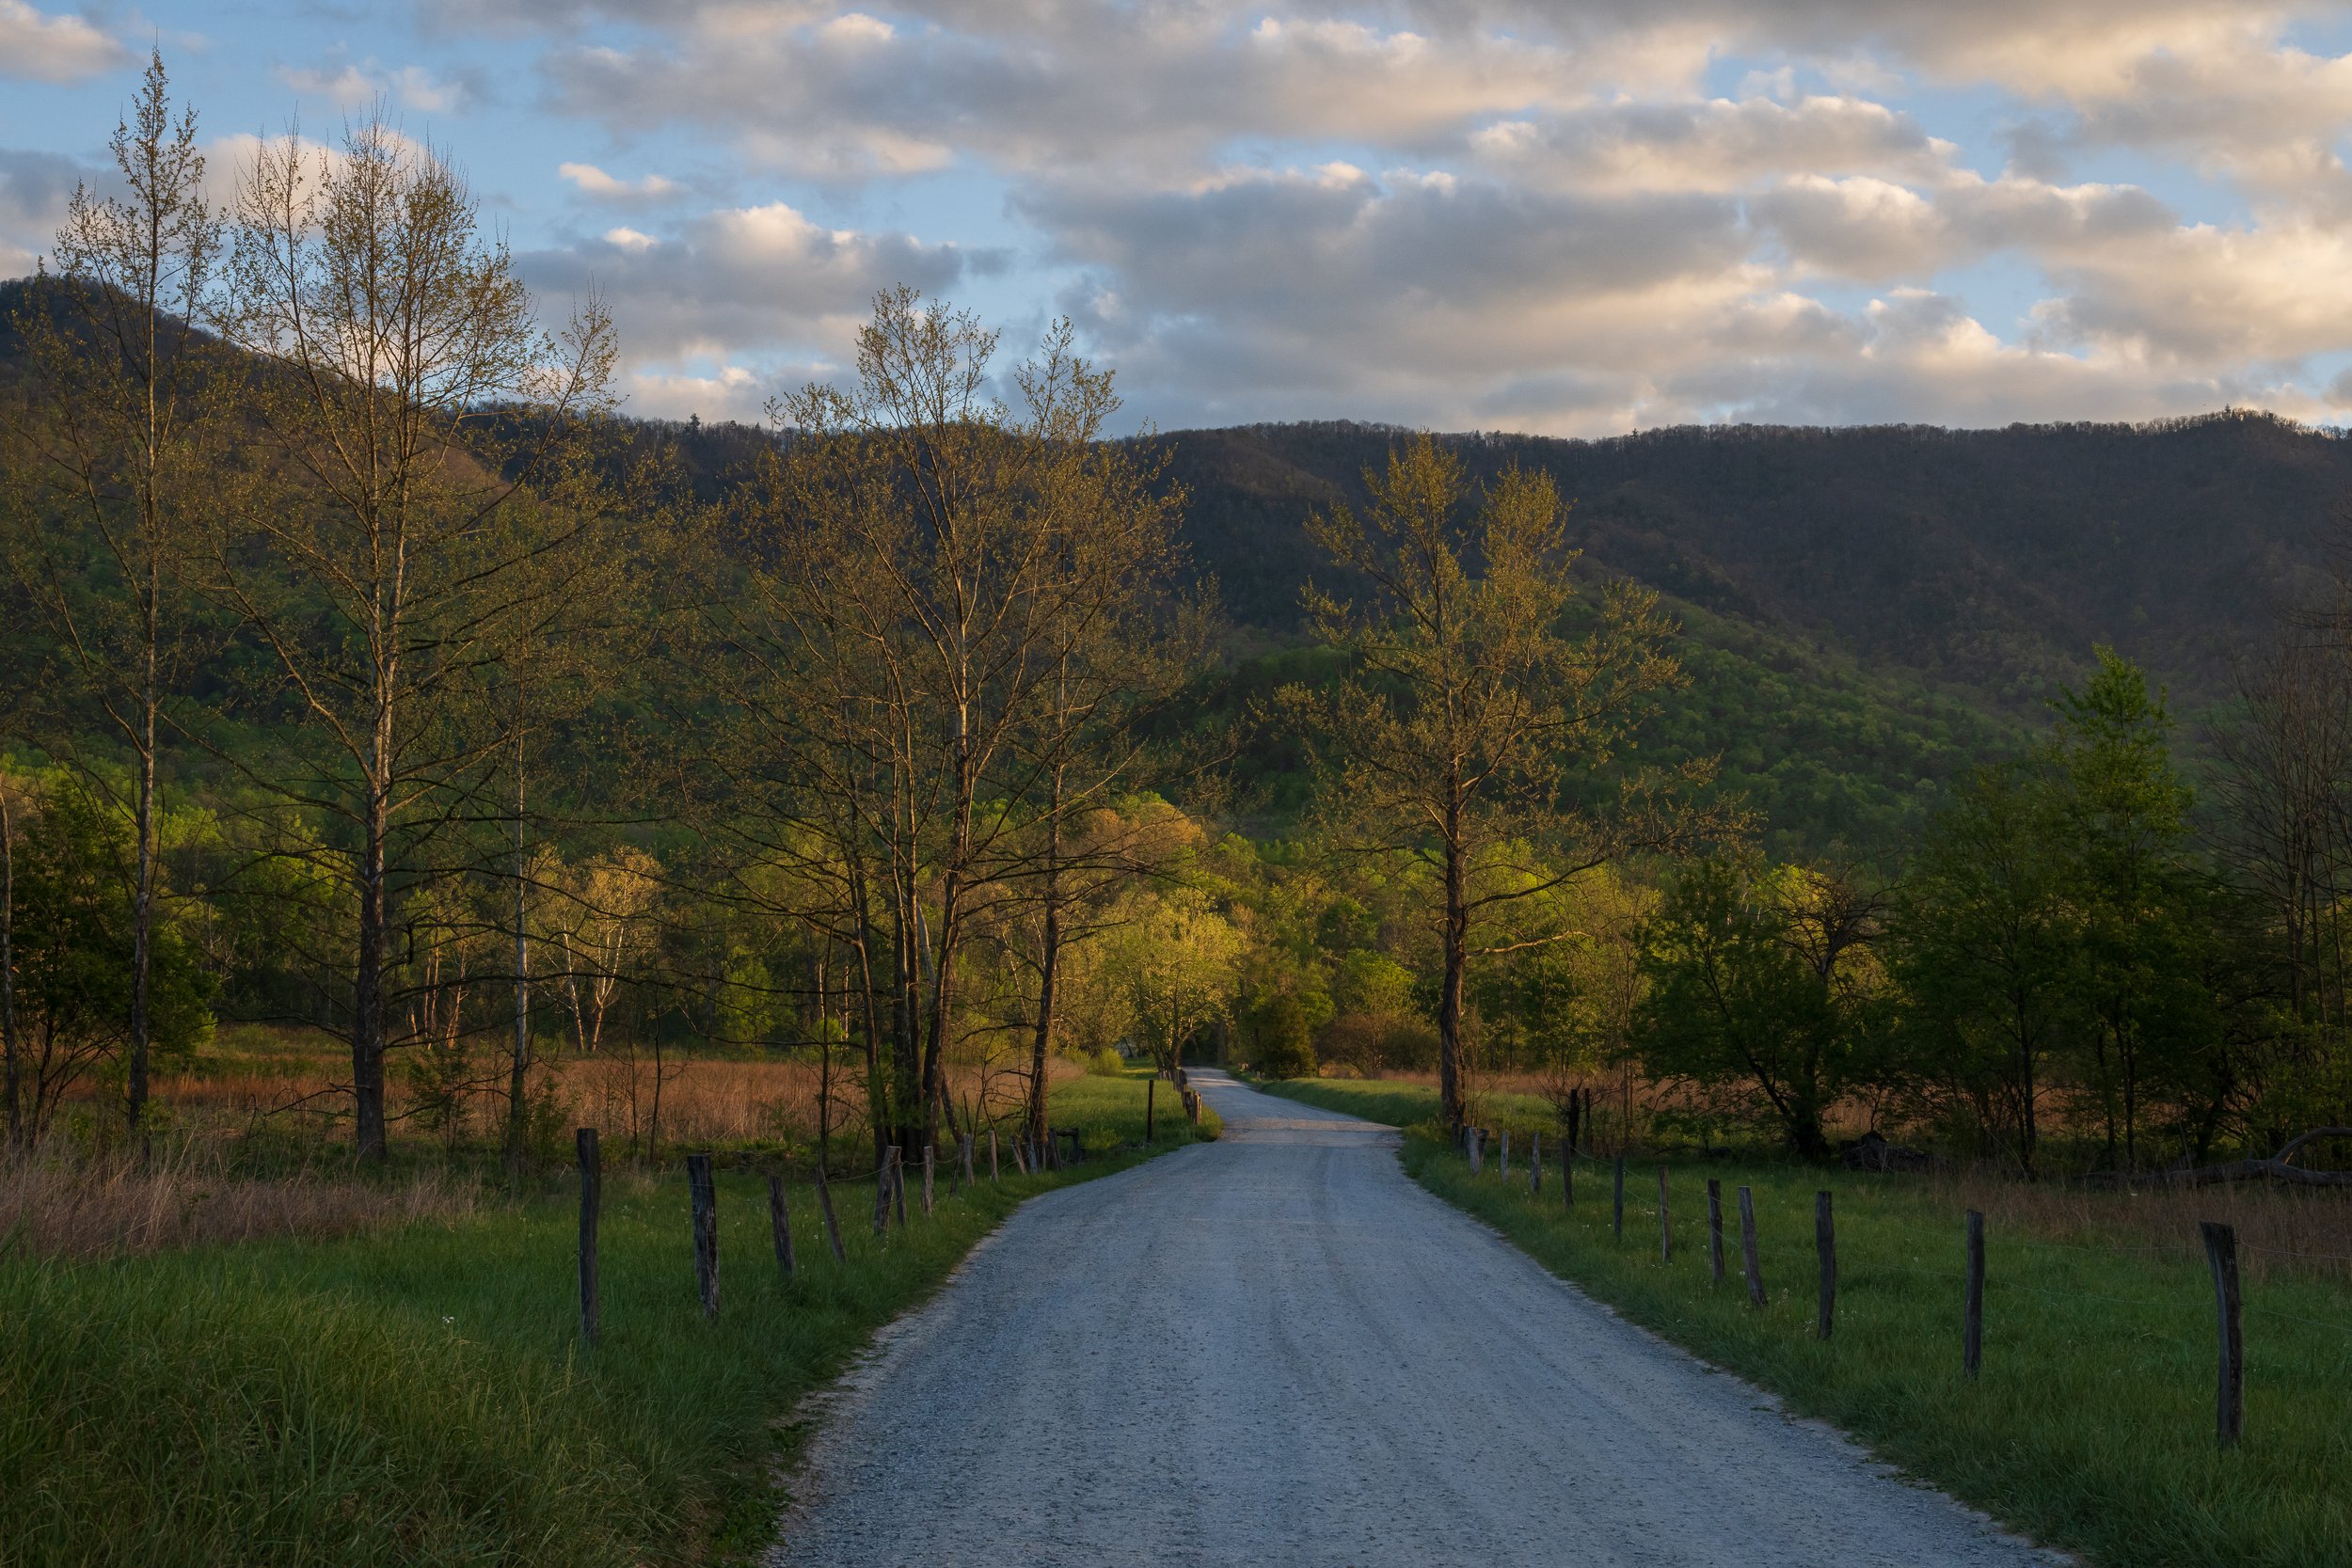
Dawn on Sparks Lane, Cades Cove
House were simple usually with just one room on the lower level and a loft above for sleeping. Families were often large with 10 to 12 children.
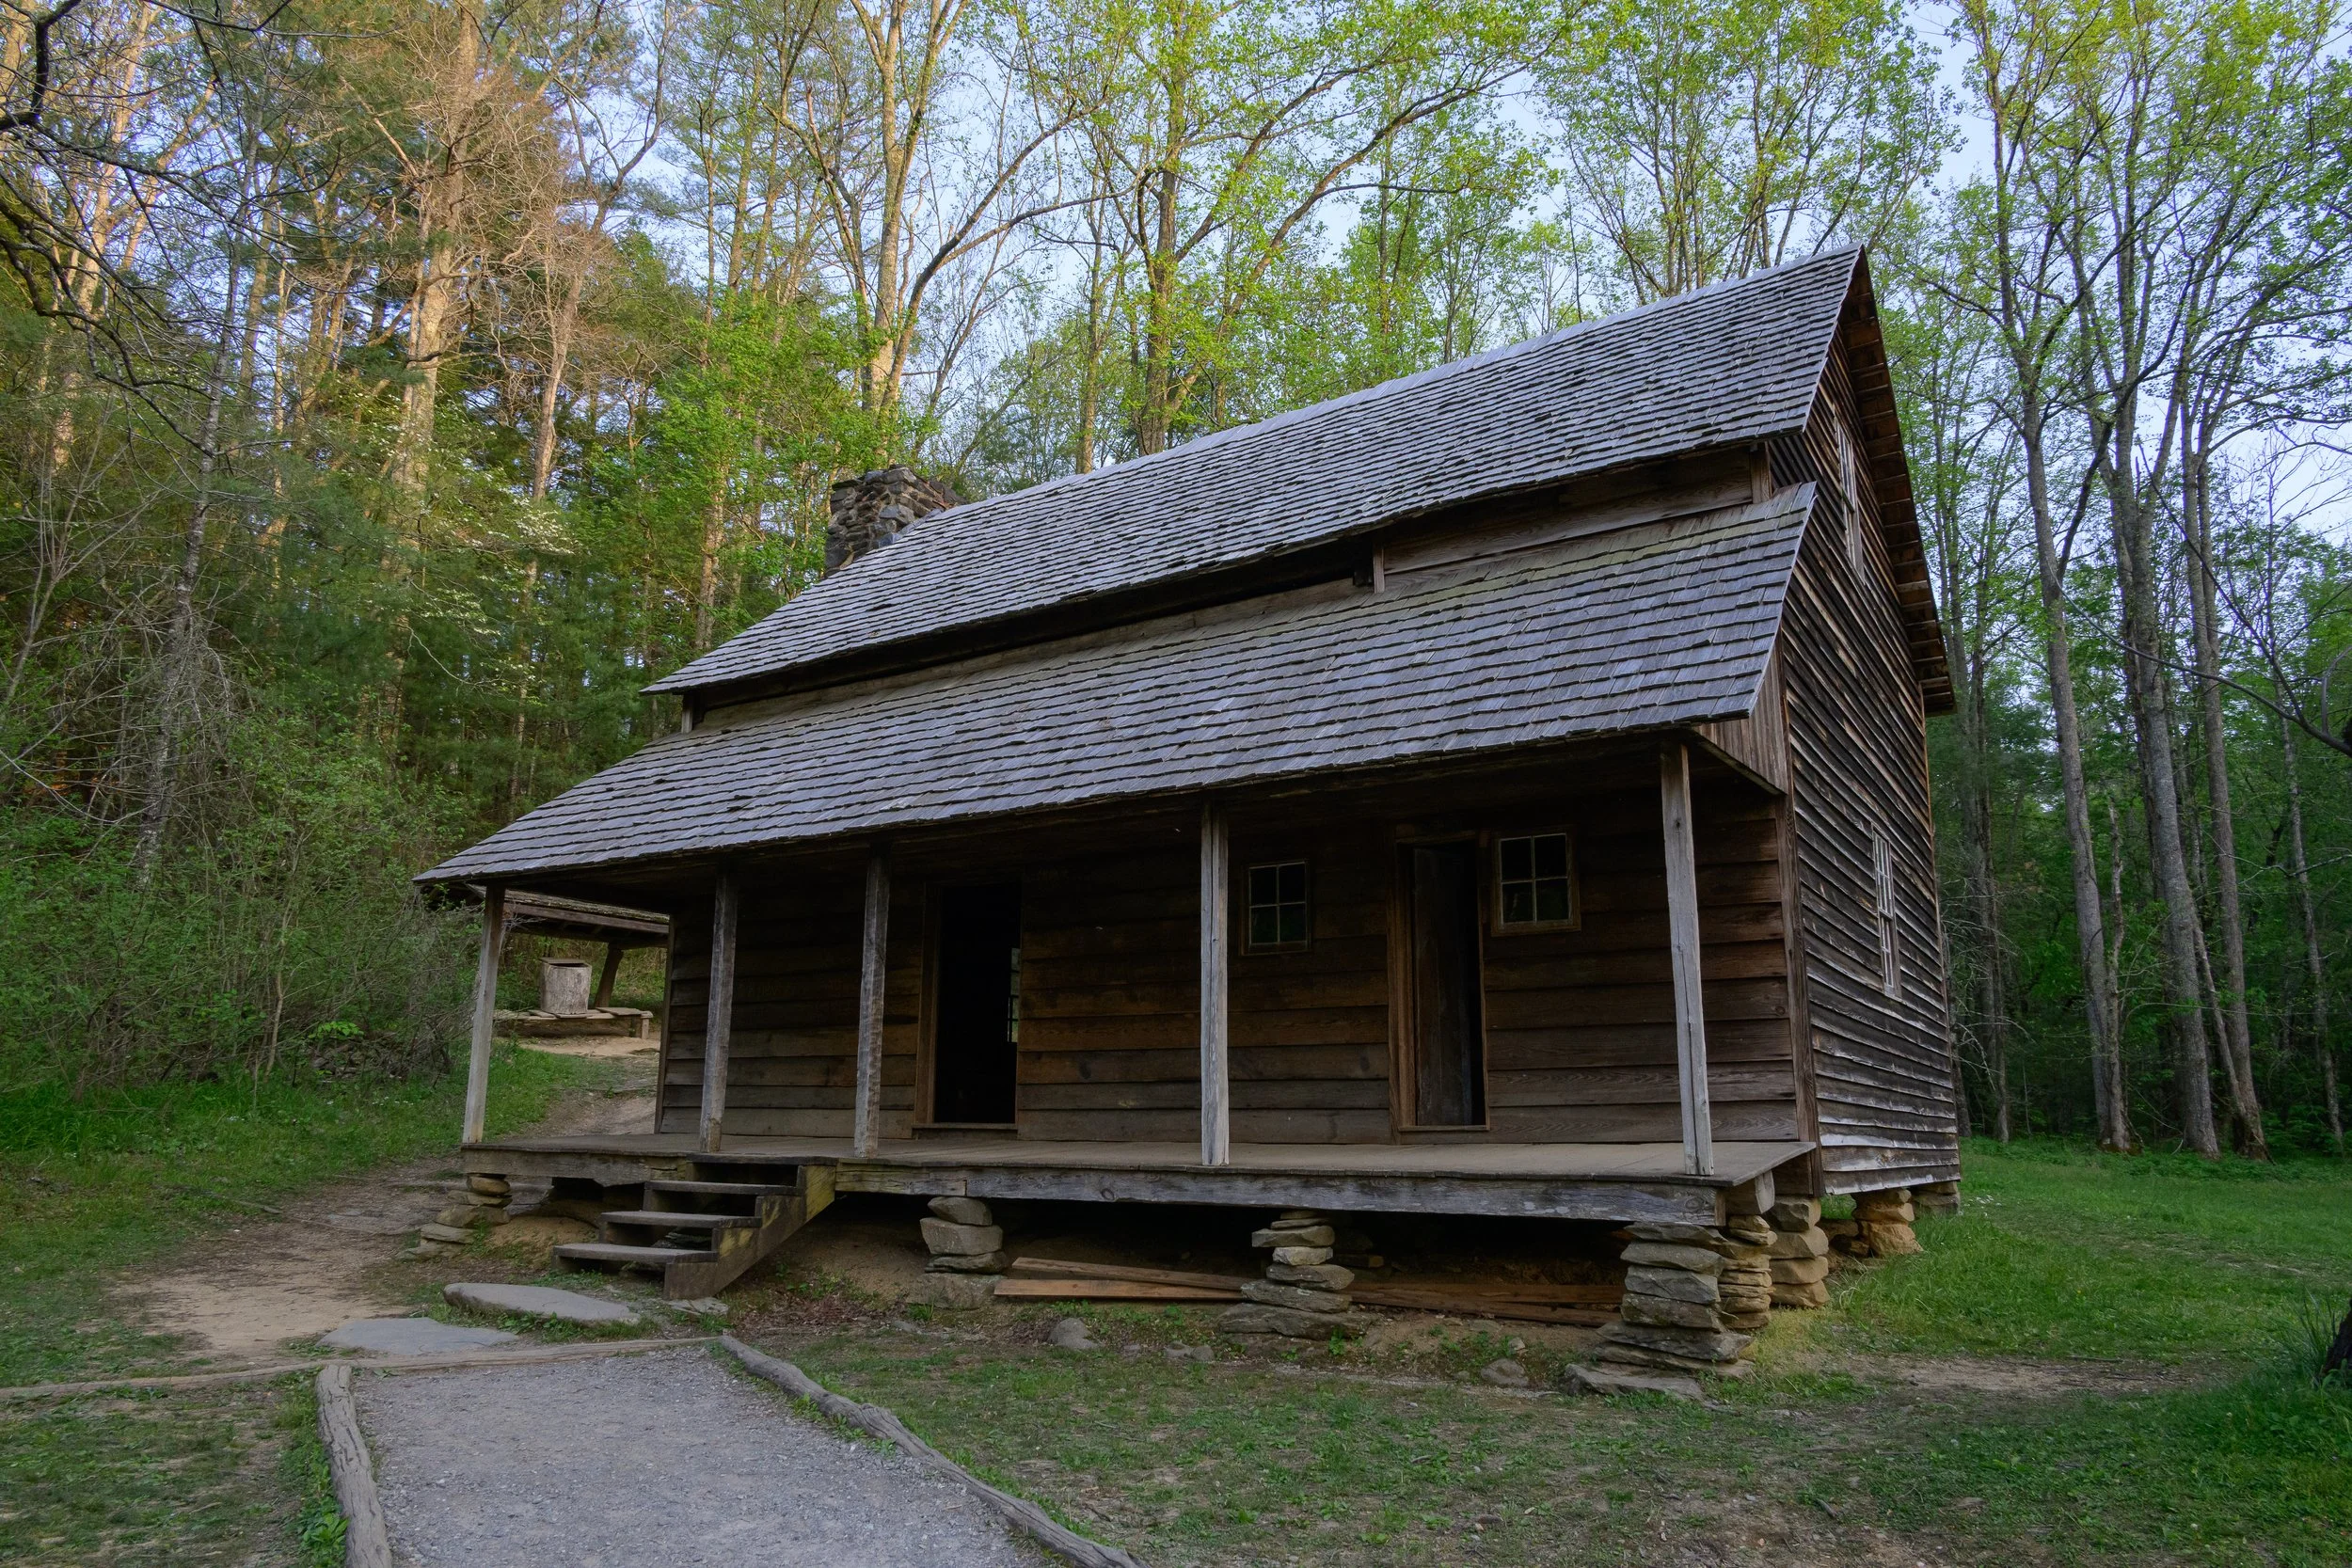
Carter Shields Cabin
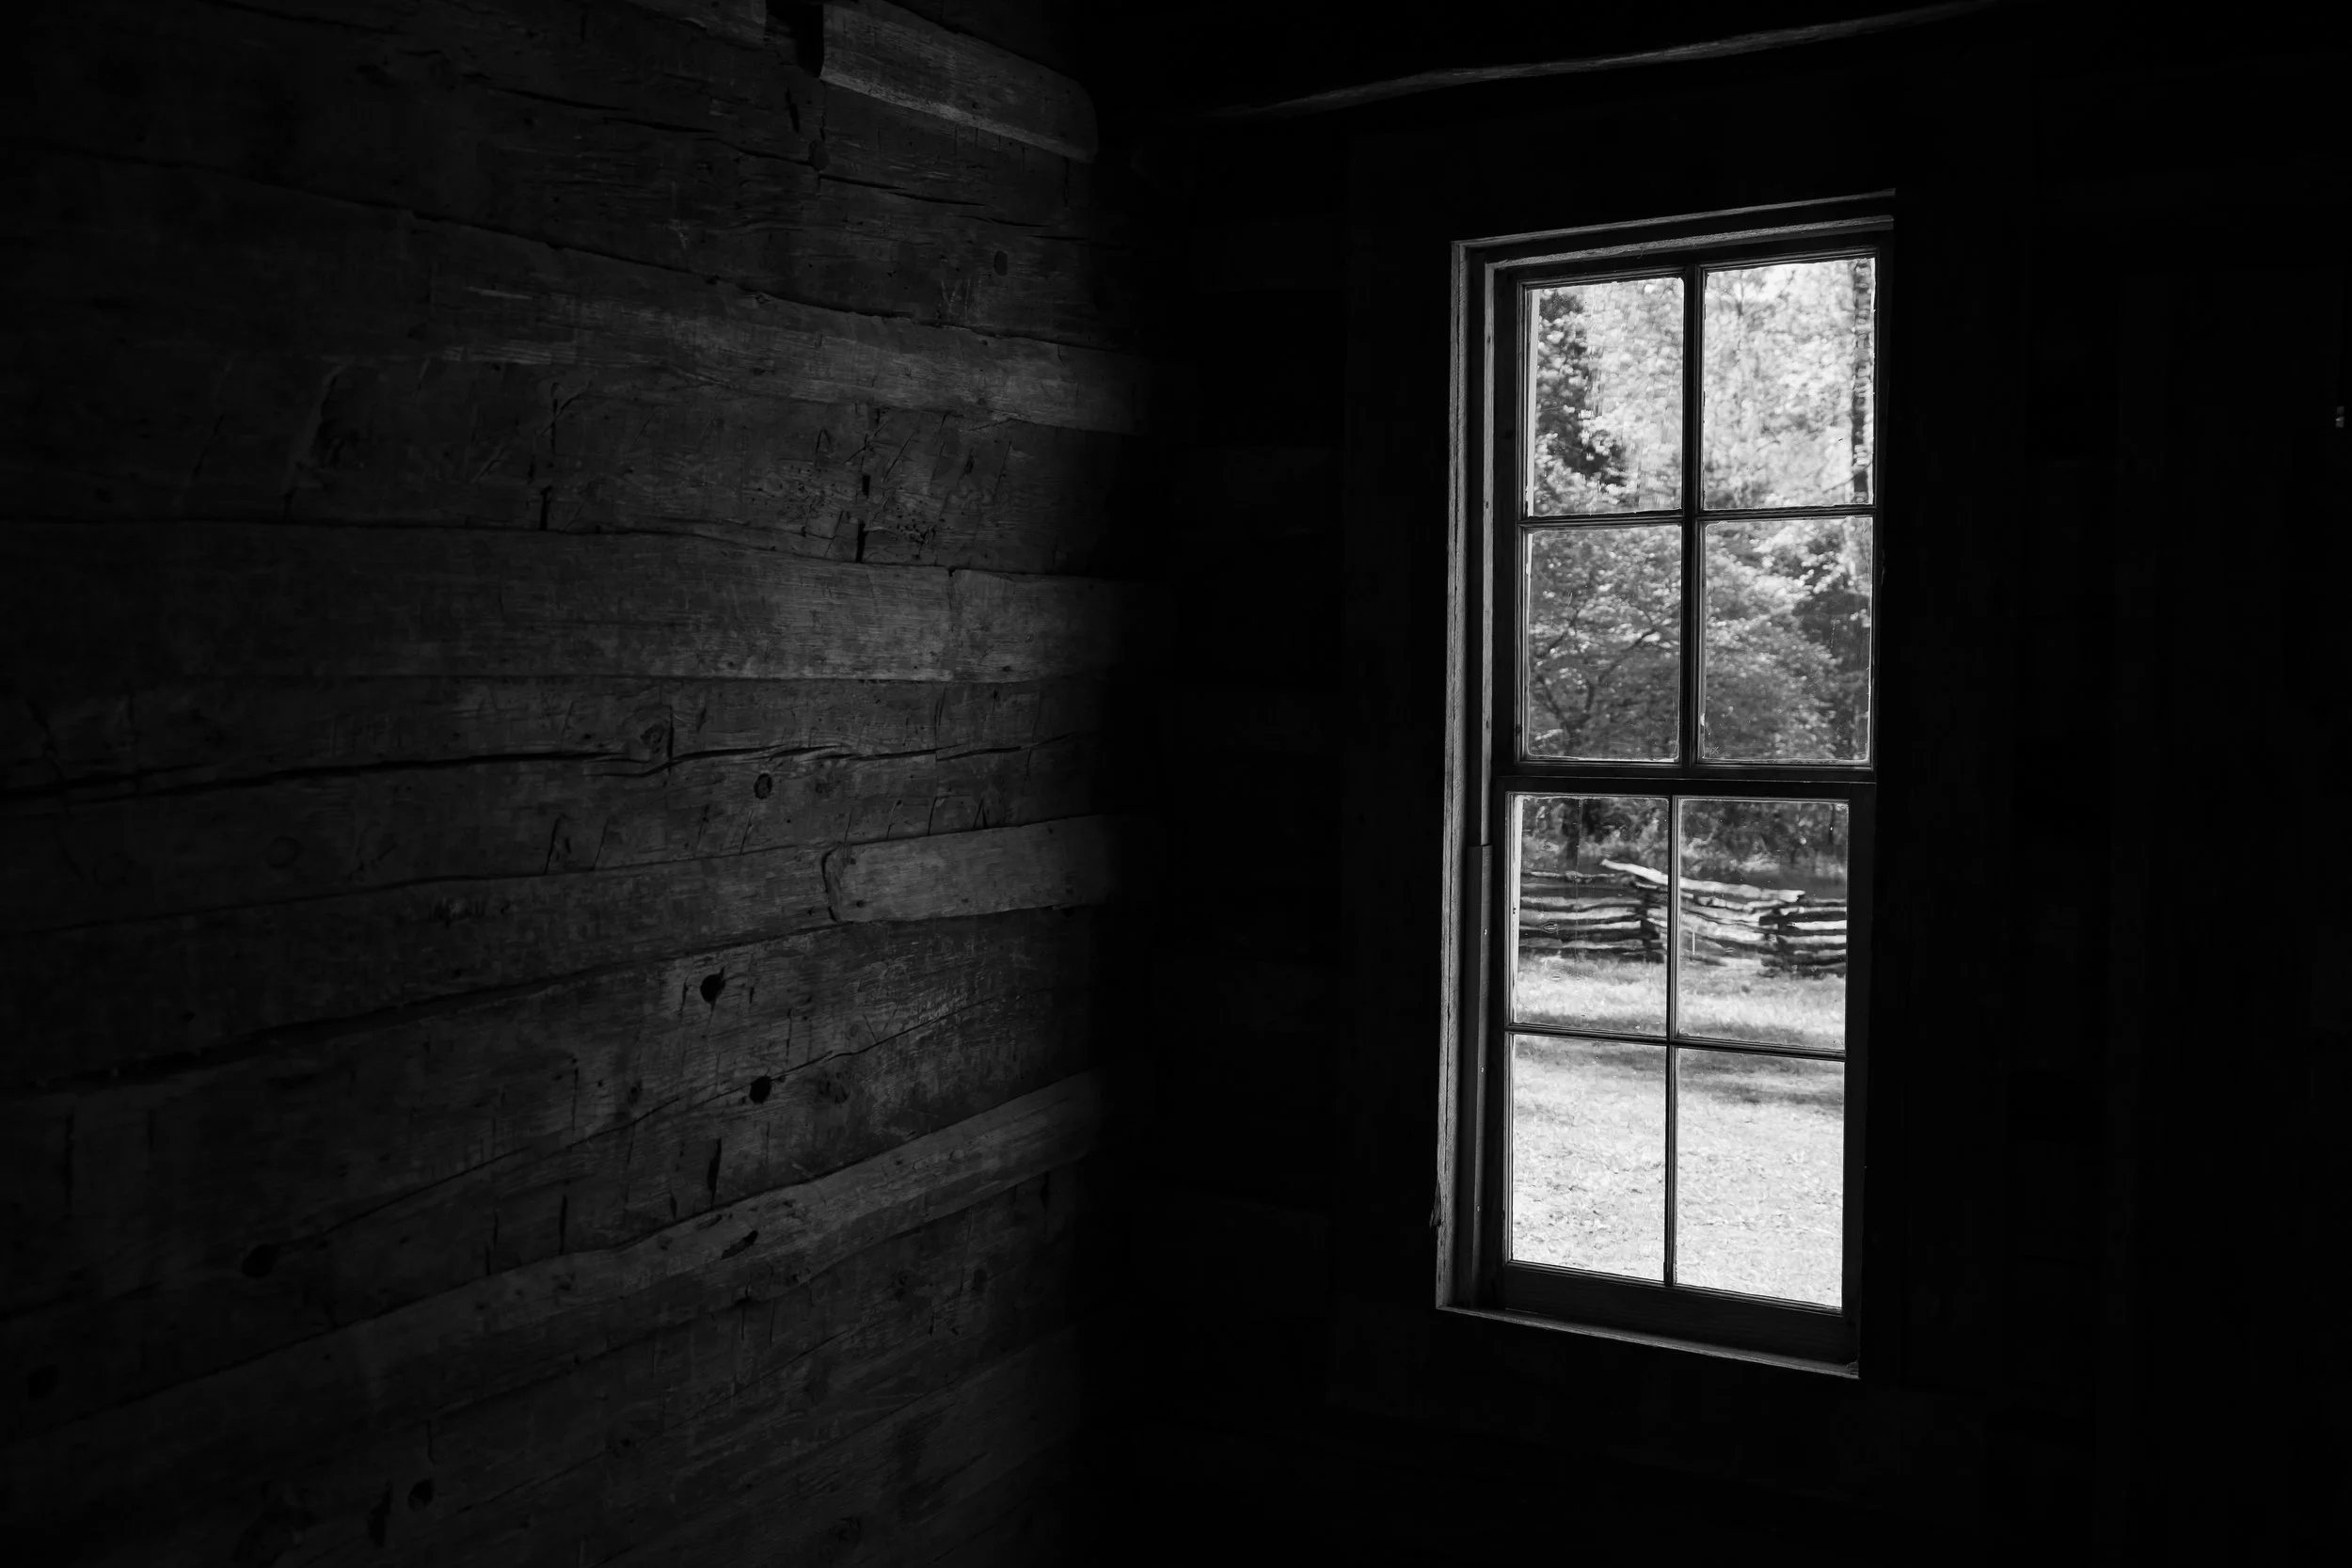
I tried to capture the feeling of what it might be like to sit in one of those cabins during the daytime before electricity.
There were 3 churches in Cades Cove. Faith was the heart of life in the Cove.
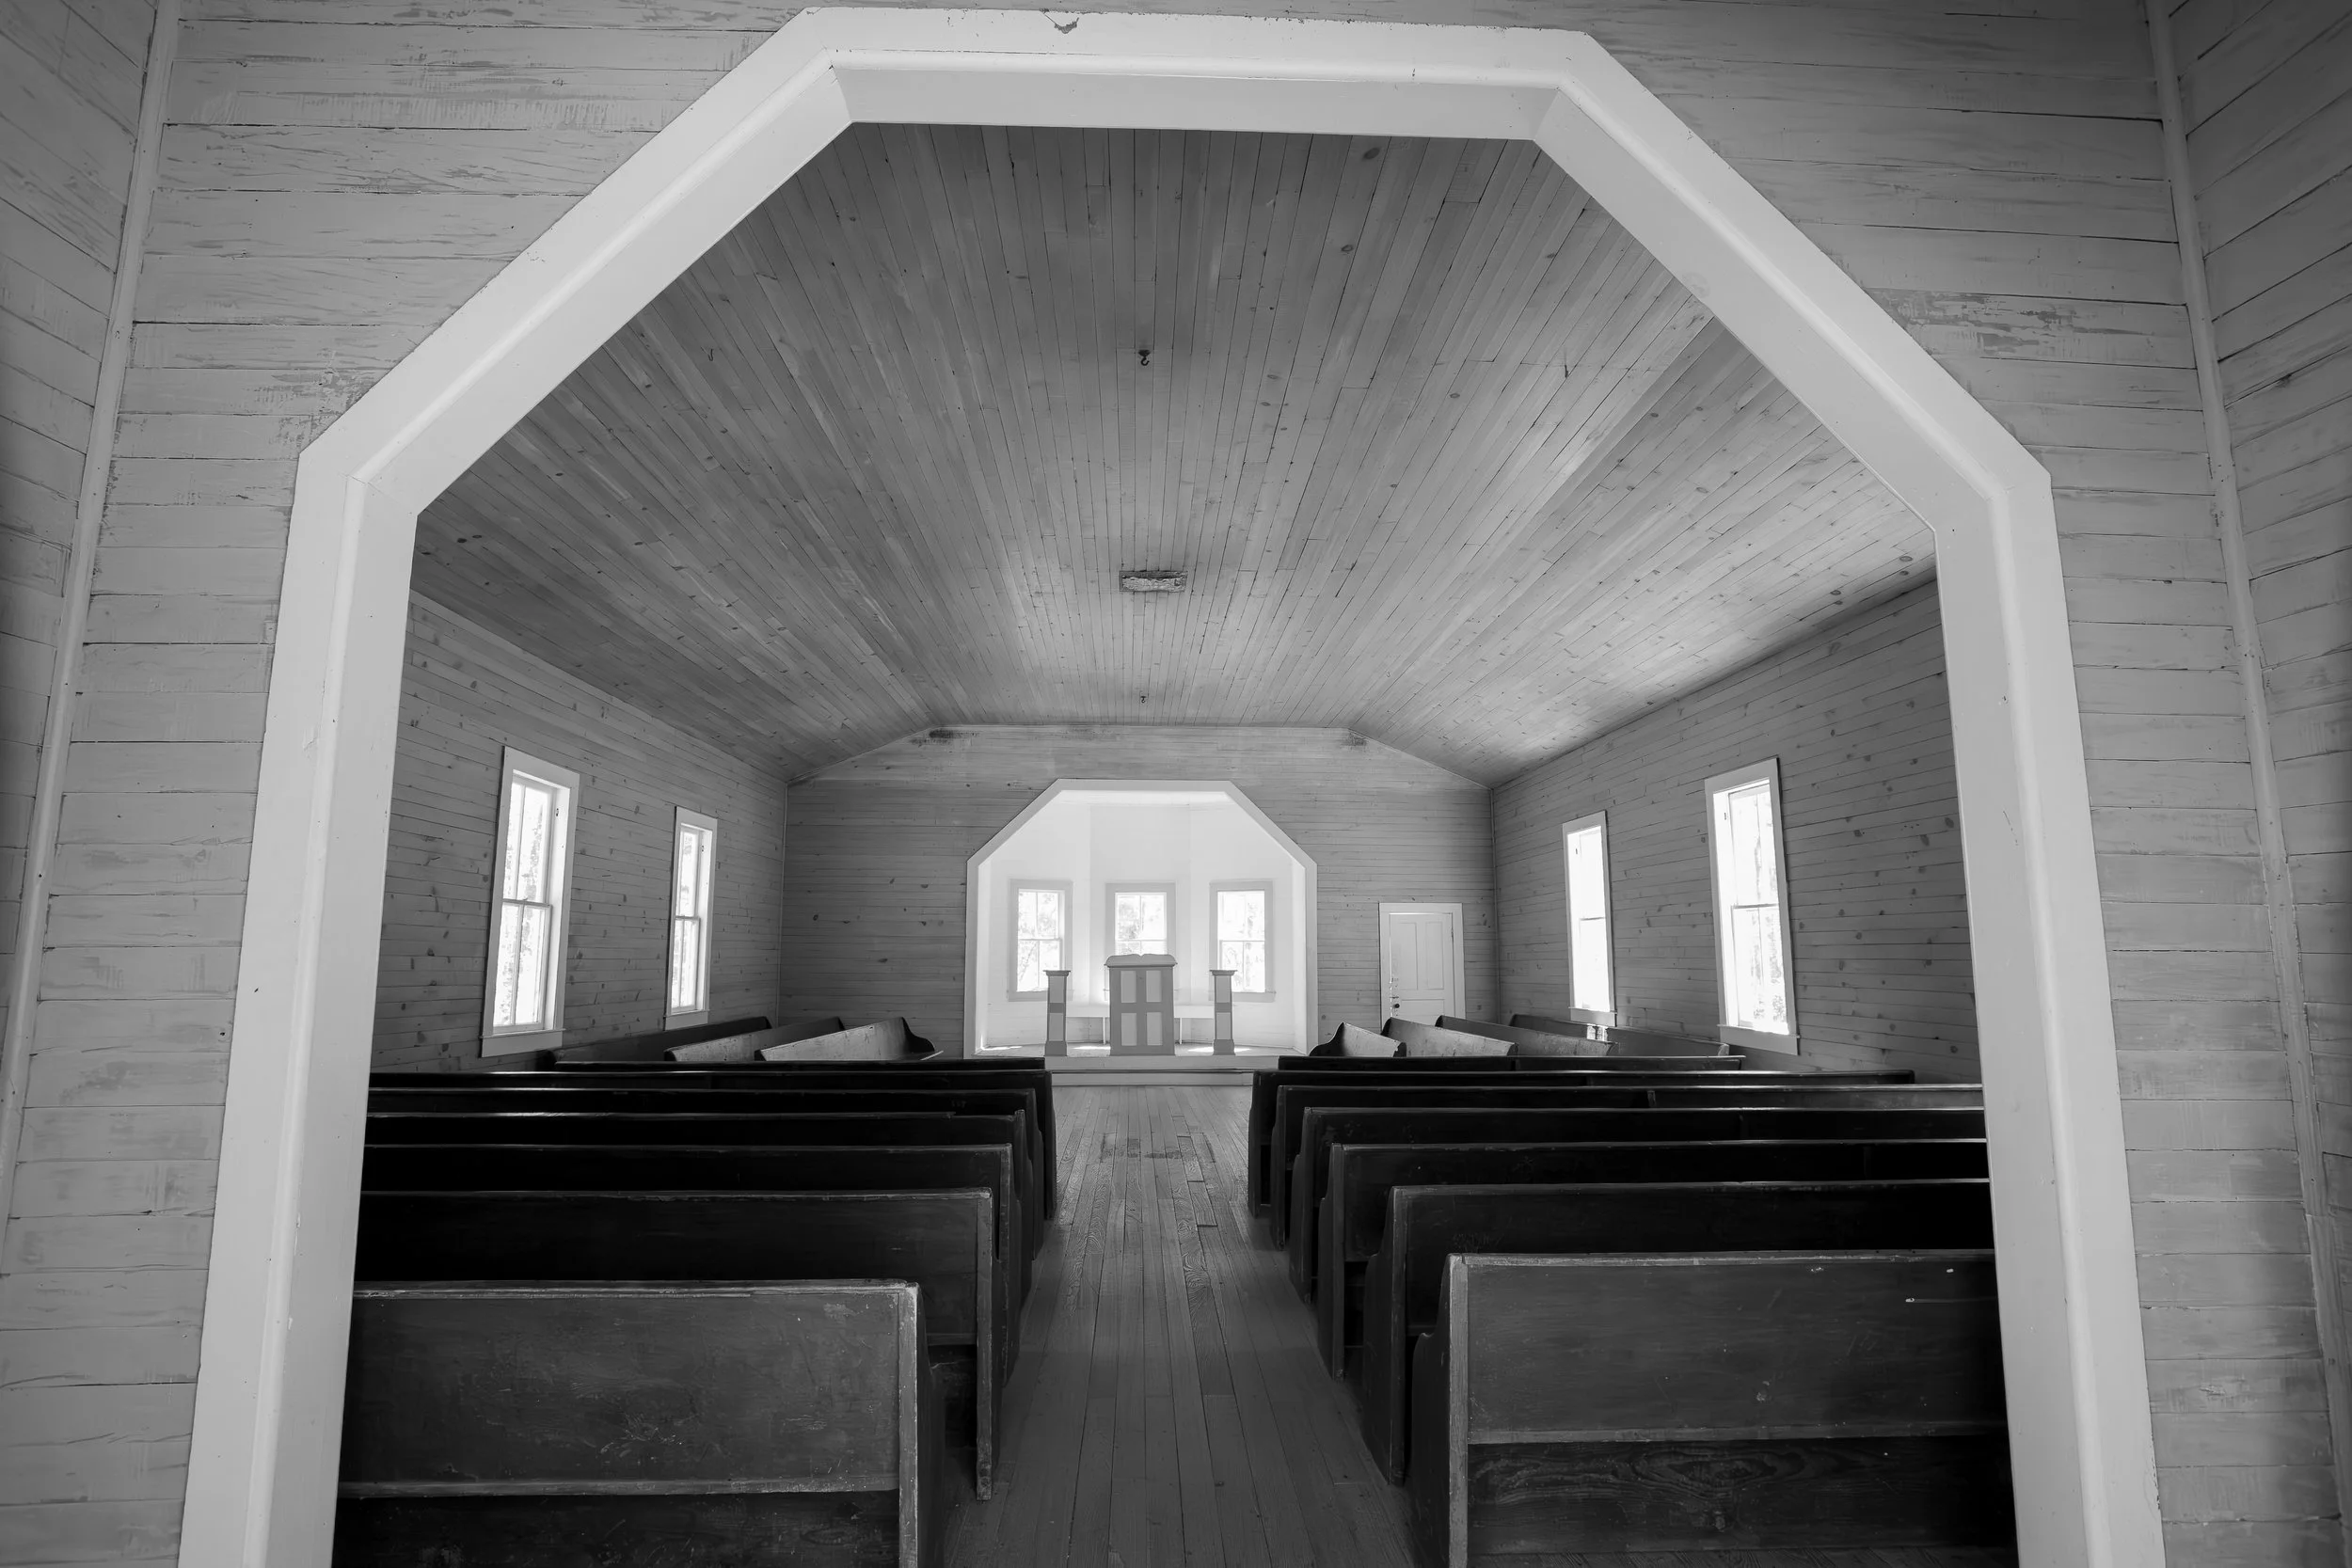
Inside of the Missionary Baptist Church in Cades Cove
Prior to electricity water powered the mills. This is the John P. Cable Grist Mill.
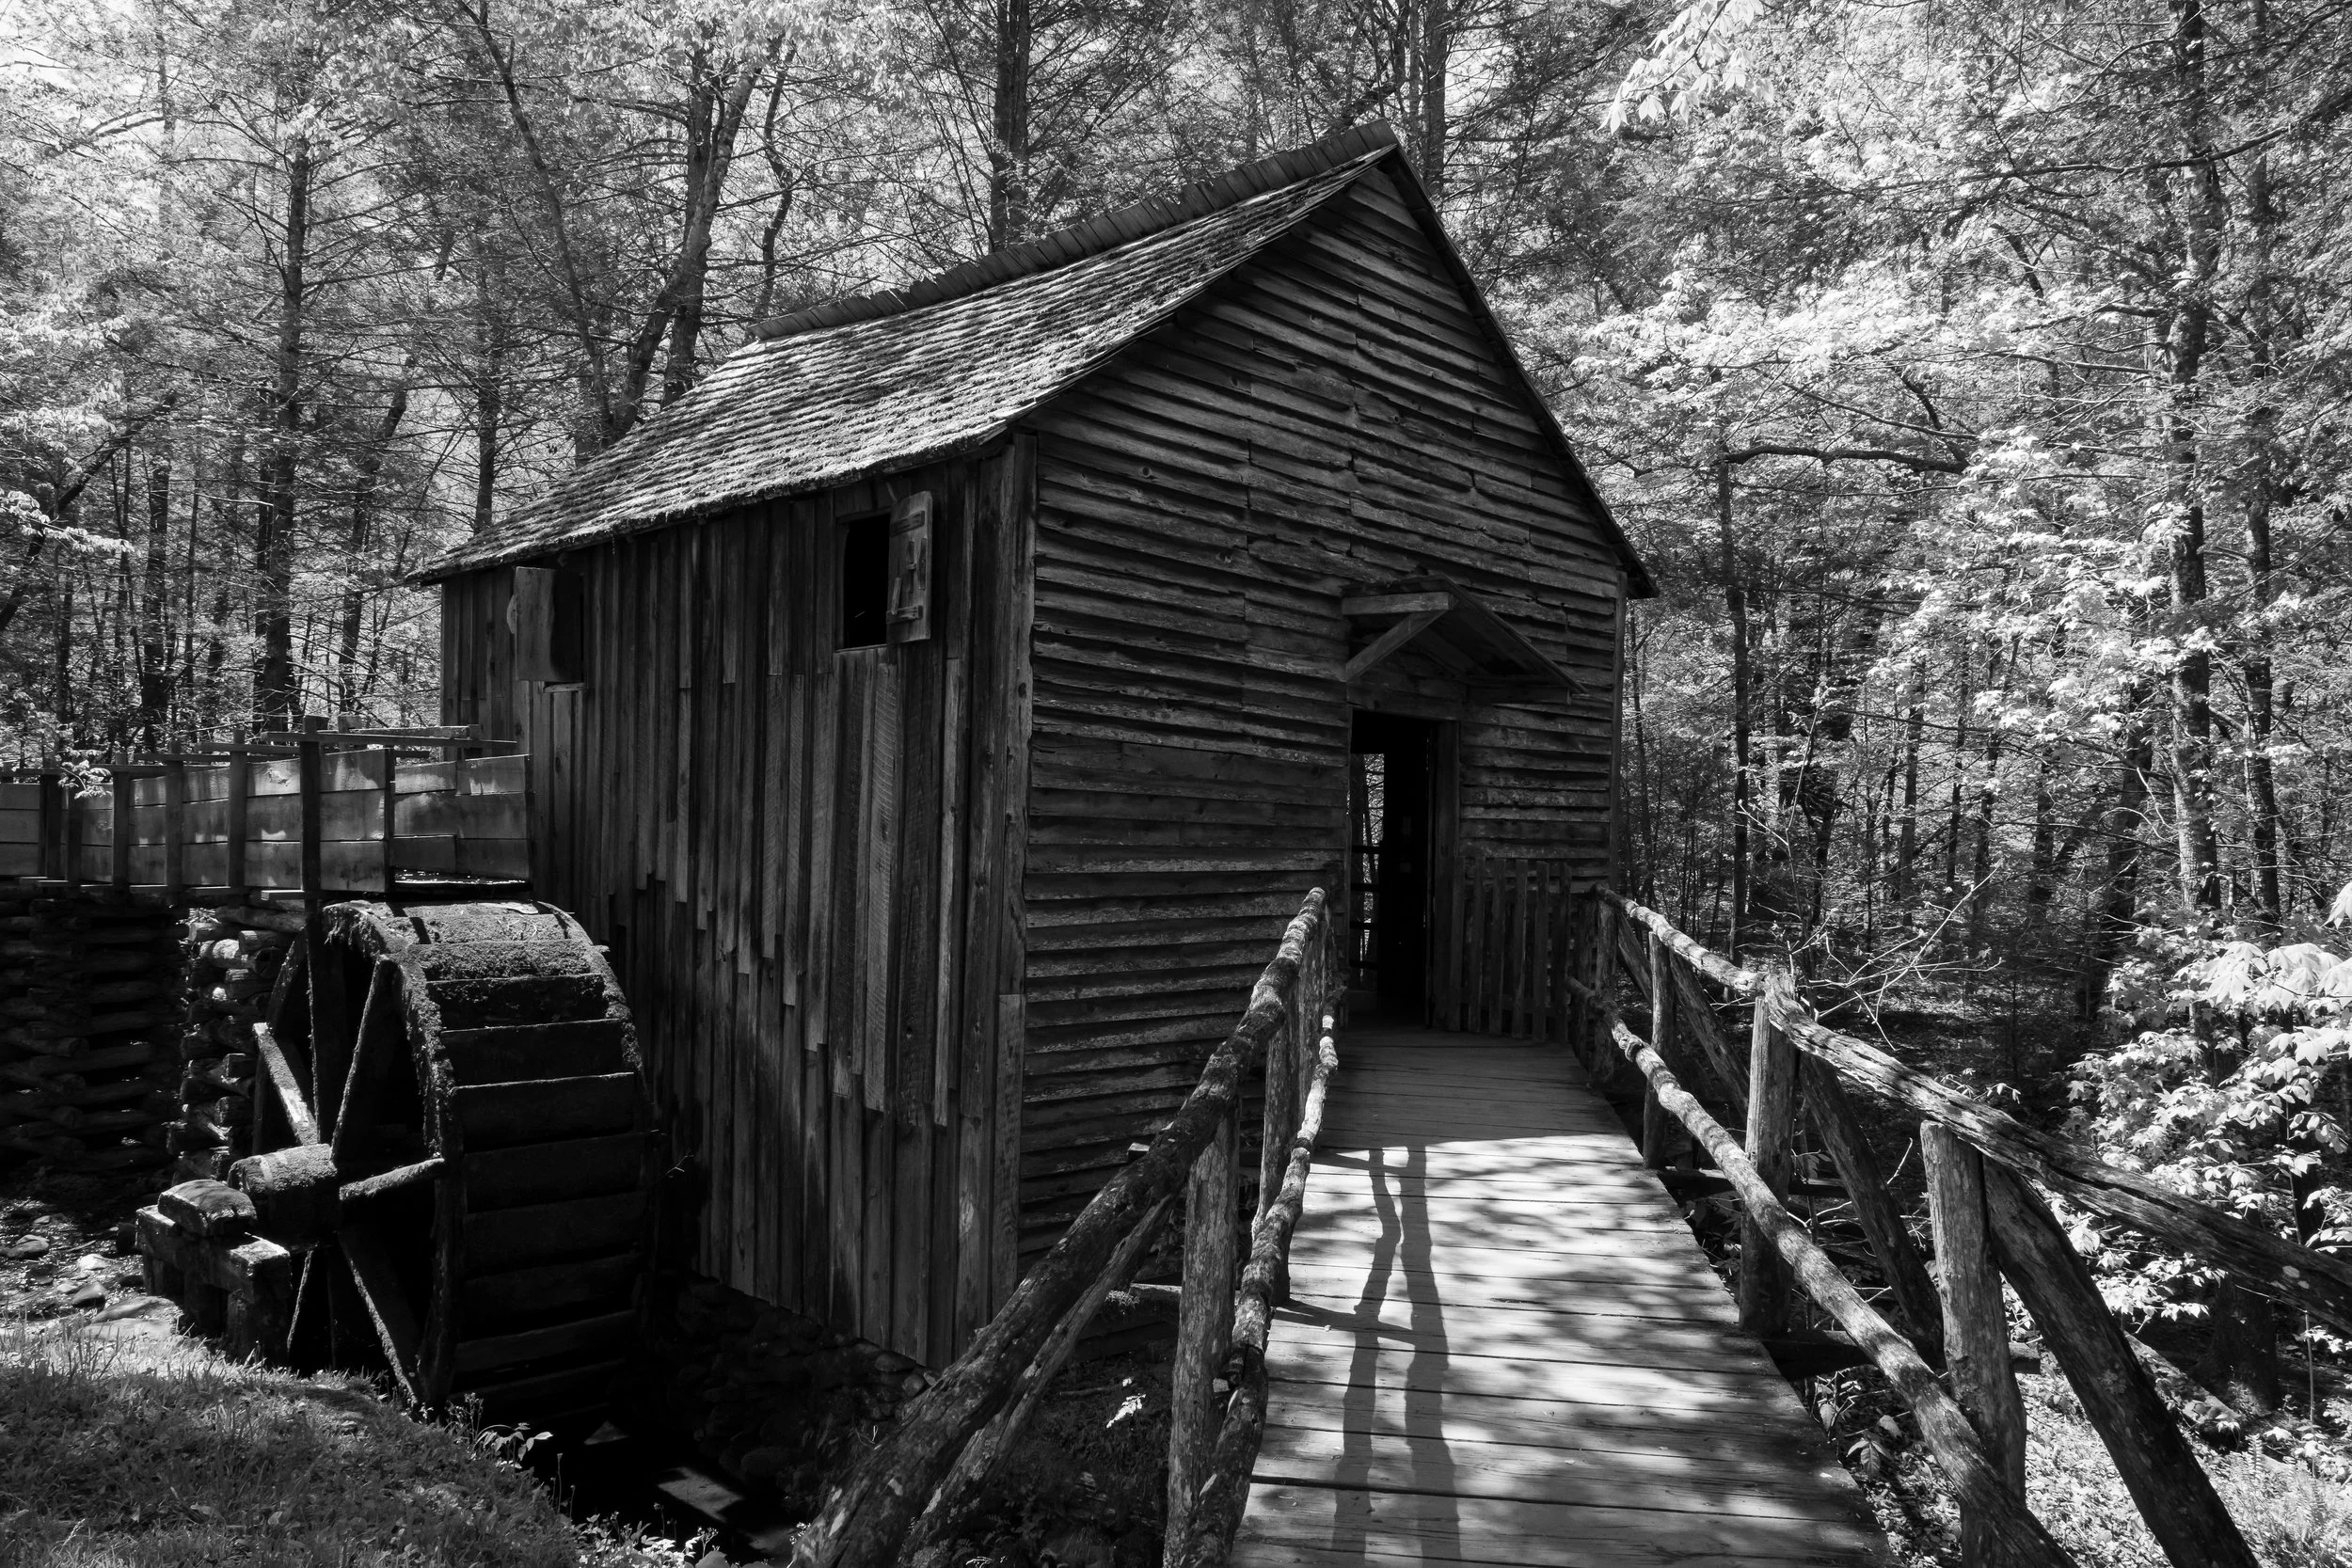
John P. Cable Grist Mill
Thanks for reading if you made it this far. I hope you gained a better sense of this place and follow your curiosity and ask yourself questions when you visit a new place.
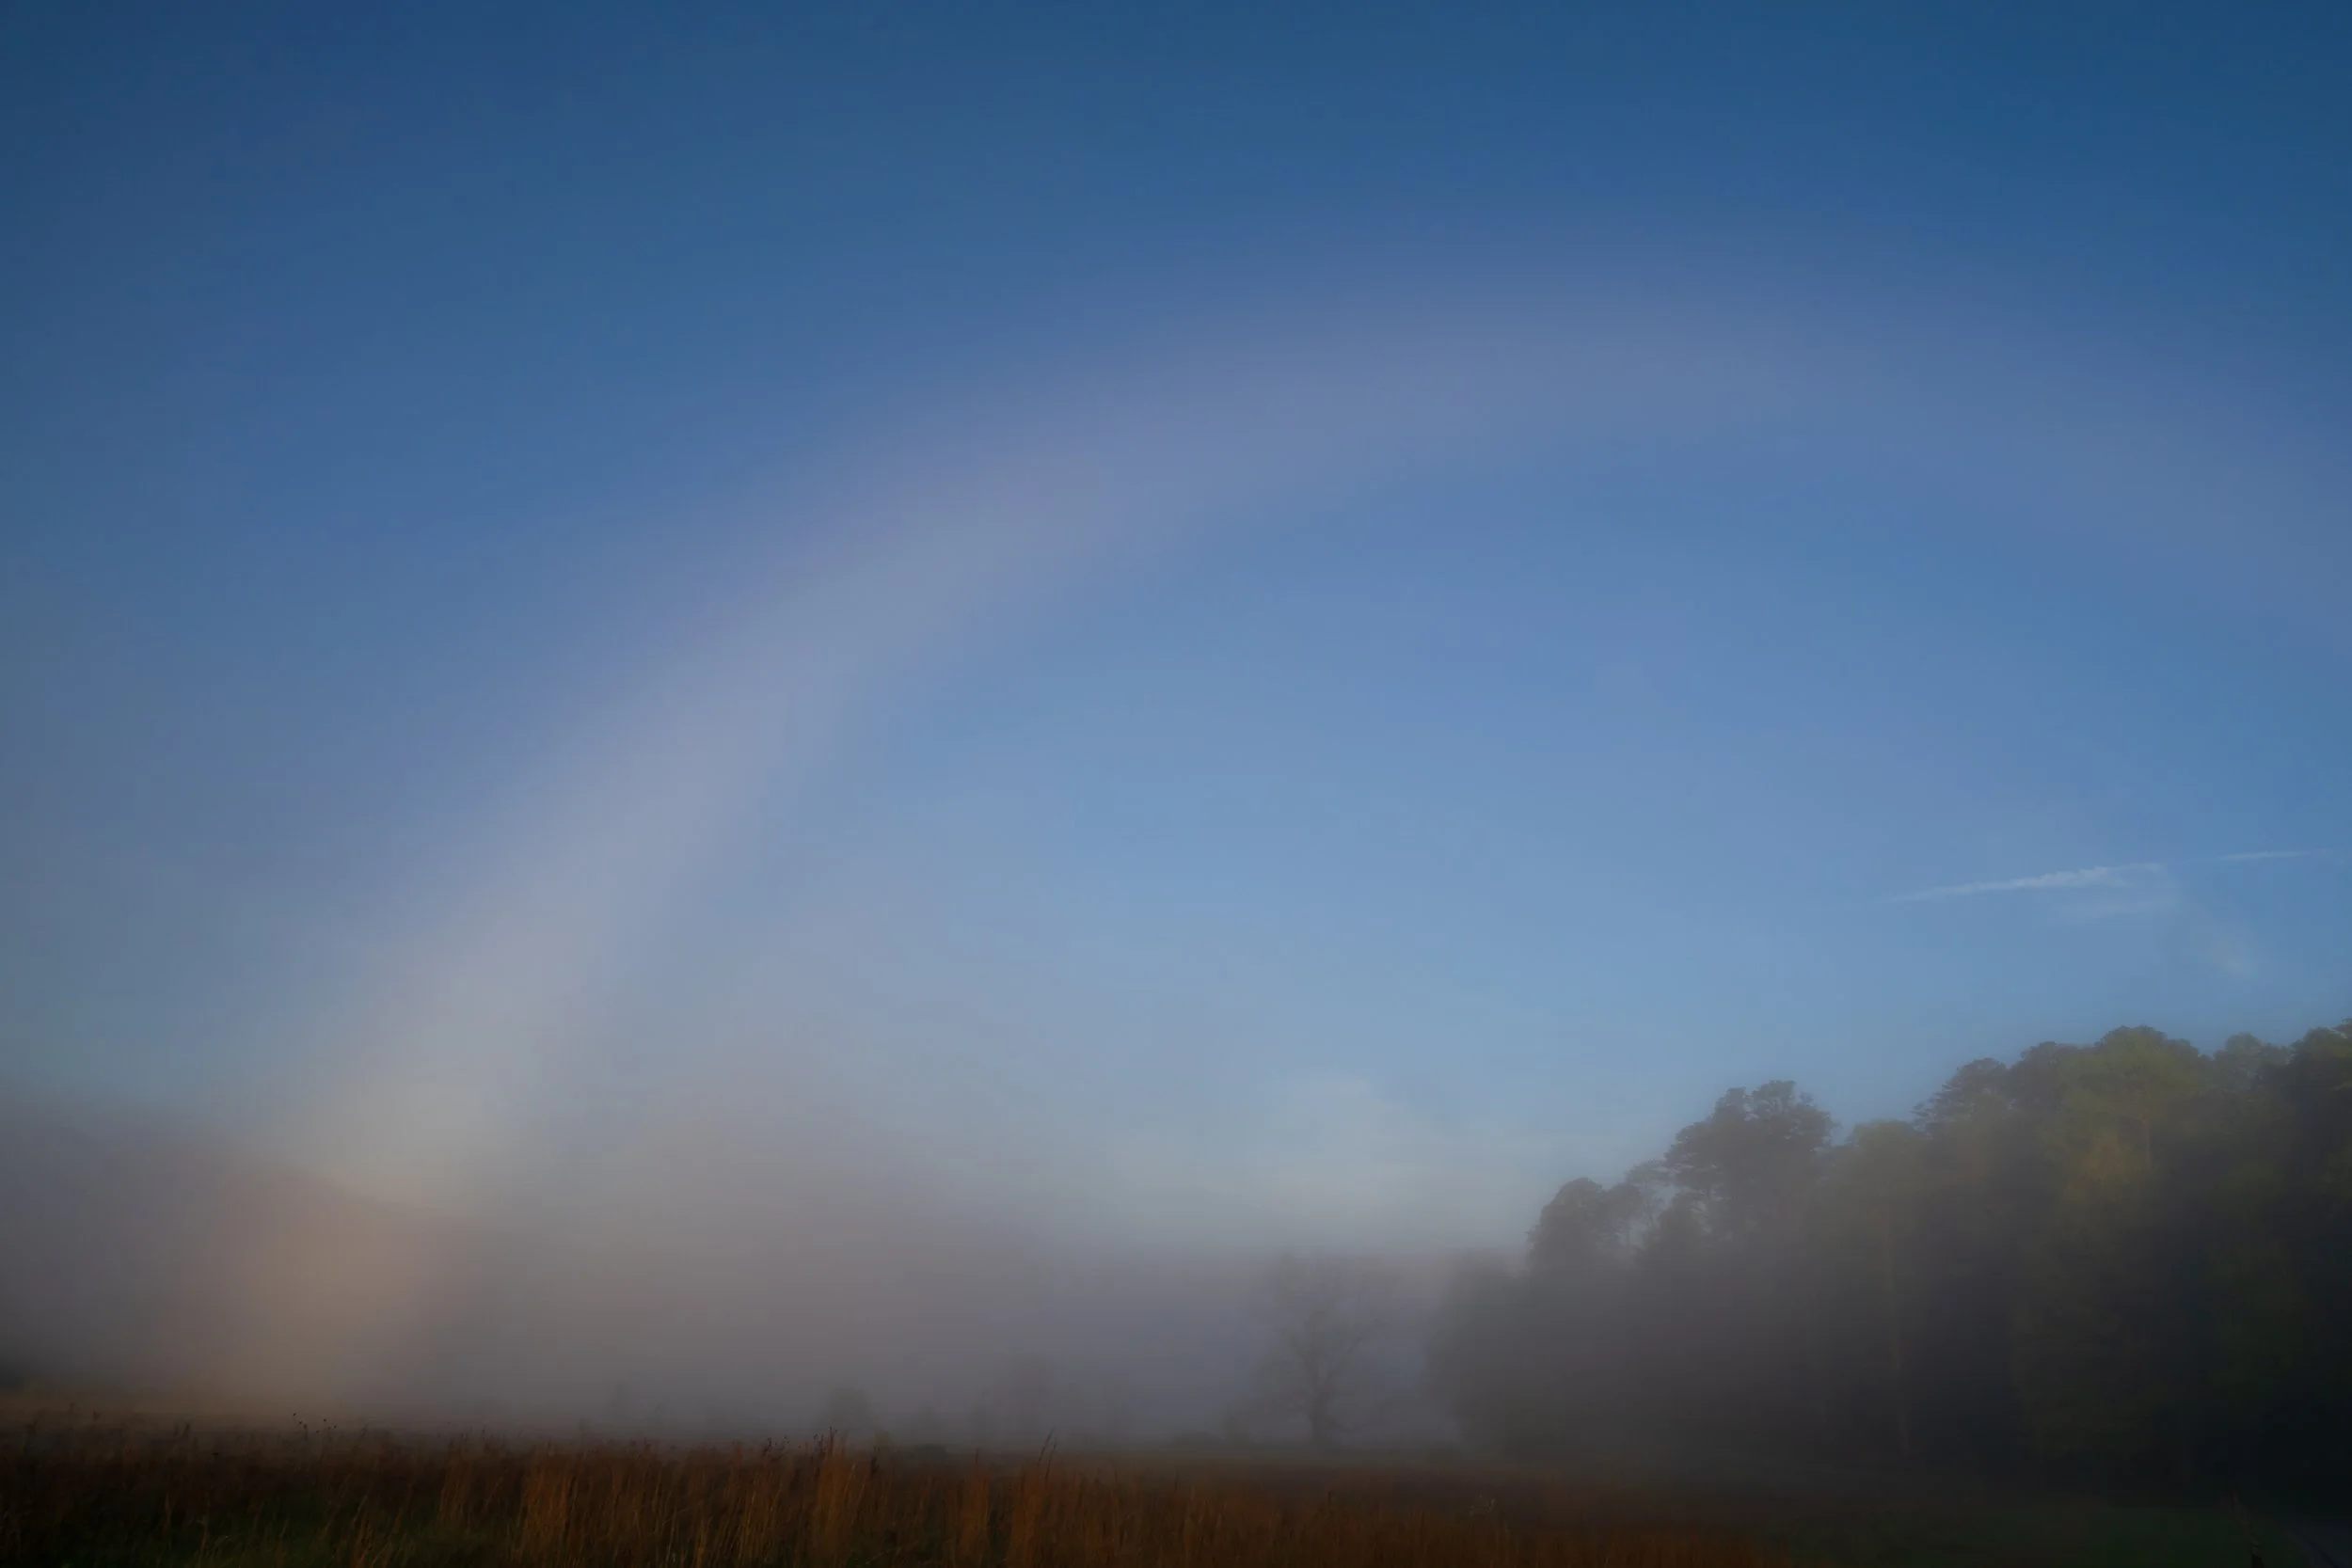
A fog bow over Cades Cove
How to Find and Photograph a Fox Den Ethically
Note: I publish a newsletter on Substack. This is an example of an article I publish twice a month other there. To subscribe to that newsletter go to Wild Photo Ideas | Substack
Why photograph fox kits?
Few animals in nature are as playful, cute, and surprising as fox kits. You never know what you will see them do!
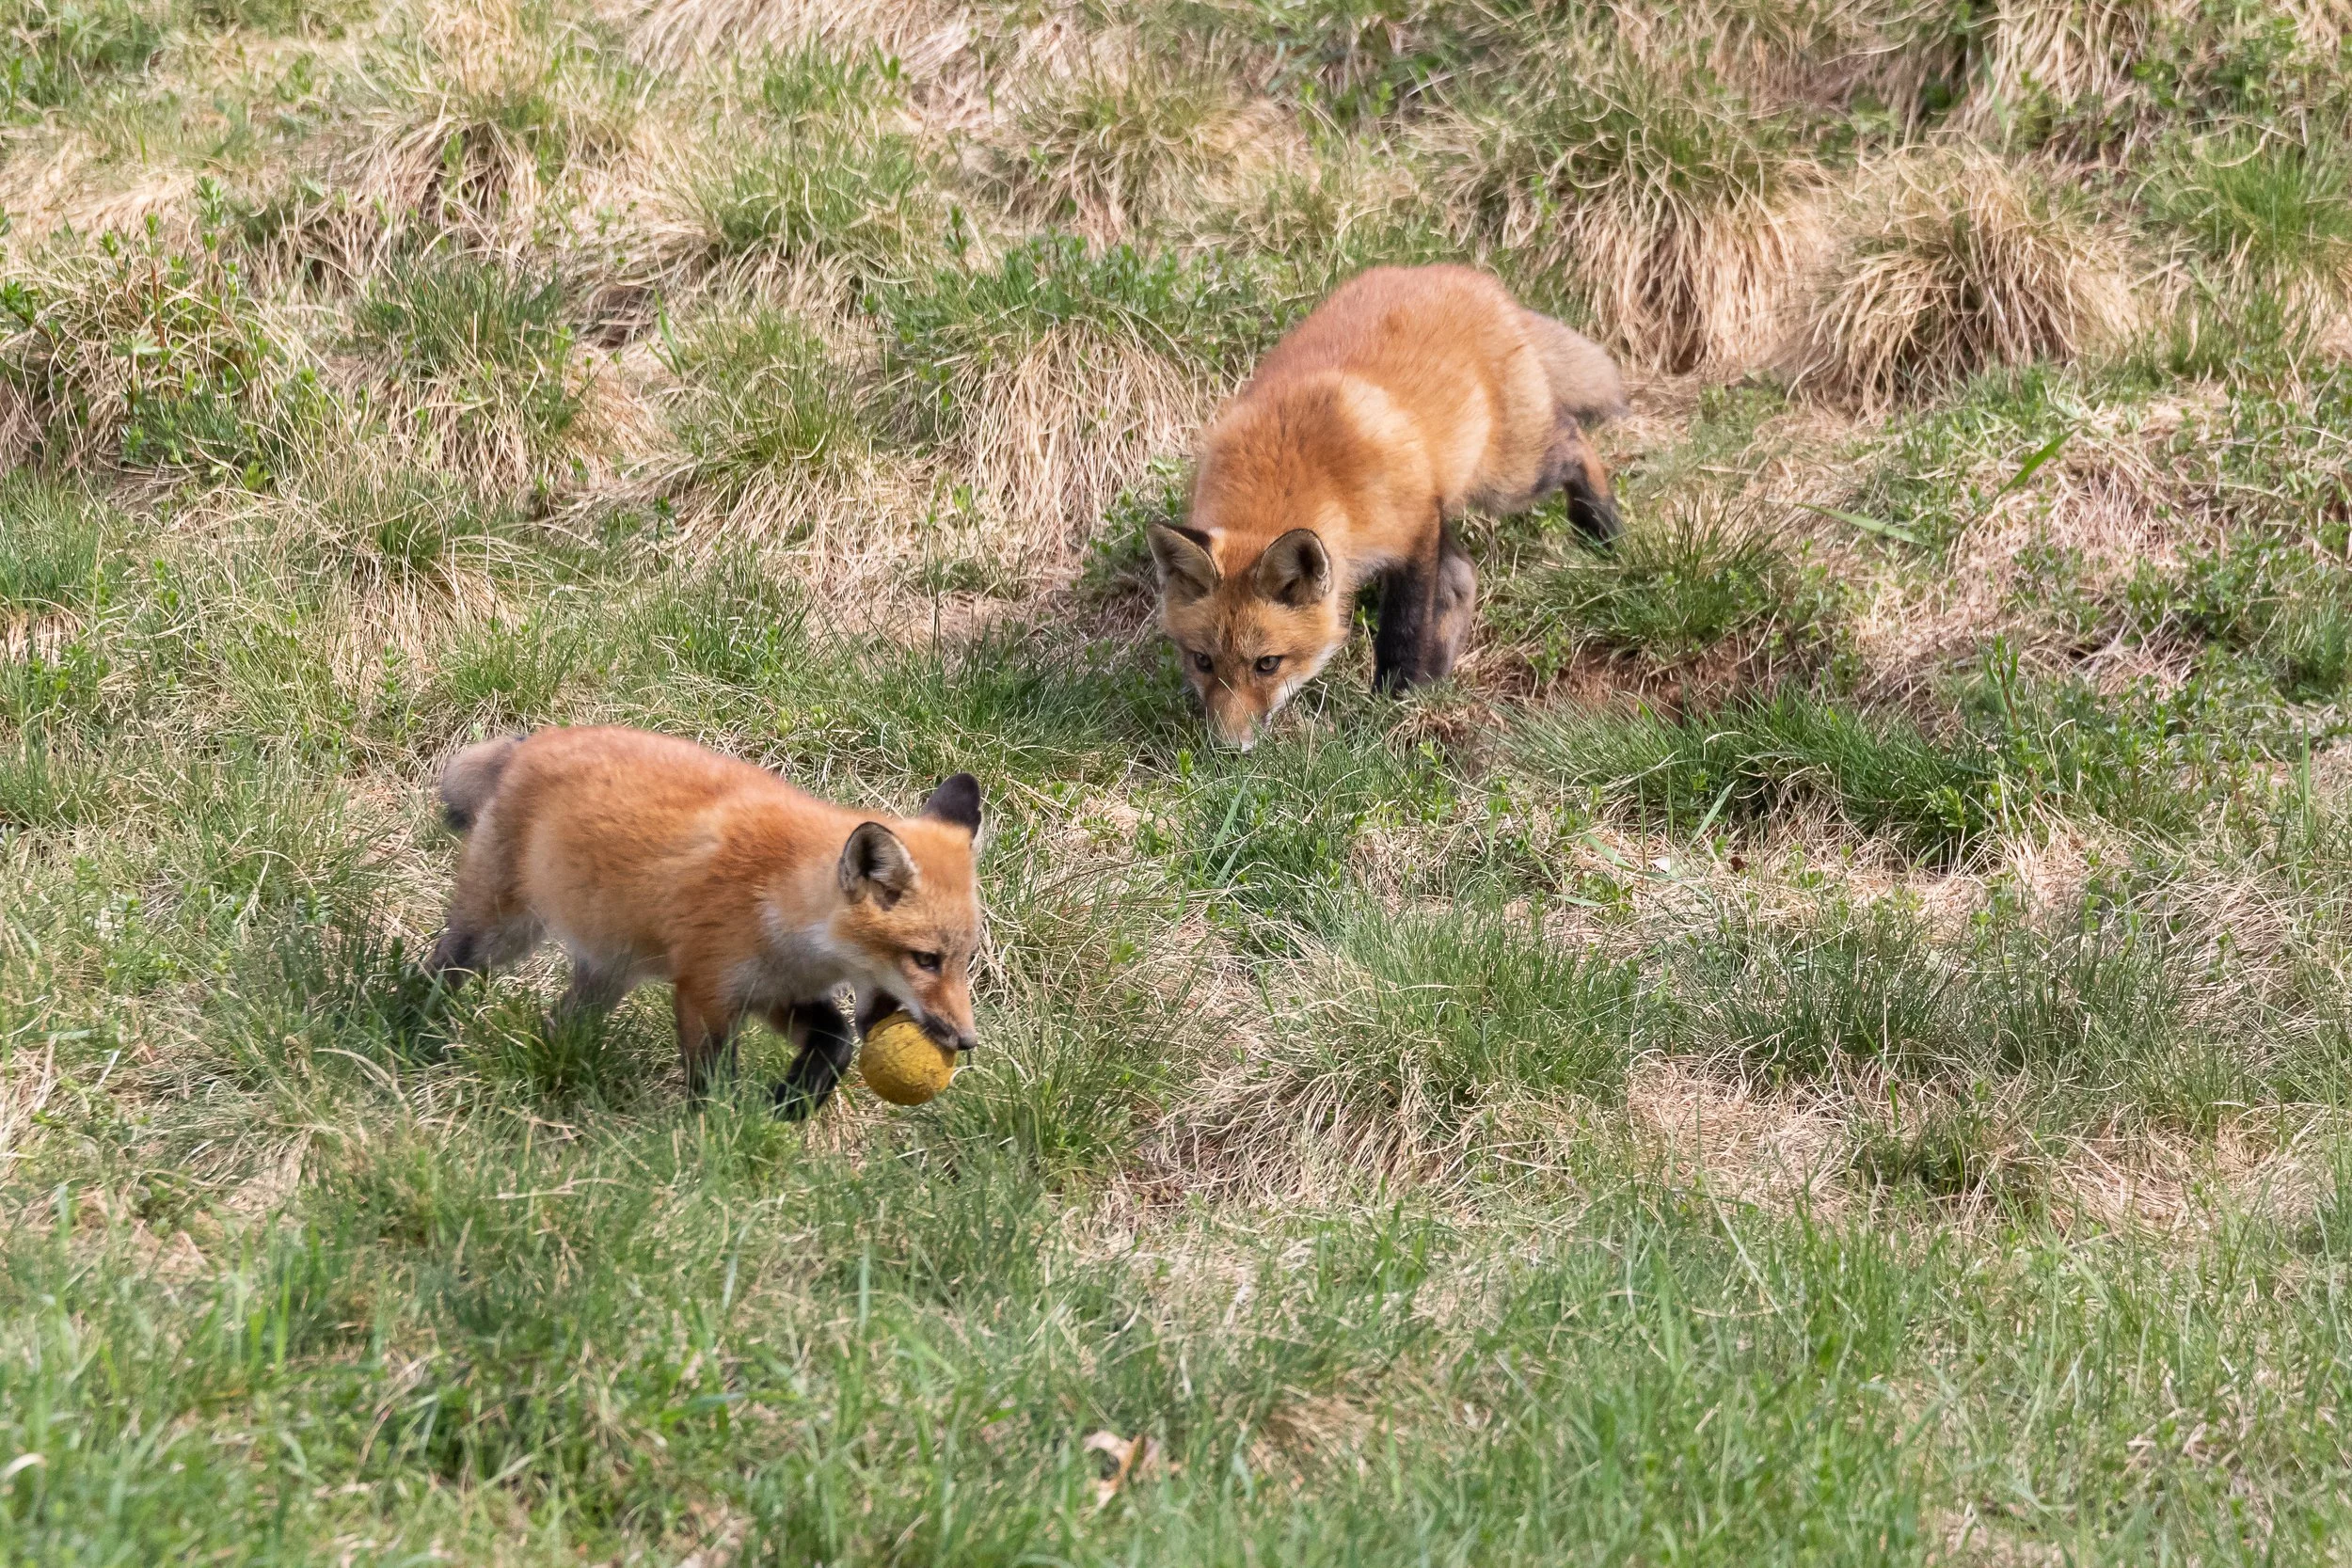
These fox kits must have stolen some kids ball and were playing catch and fetch with it!
Red foxes are common across much of the North American continent making them a subject that is possible for nearly everyone. But of course, there is a catch, it can be difficult to find and photograph a fox den successfully and ethically. In this article I will give the short version for success! As you will see April and May are a great time for this project!
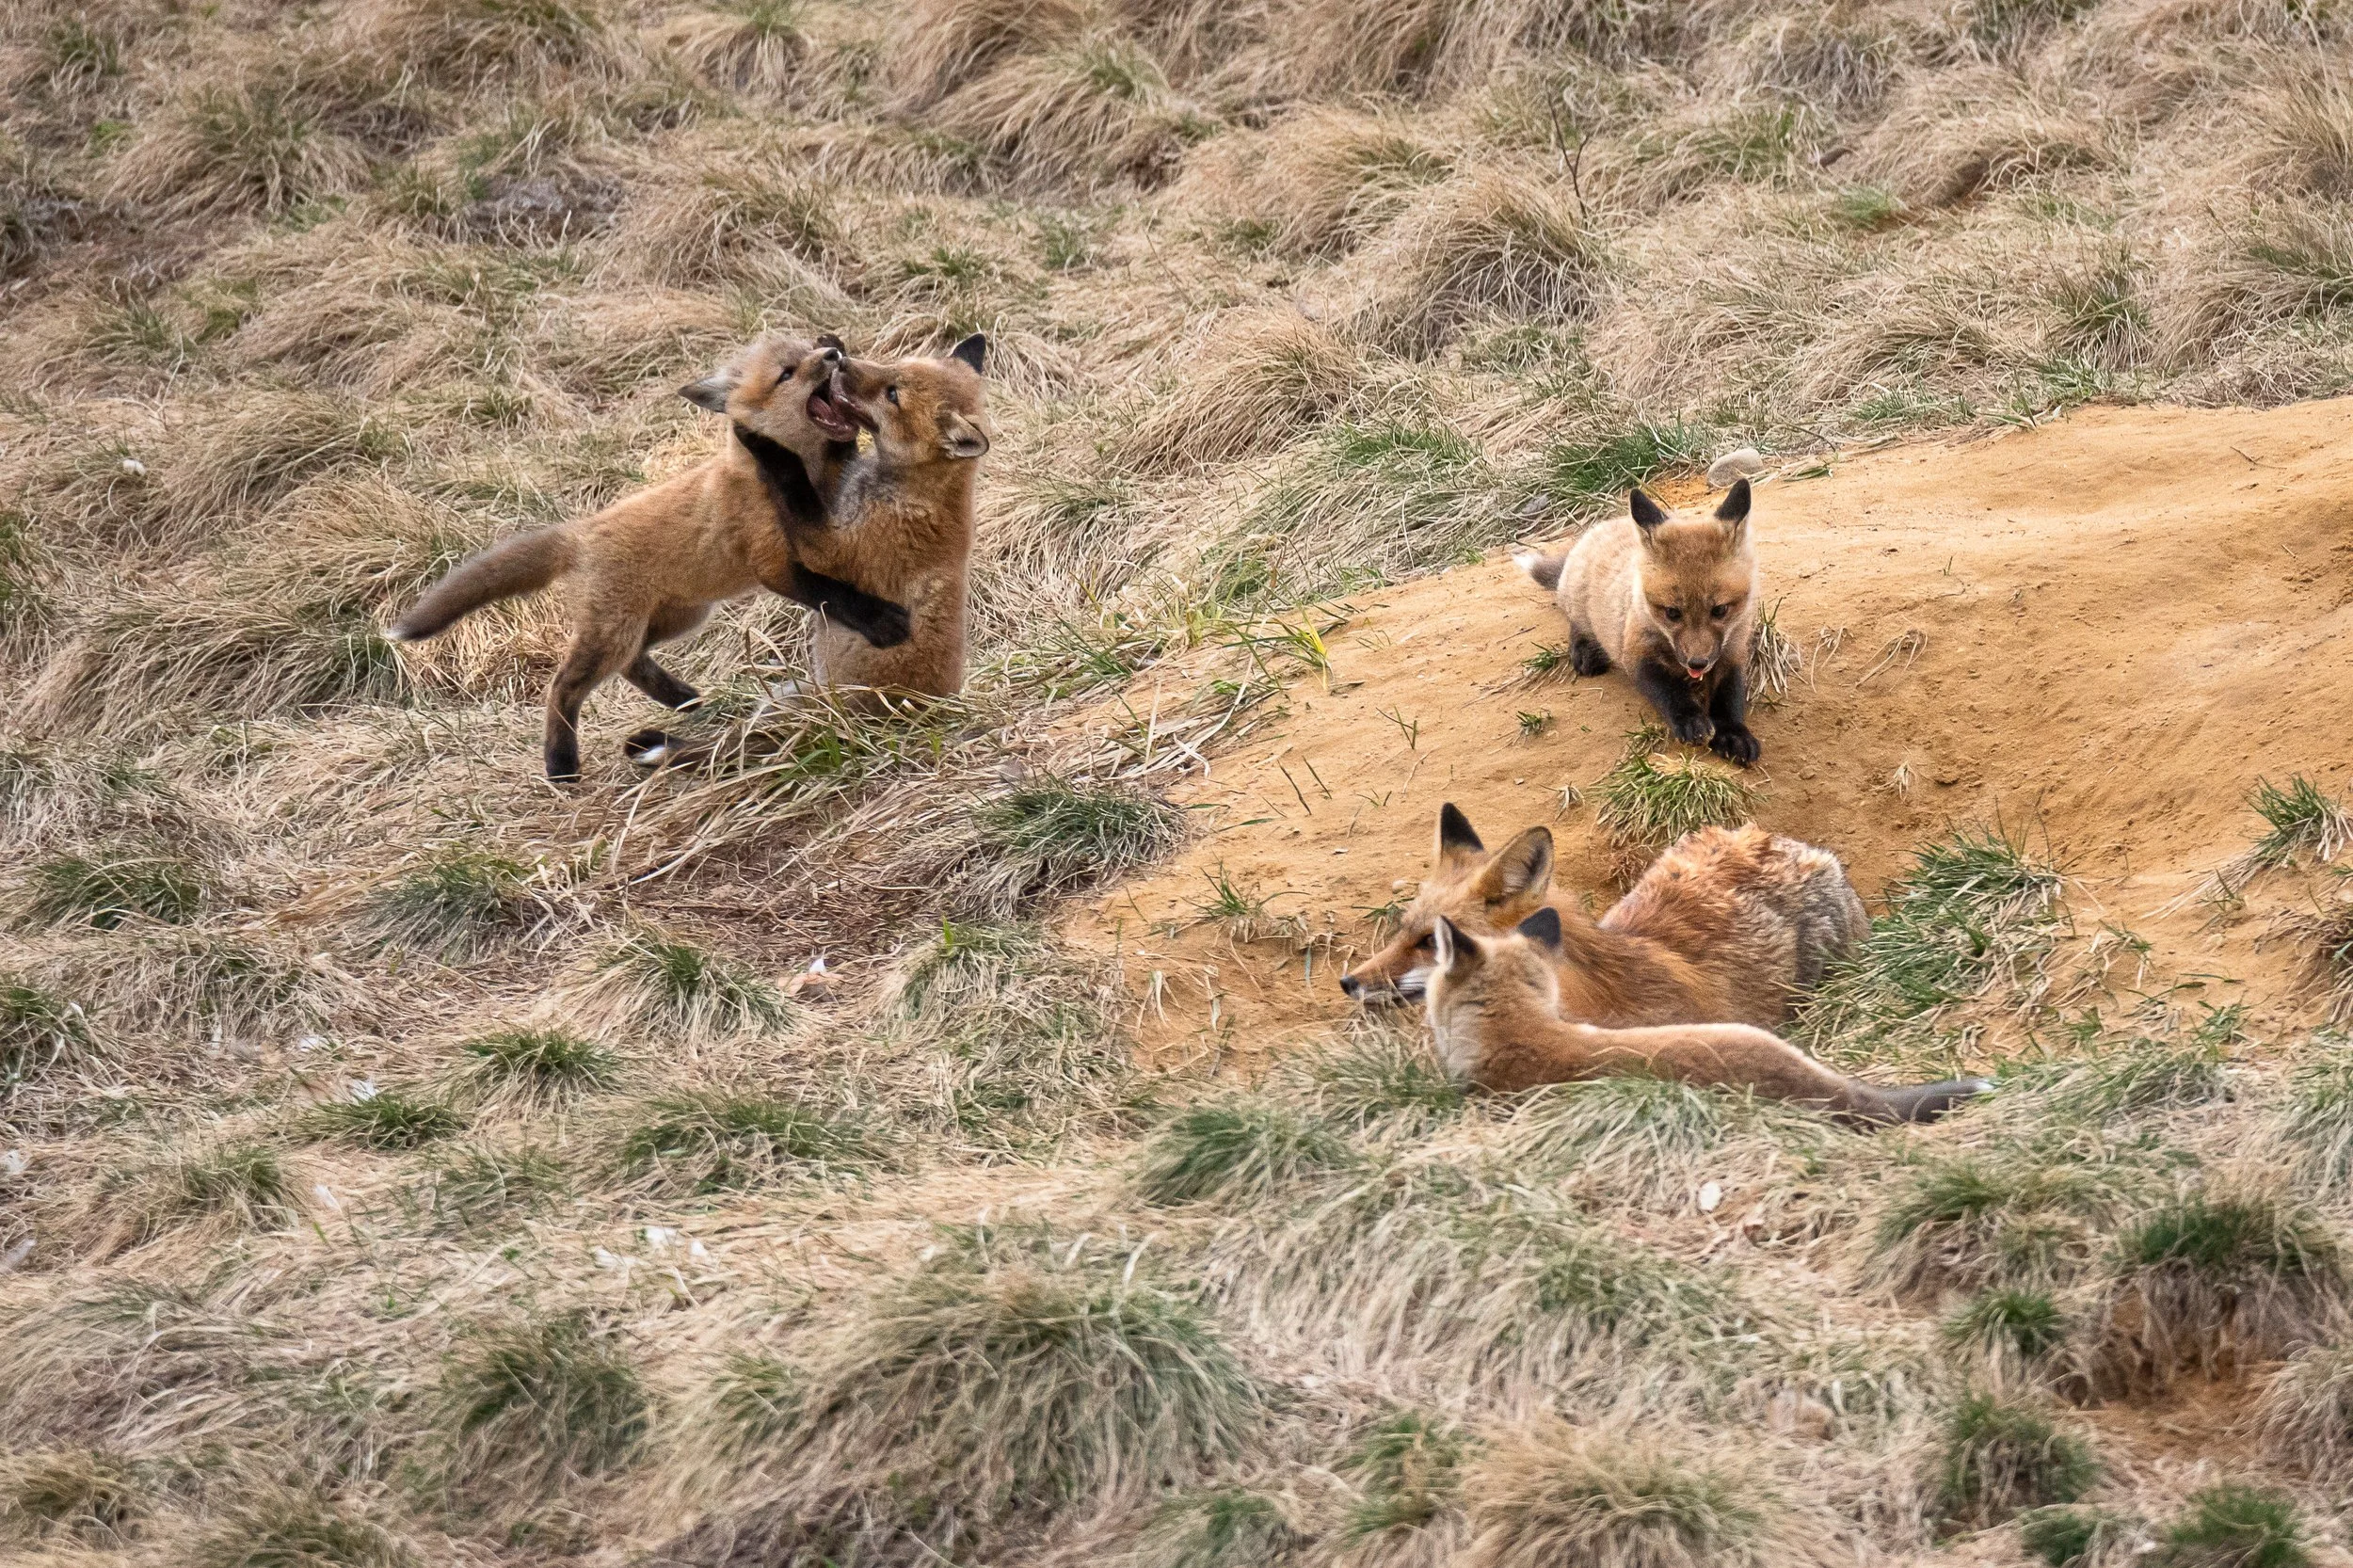
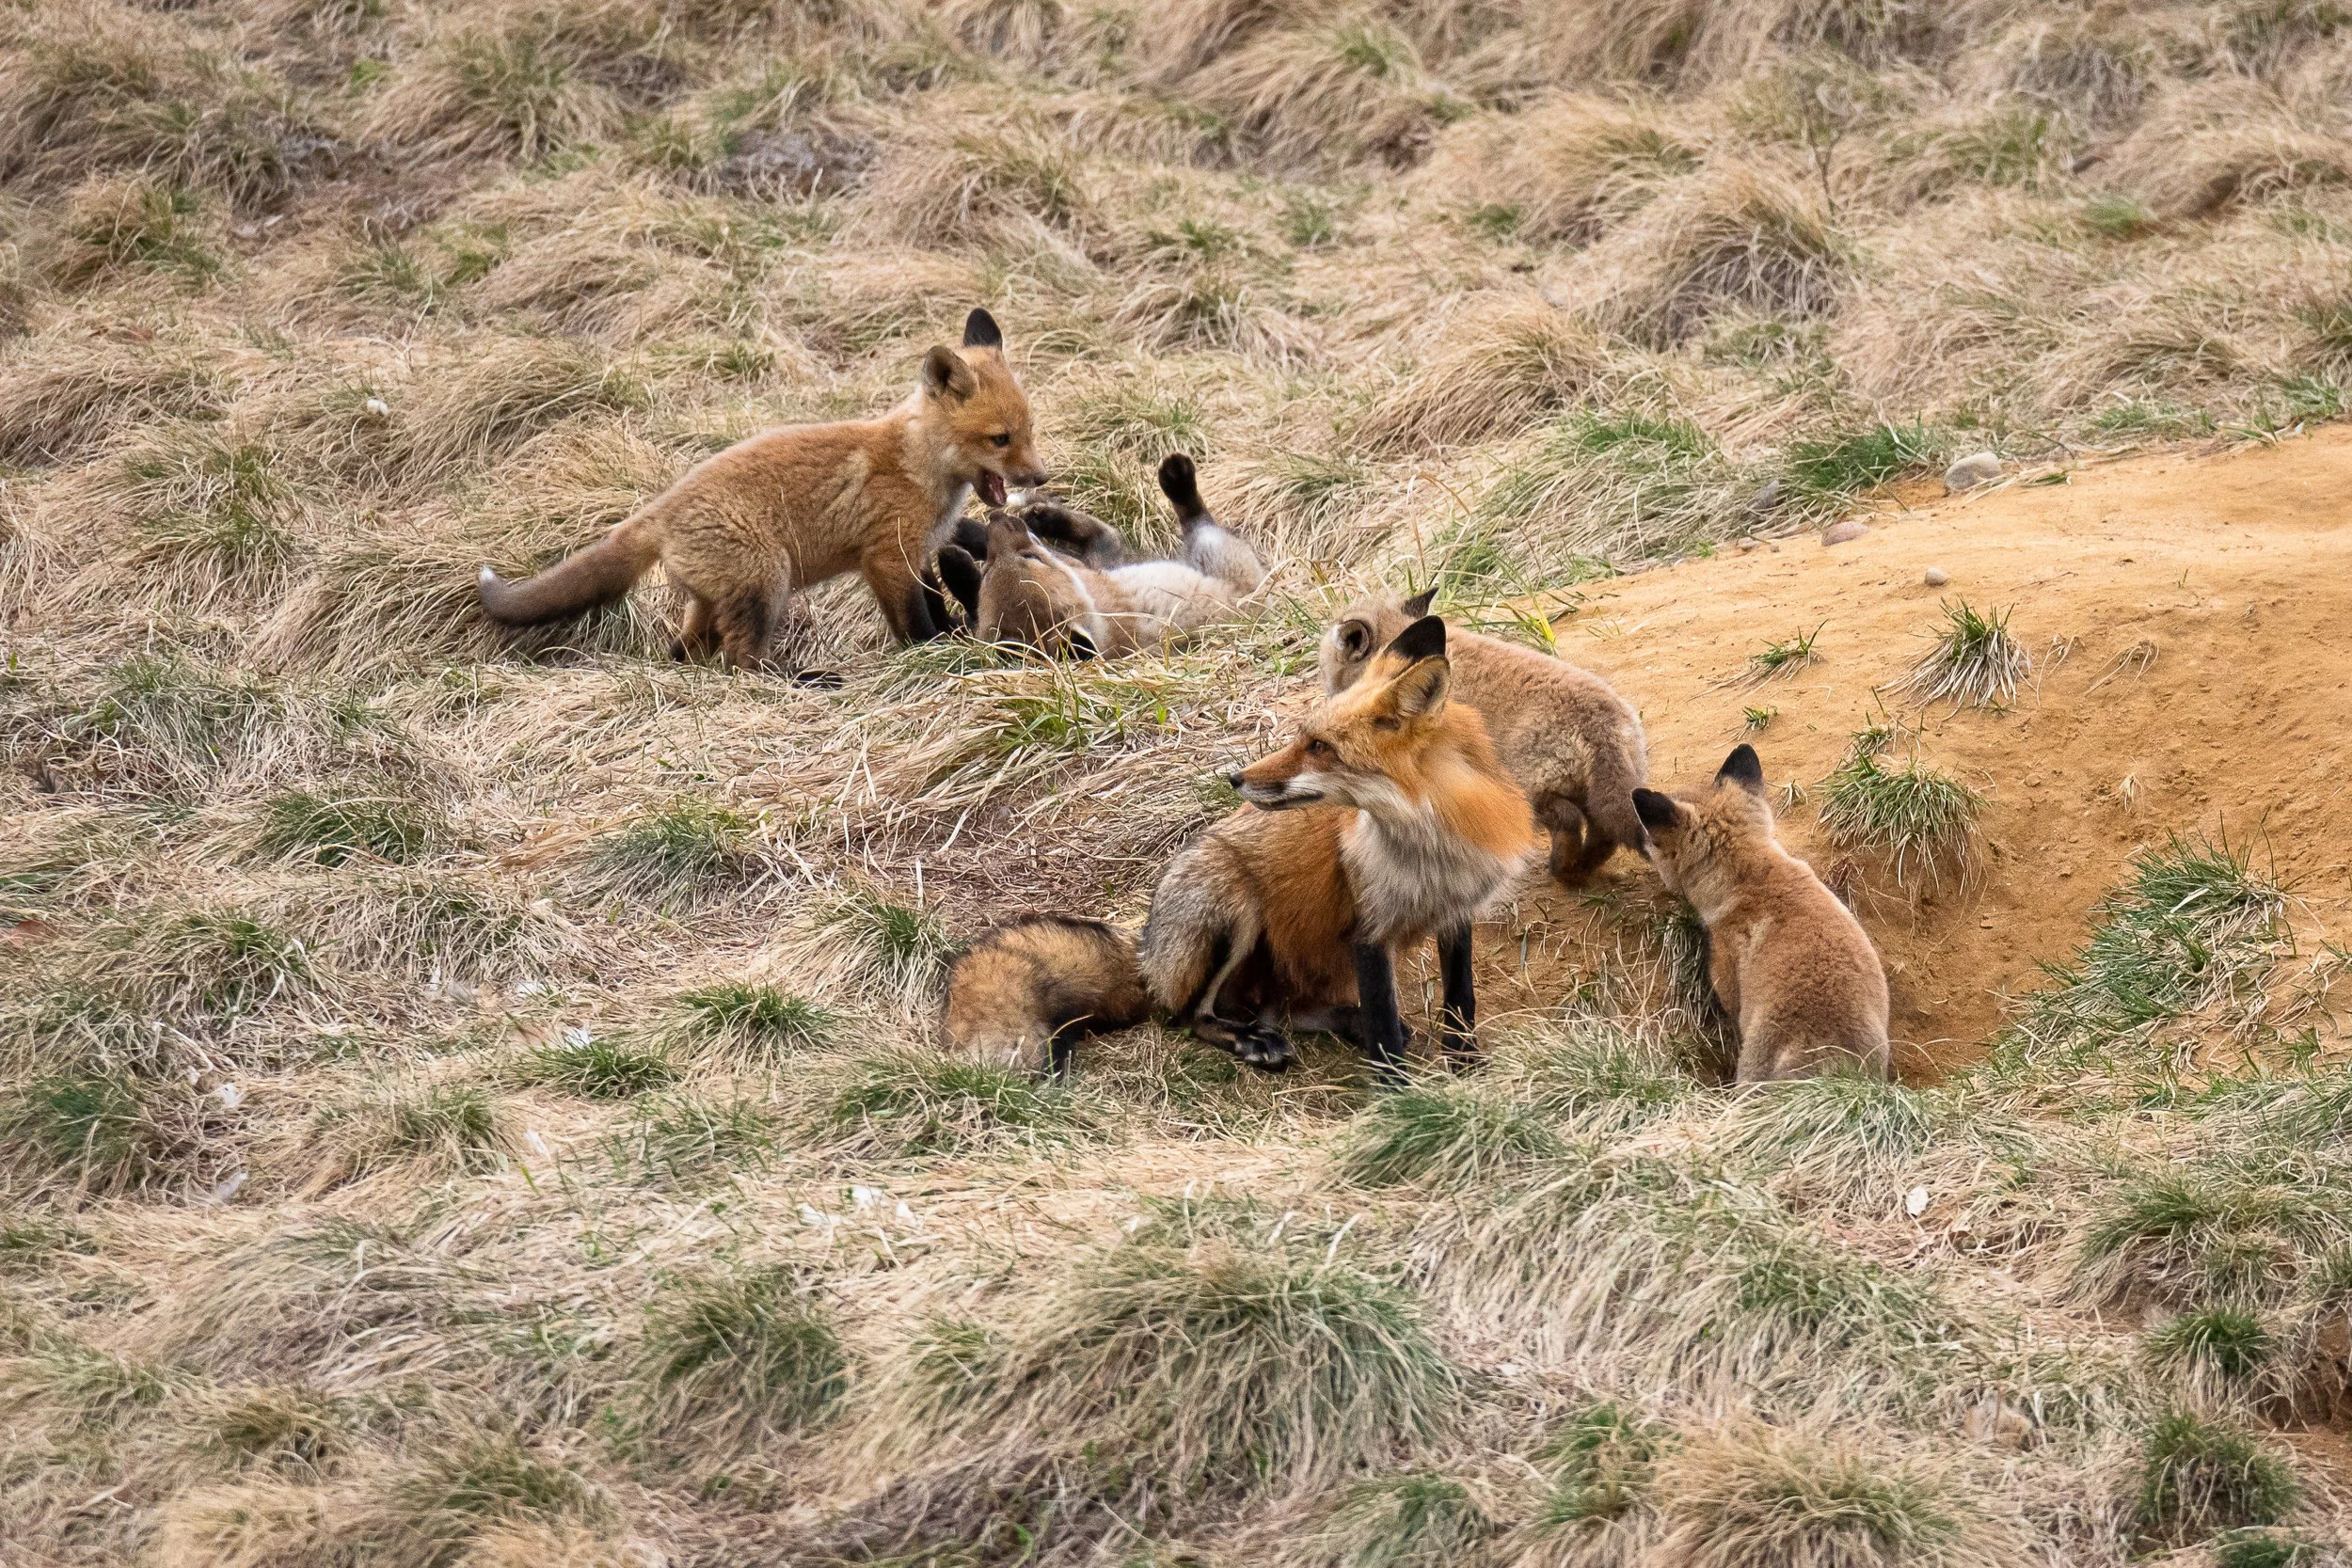
A mother fox sits with her kits at the sandy opening to her den in a field.
How to find fox dens
The best tip I can give you is that fox dens tend to be found close to human habitation in sandy spots on fields, or underneath stonewalls, old buildings, or logs. I have not found any dens deeper in the woods. You might be surprised at how close dens are to people. I believe this is done by the foxes on purpose to protect their young from the much larger coyotes which will prey upon them. Coyotes tend to avoid humans so I think foxes may feel safer closer to humans.
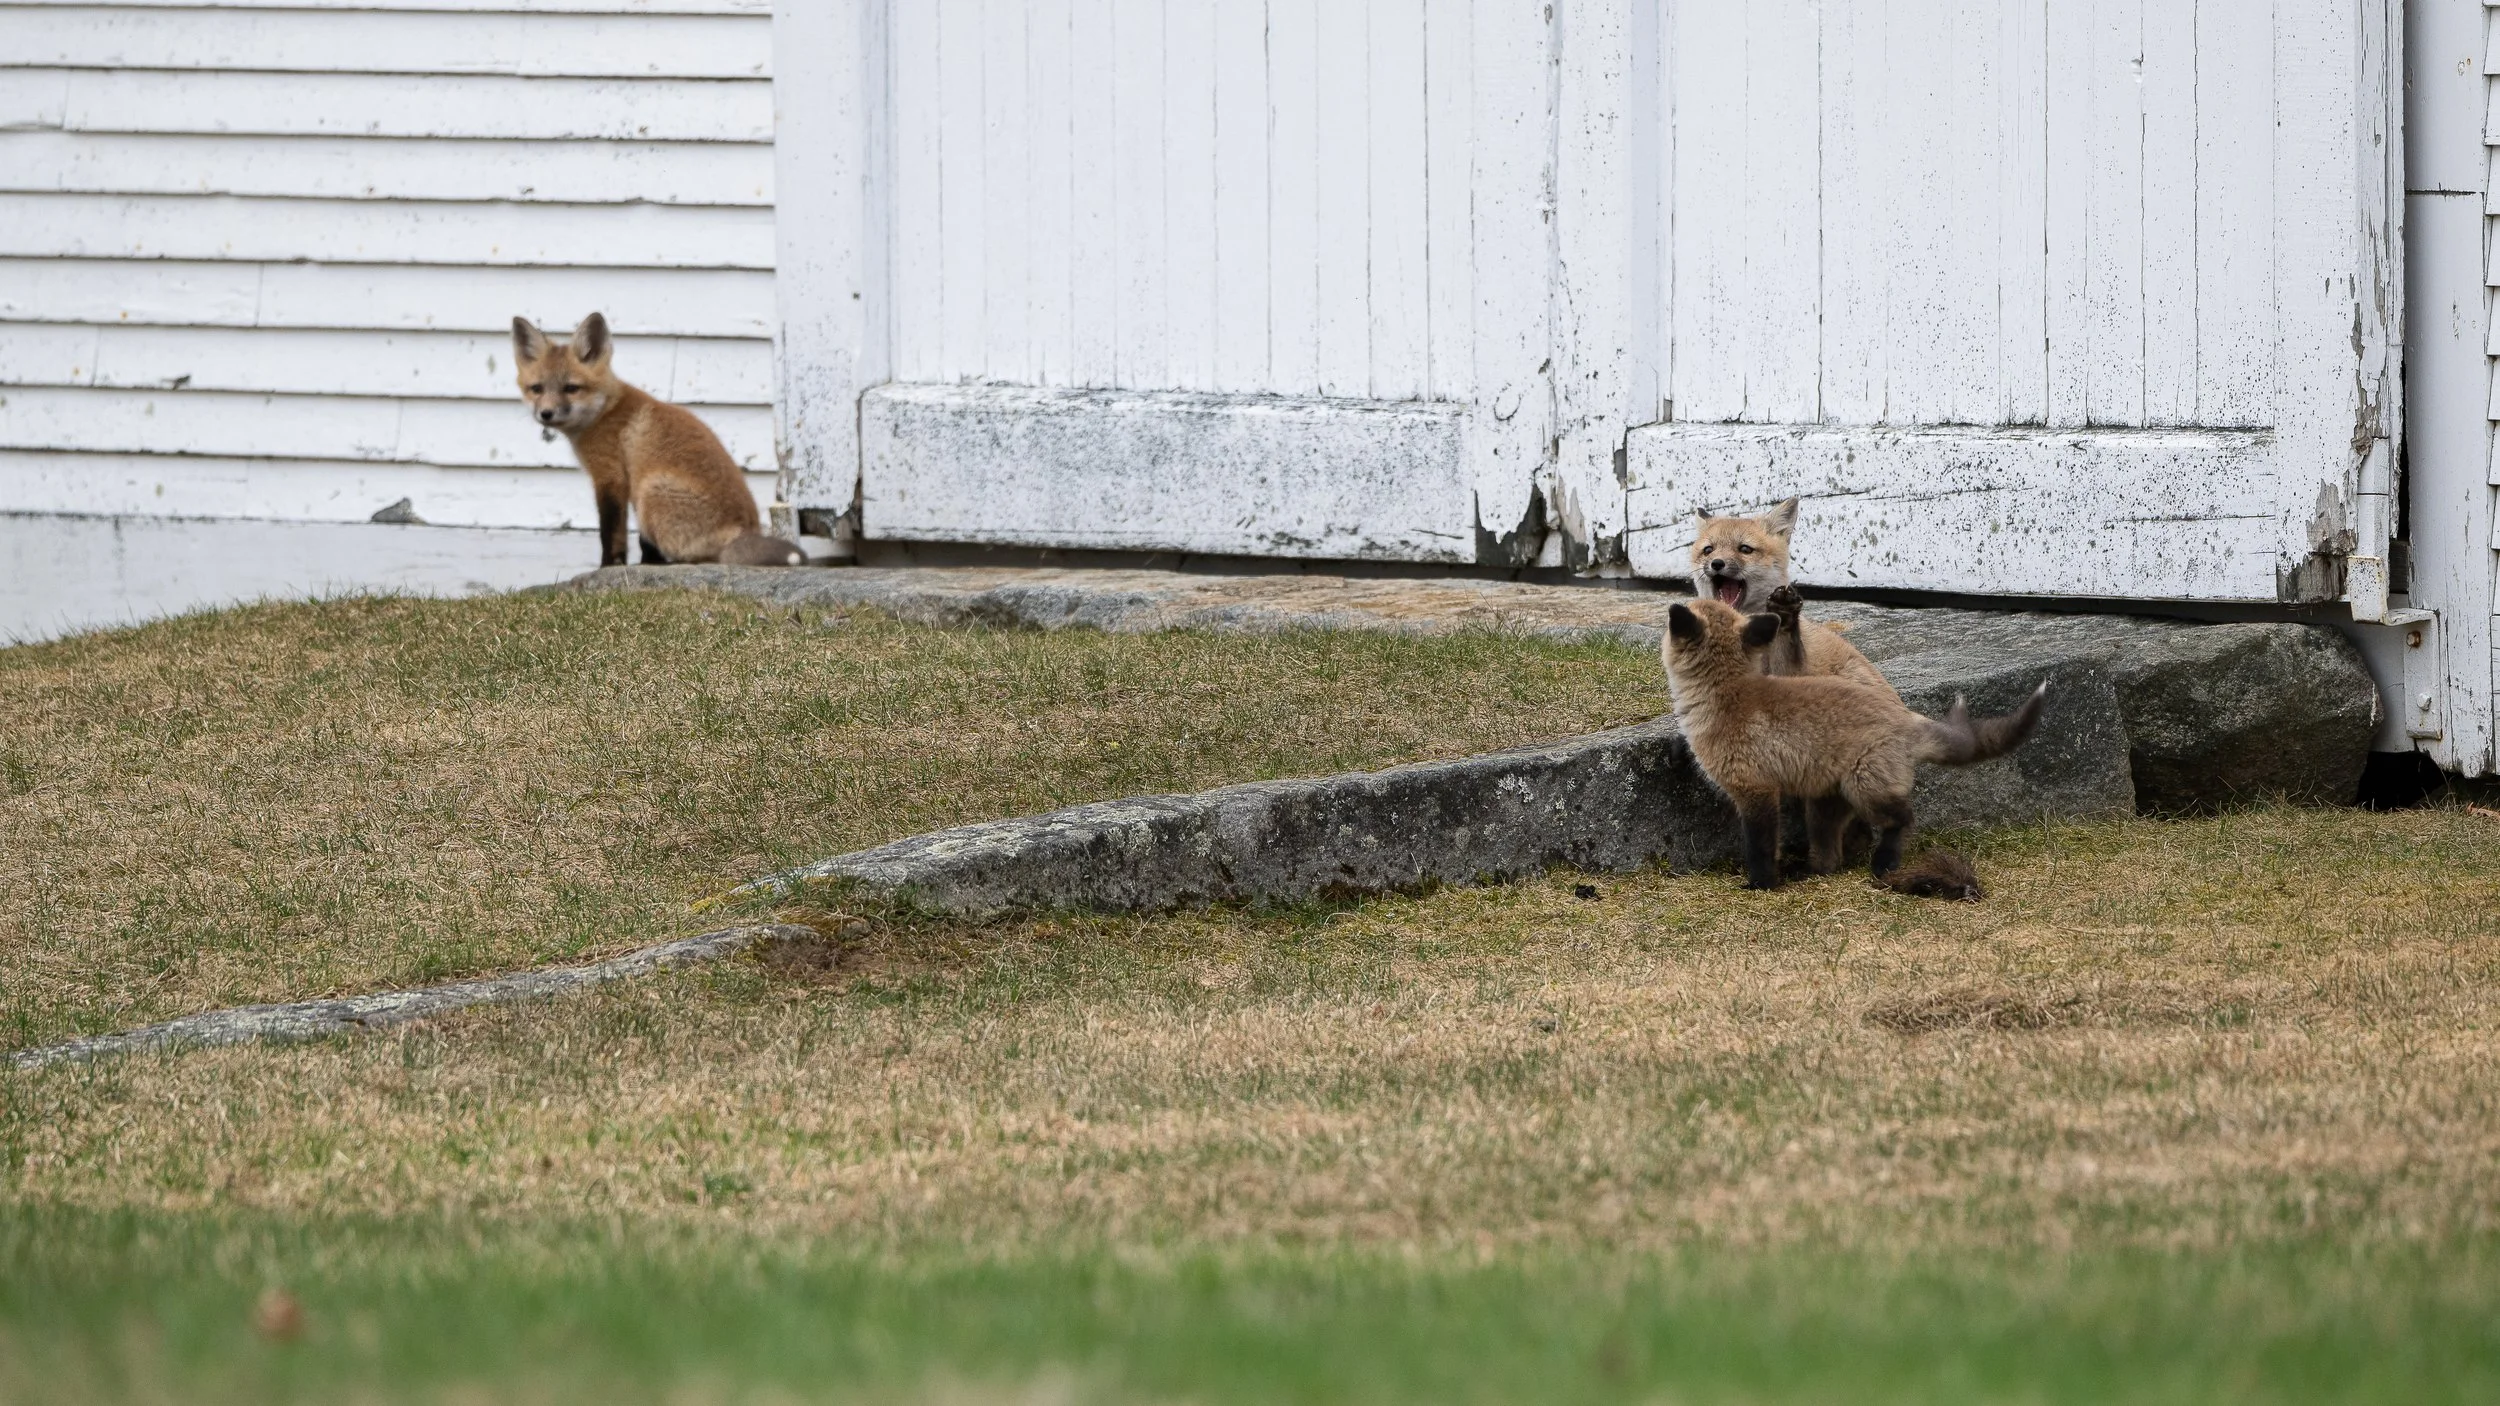
This fox family had a den right under the building!
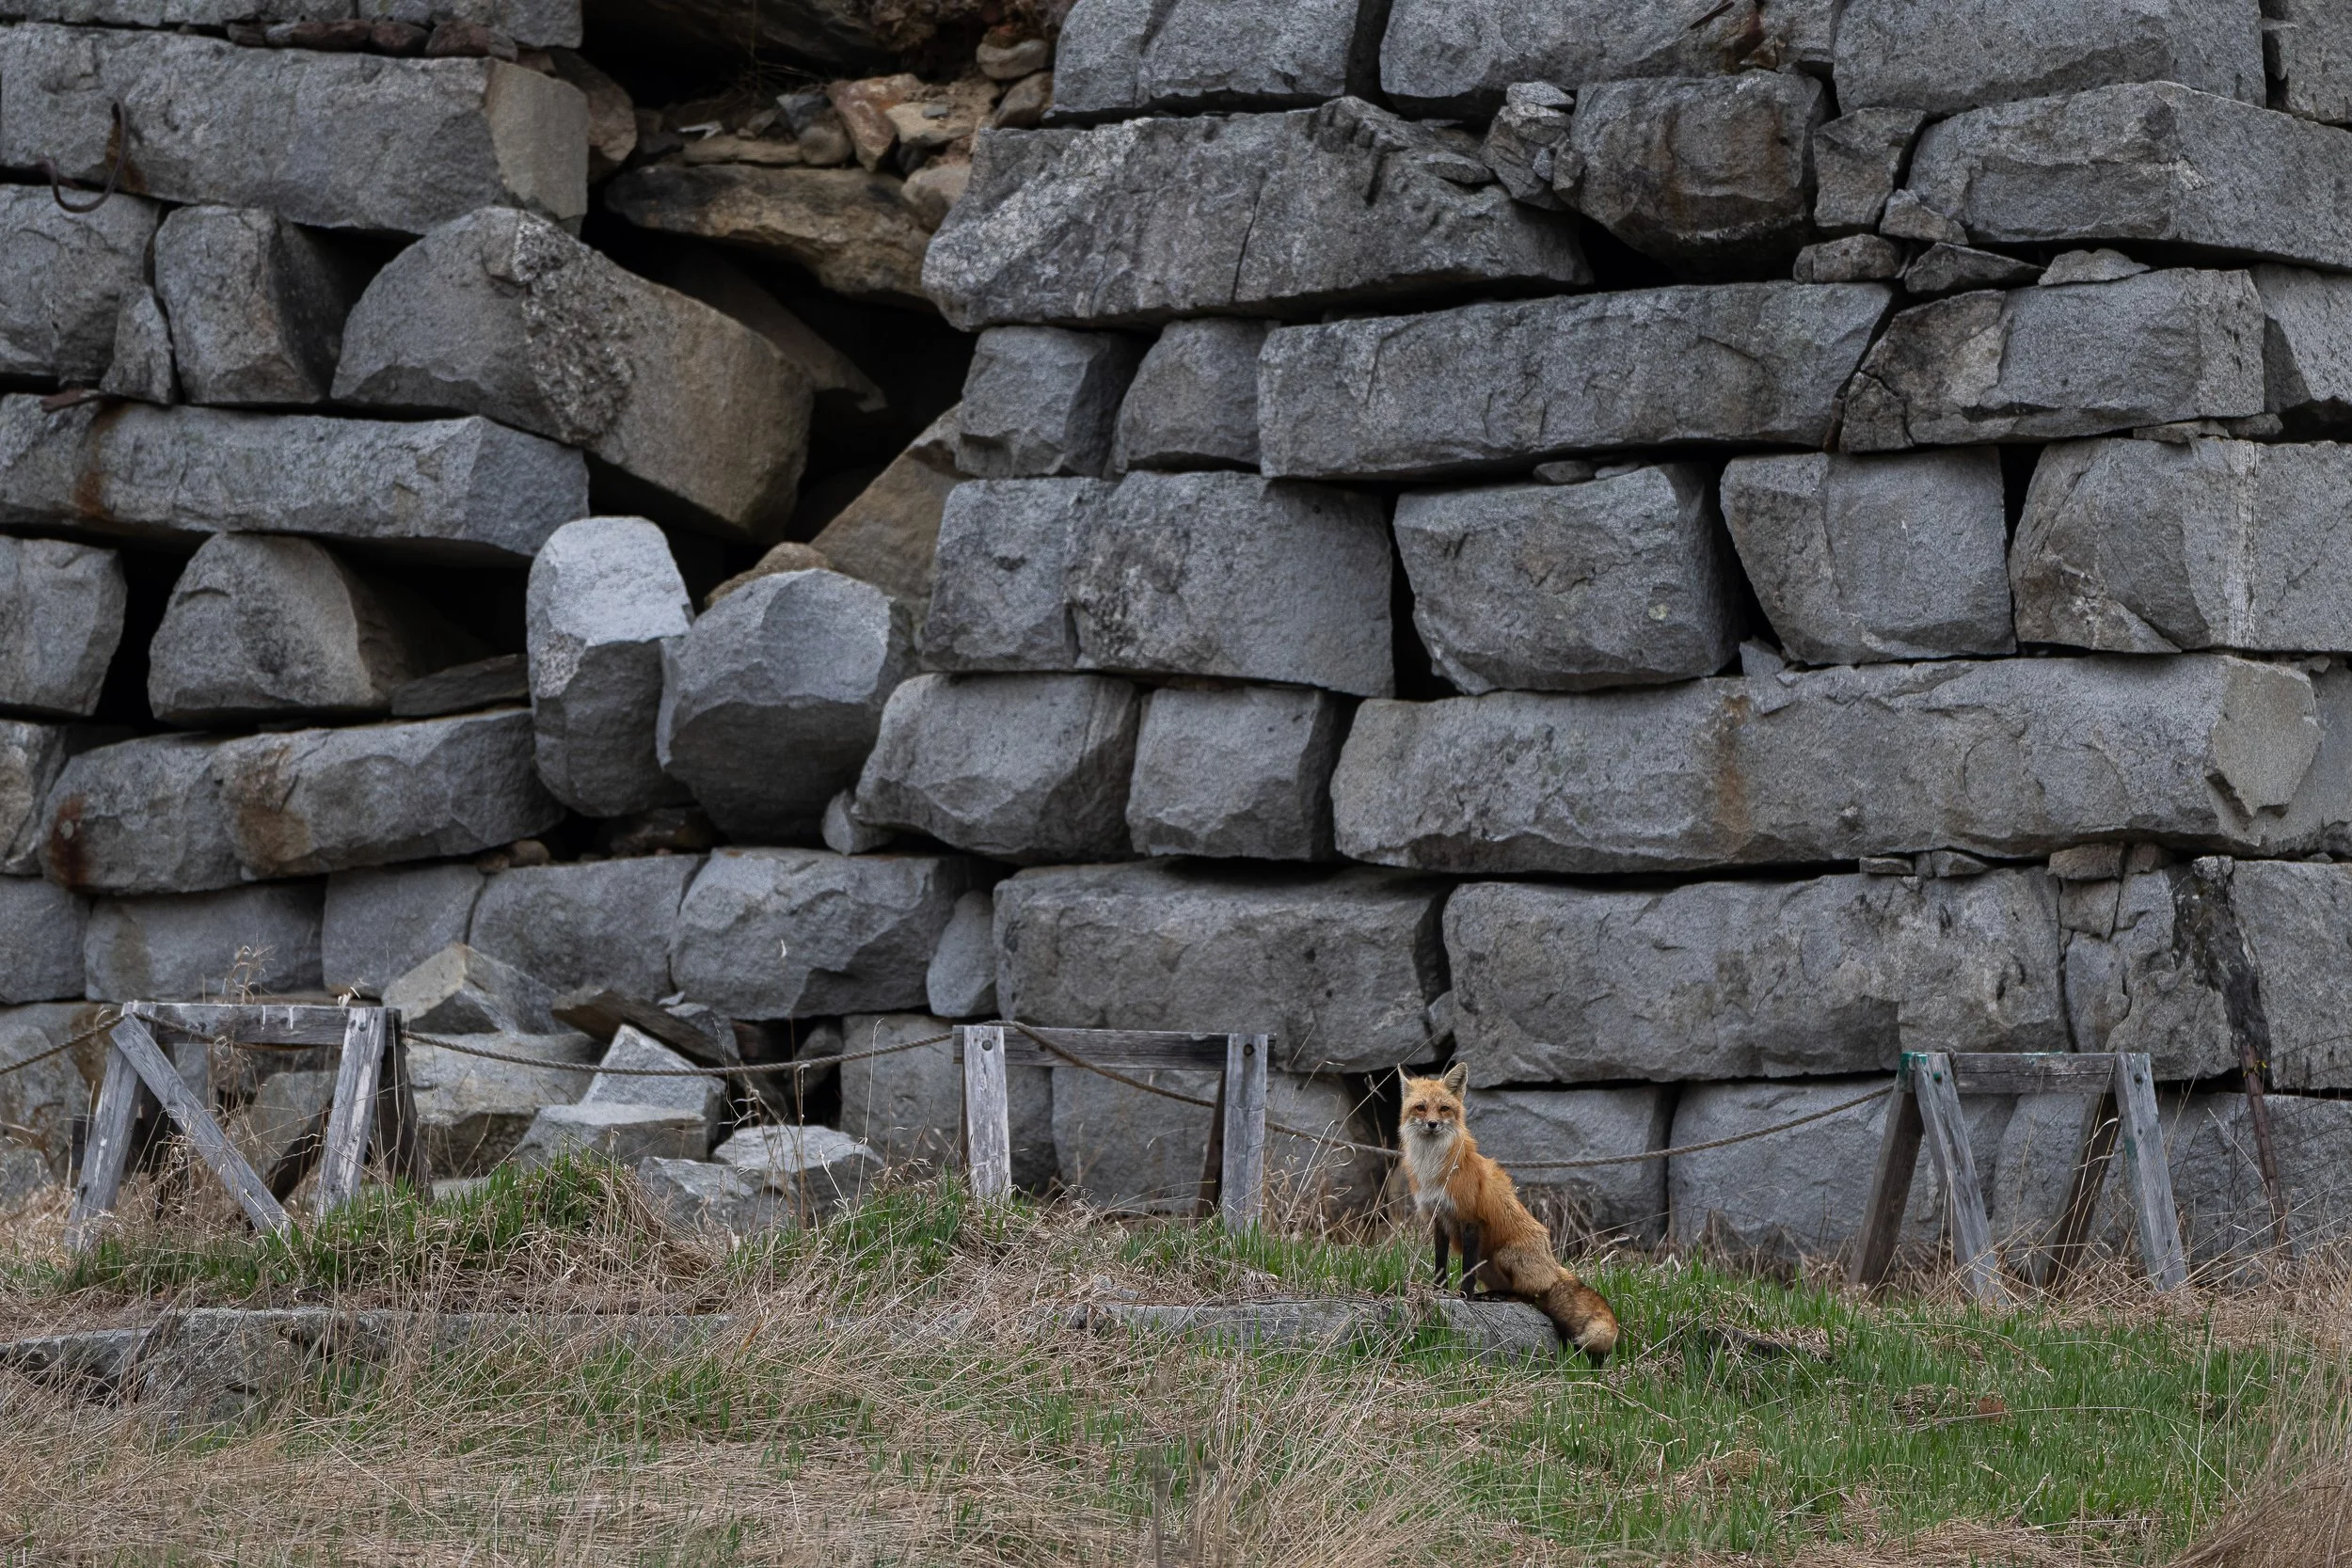
Abandoned buildings or ruins can be great fox den sites!
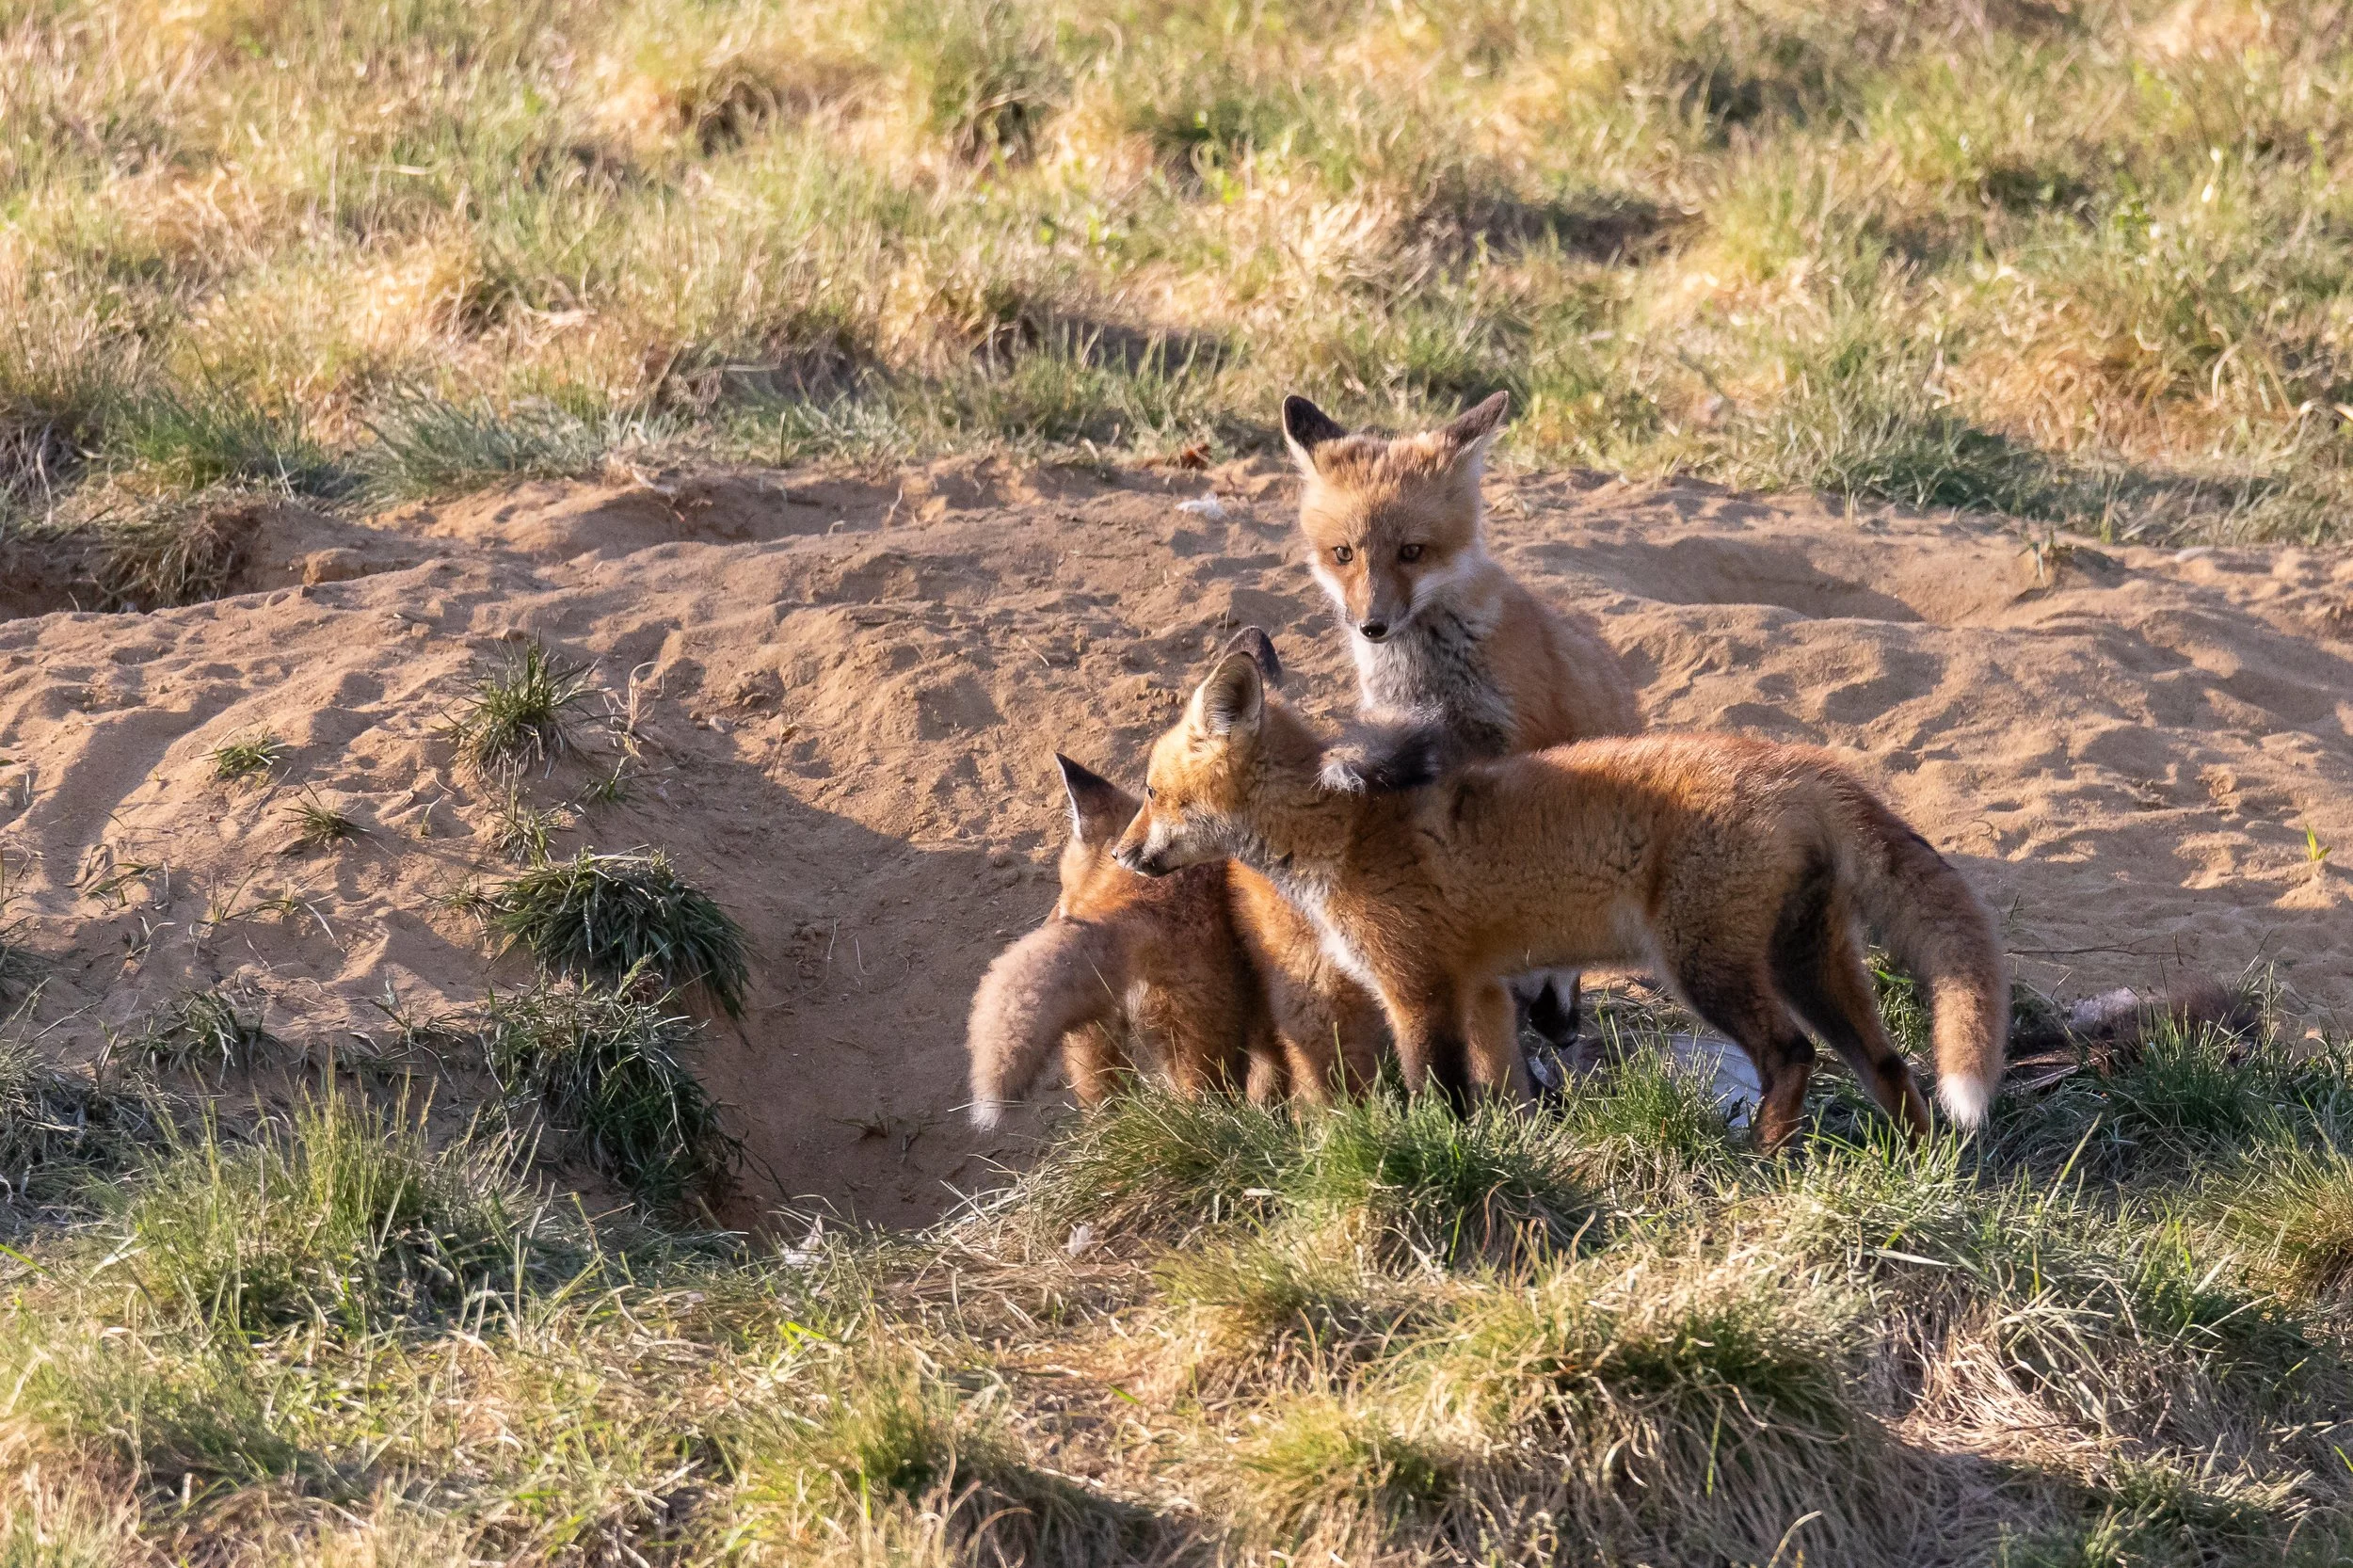
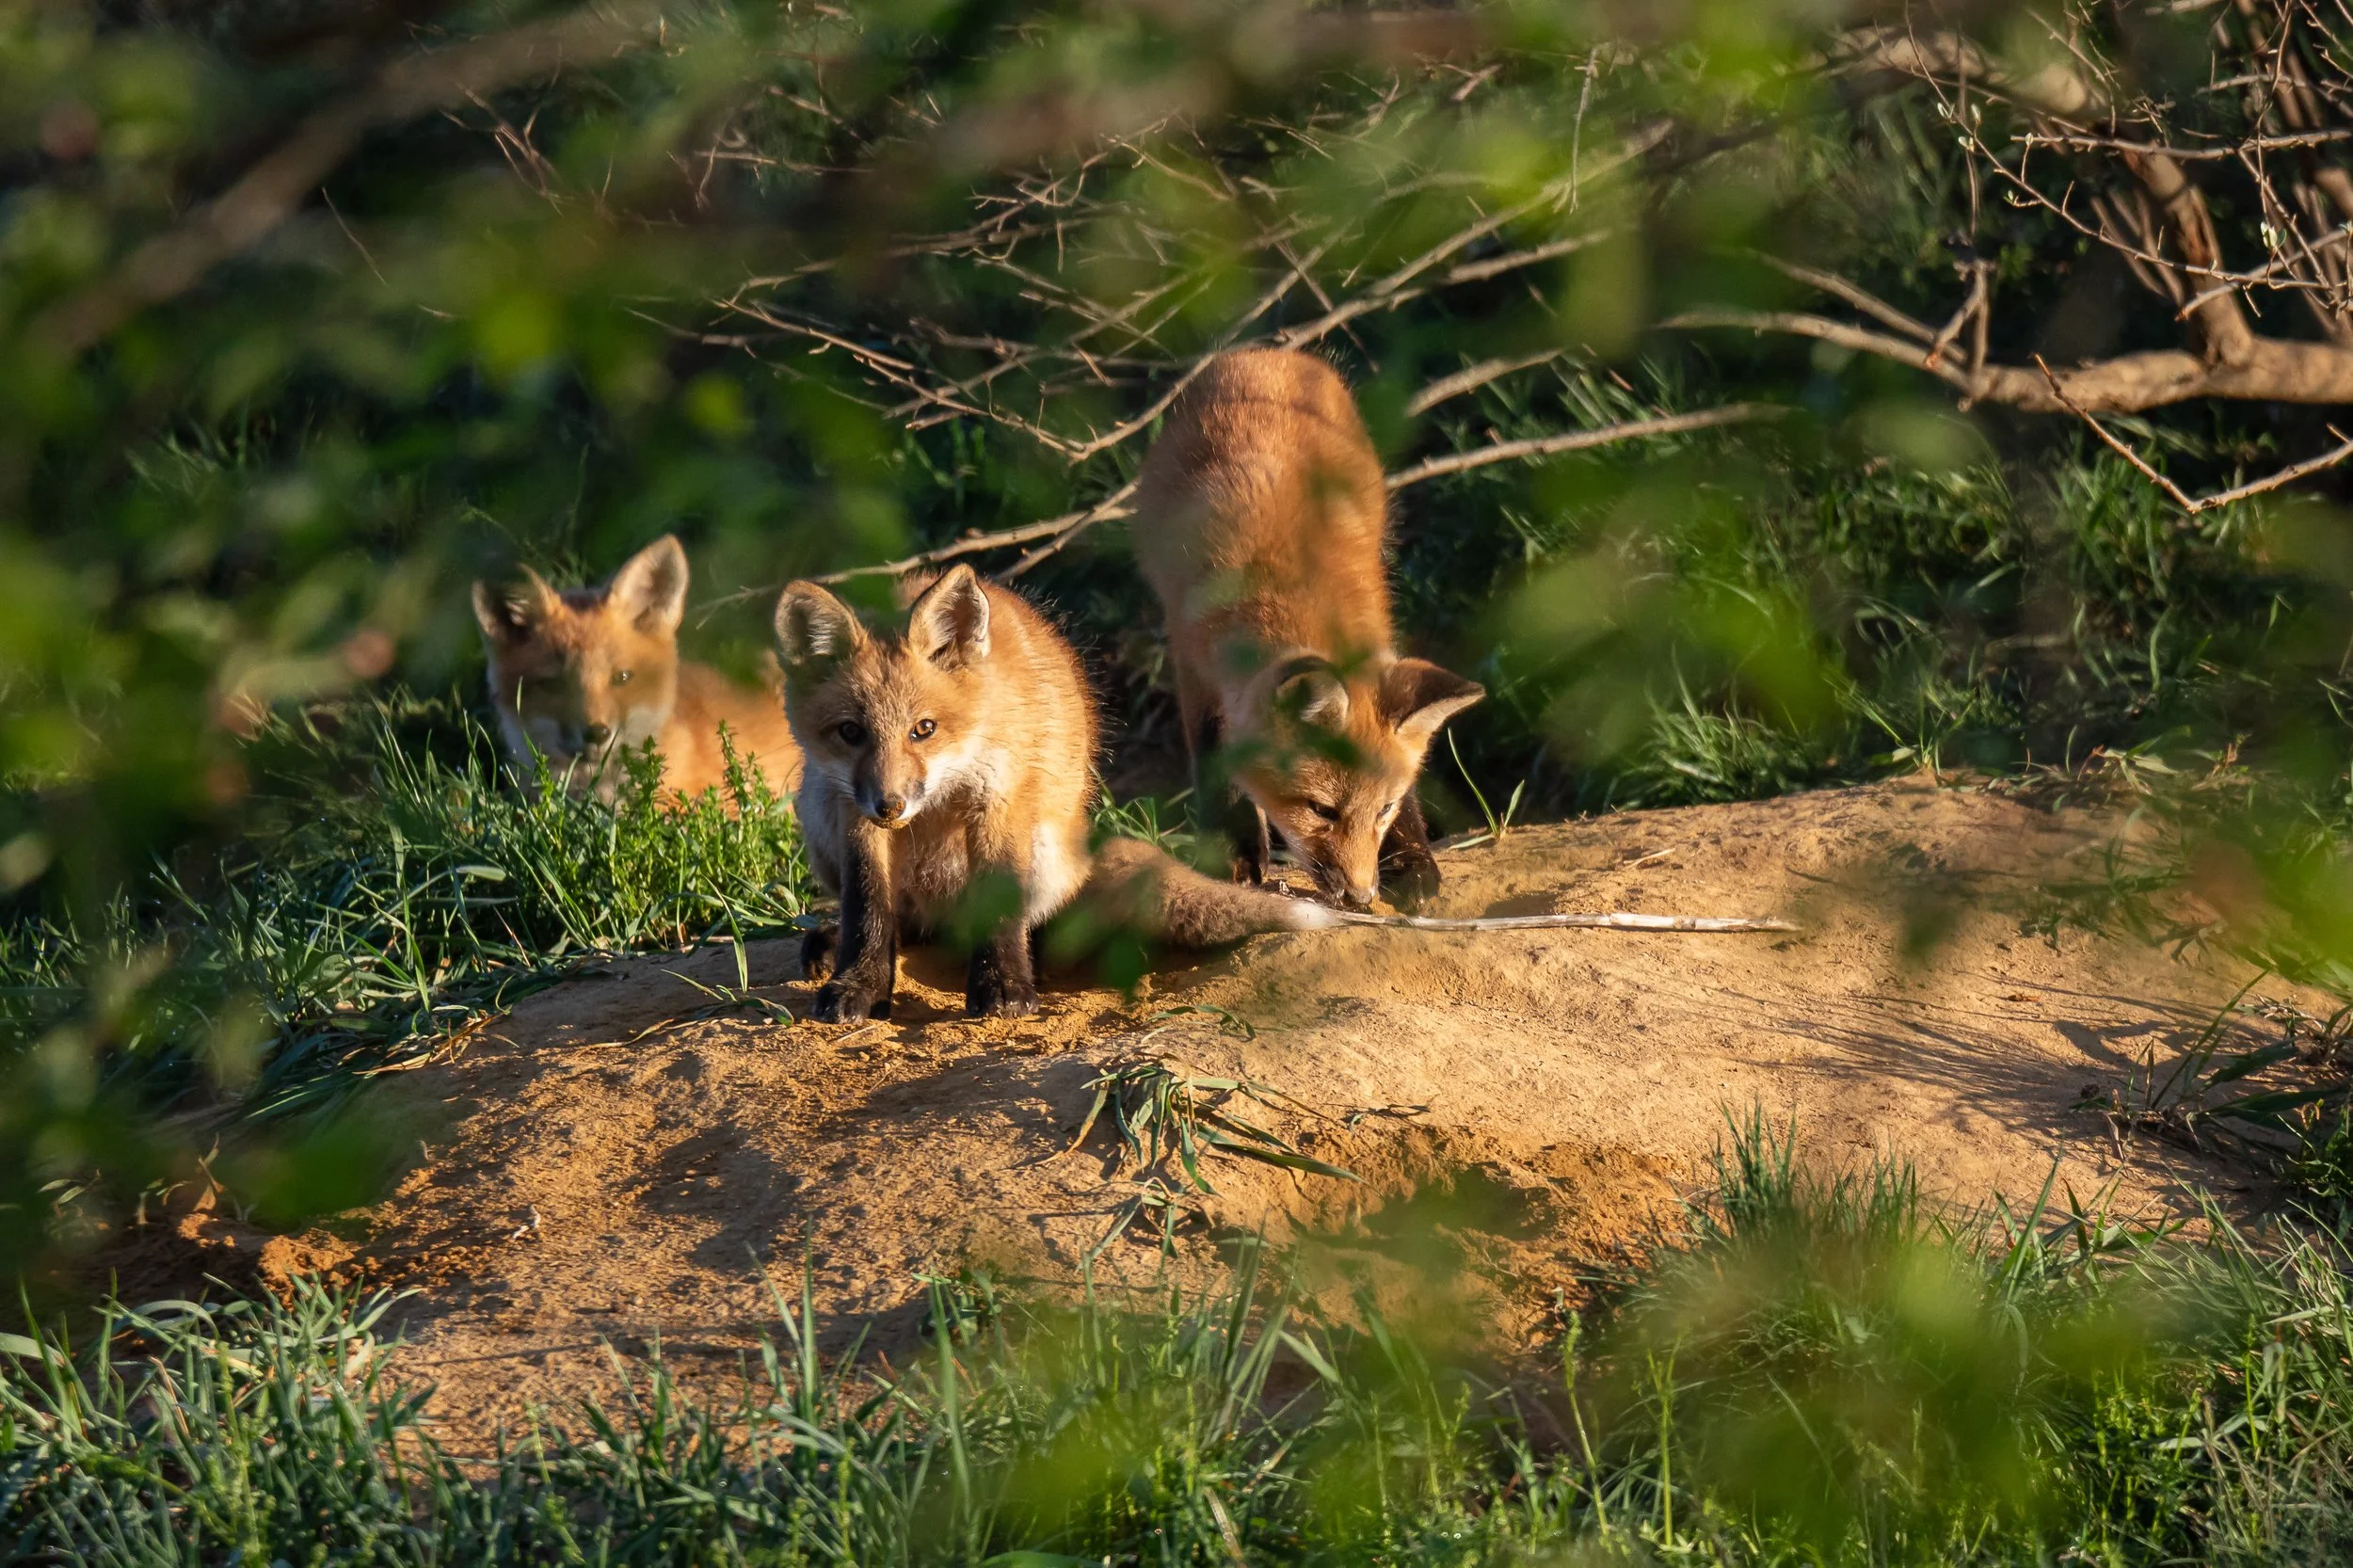
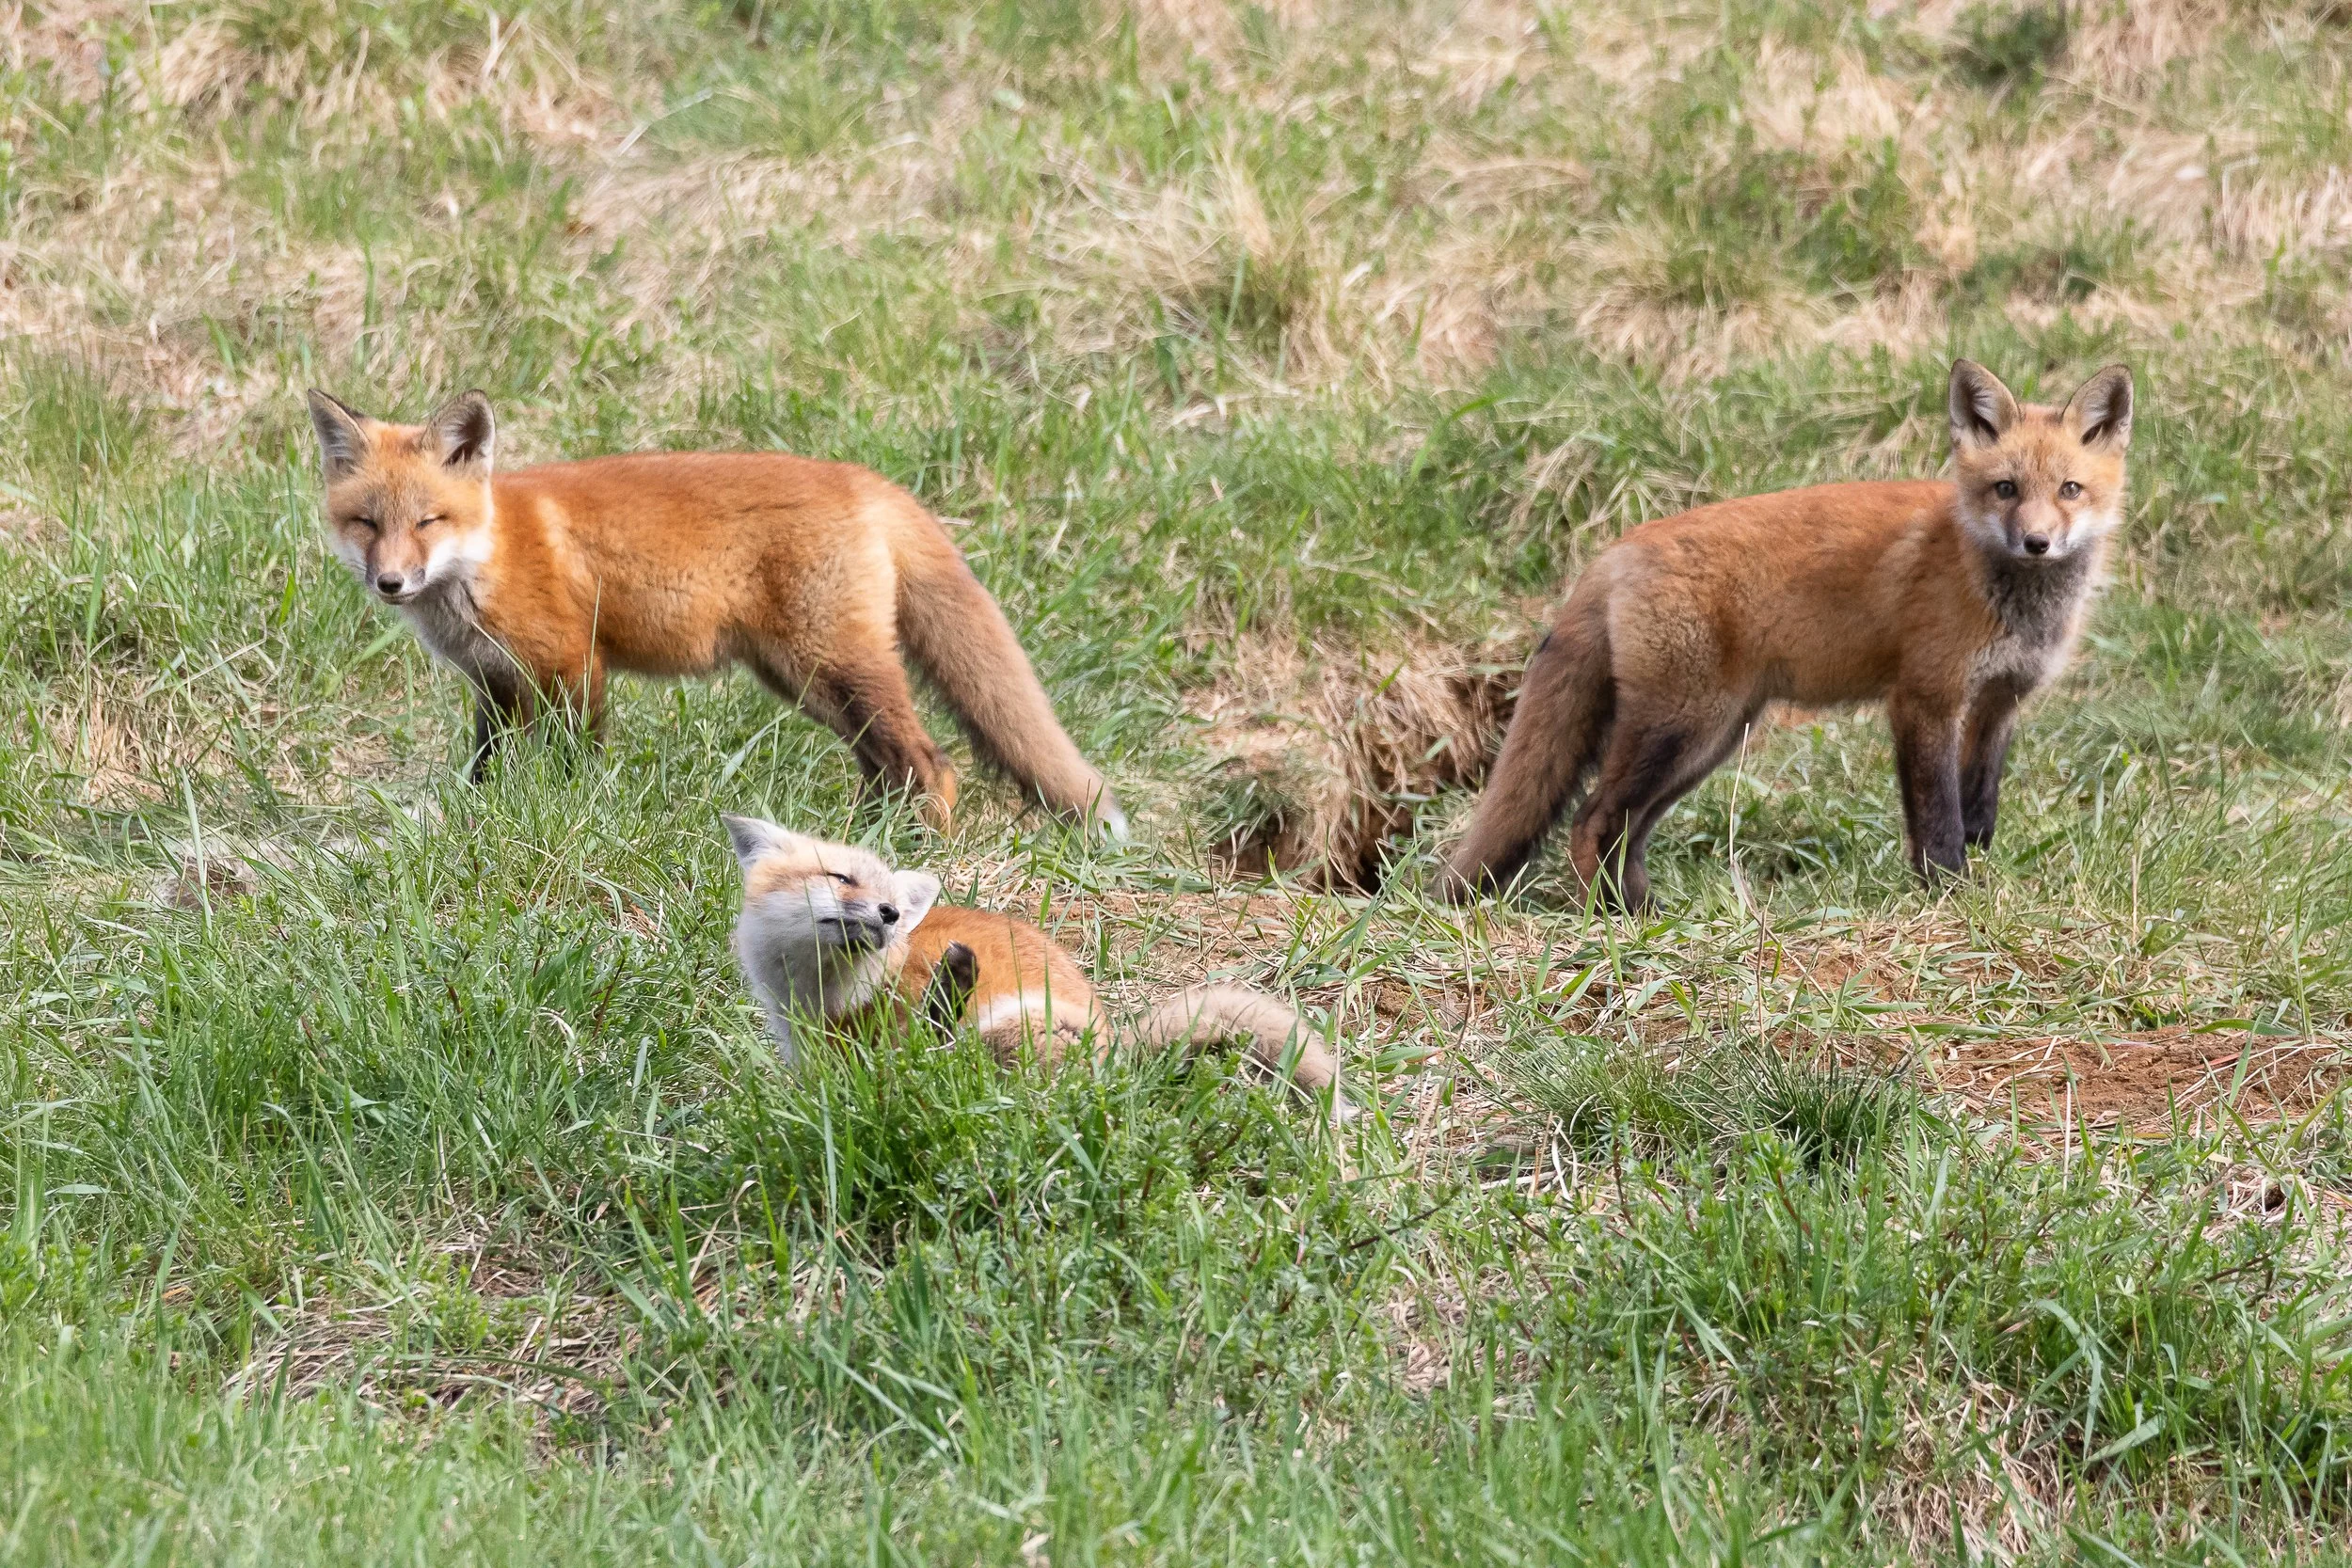
Finding dens usually comes down to understanding the timing of when kits come out of the den to play for the year.
Fox kits playing above the opening to their den in late April.
Foxes have their young, called kits, typically early in the spring around March. They will stay in the den for the first 4-5 weeks but then will come out more often to explore the world and play later around April into May. Exact timing may vary a few weeks plus or minus this time frame.
Knowing this timeframe can help you to discover a fox den. During April and early May, I would spend time very early around dawn or late during dusk driving or hiking around suitable den areas. Think edge habitats where fields and woods meet, with abandoned structures, or even cemeteries. That is how I have come to find several different den sites over the years. Another tactic is to look for fox tracks in the snow during the late winter months like February and March to see if there are areas with high fox activity.
In my experience, fox pairs will use the same general area for dens year after year, so once you find one you may get to keep returning to photograph it in future years if you follow the right ethics and fieldcraft.
Ethics & Fieldcraft
This is the most important part of this article. Please keep ethics and the welfare of the foxes in mind. This will be best for the animals and your images, now and in the future. Please keep a good distance, concealment, respect for private property, and don’t advertise the location online or by drawing attention to yourself in the field. If do these things right, you may get years of potential experiences from the den you found!
Foxes actually have multiple dens dug and if you pressure them, they will abandon the den you found.
Fox dens will often be on private property. Even if you are shooting from a road or public space, I find it’s a good idea to see out the property owner and ask about photographing. Honestly you will look suspicious pointing a big lens at someone’s property. I have asked property owners before and usually they were happy to help me and appreciated the communication. One owner let me onto the property and set up an area of natural concealment by some big, downed trees. This was a win-win because it kept me hidden from other people so I wouldn’t attract more attention to his property. Property owners can of course say no and please respect that.
If it’s possible or practical, getting a blind set up will help. Foxes will naturally spend time in their den. That is the time for you to get into the blind, not when they are already out. Ditto for exiting the blind. Patience pays off! Honestly though, foxes are very aware and I have found they always know you are there, even if you follow this procedure for the blind.
Photographing fox dens will be a many day and week endeavor. Start by keeping more distance than you think is necessary and read their behavior and let them see you aren’t a threat. If they are disturbed or go hide in their den it likely that means you have spooked them. Return several times and if they are comfortable you can try to get maybe 50 to 60 meters away for a place to set up. This seems to be a good distance that doesn’t bother the foxes. You can check the distance by manually focusing your lens as most these days will tell you how many meters away you are focused. If the foxes are playing, eating, and resting in the open you know you are doing it right and will get tons of fun images like these below.
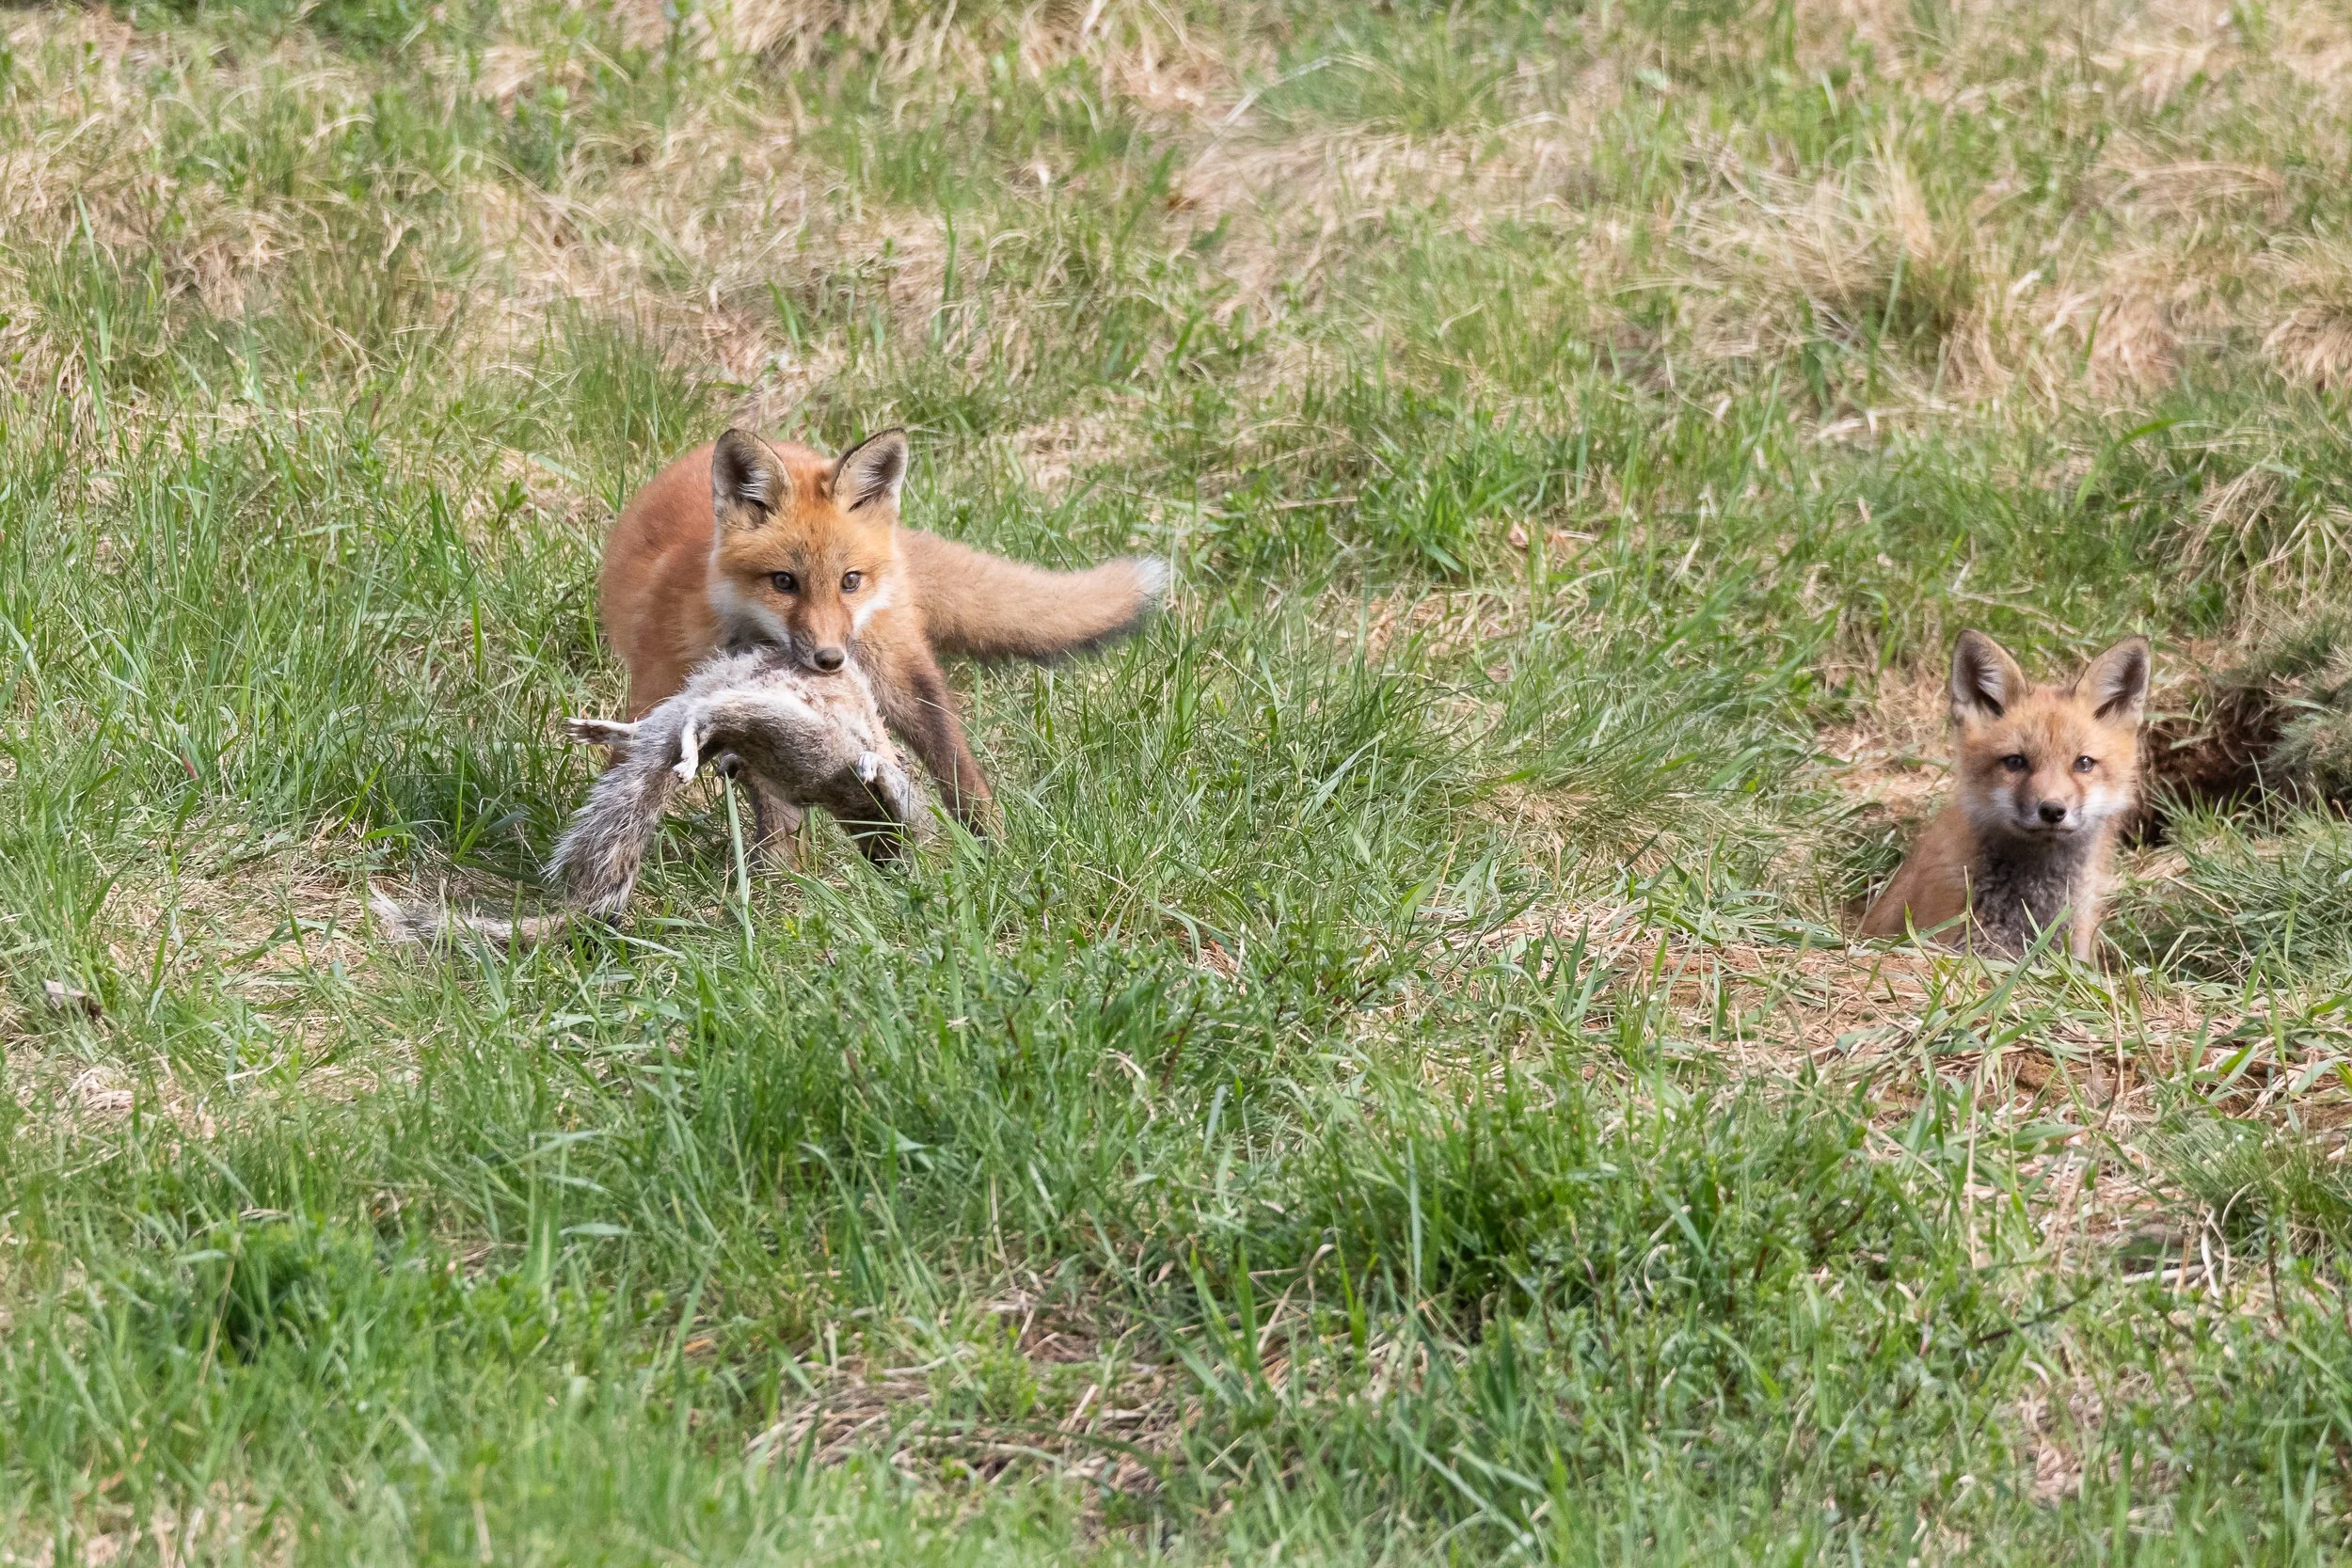
I got to watch this kit play with and then eventually eat his squirrell dinner.
taking a slow approach to setting up around this den allowed me to witness this natural behavior.

A neighbor probably wasn’t happy about this chicken being taken from their coop!
A final ethical tip is to consider not posting pictures of the fox kits or den online until they have grown up and moved out for the summer. This will protect the fox den from being mobbed and causing the foxes to abandoned it. I also recommend delayed posting because inevitably people will ask you for the location and you can avoid being in that situation in the first place by delaying posting until they have left for the season.
Camera Considerations
Having a lens that can give you 600mm of reach is very helpful here to keep the kind of distance we are talking about. A zoom lens is helpful if you want variety. A tripod is essential for working in a blind and keeping your lens from flailing around to spook the foxes. For a shutter speed I keep it around 1/1000 as a default if I have the light. Playful action can break out fast so that is the minimum, but I would go faster up to 1/2000 if there is action. Yes, you can get away with slower shutter speeds when they are still, but I have missed some good action shots because I was at 1/500 or lower and something happened.
In Conclusion
Have you ever found and photographed a fox den? How did you find it? If not, do you think this is a wildlife photography project you might try? Leave a comment and let me know!
See you in a few weeks for the May landscape photo idea post!
